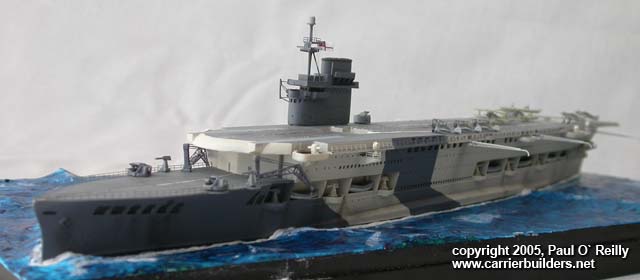
The model depicts HMS Glorious as she
might have appeared on 7 June of 1940 having just embarked the 20
Hurricanes of 46 Squadron and the 10 Gladiators of 263 Squadron RAF.
These aircraft had been delivered to Norway by Glorious a month earlier
but with the British evacuation order in June it was decided to remove
these aircraft by flying them out to Glorious for transport back to
England. The fly-on went very well with the pilots doing a superb job of
landing without the benefit of a tail hook. Unfortunately, the next day
at 1600 hours Glorious sighted the German small battleships, Scharnhorst
and Gneisenau immediately to the west. Glorious had been steaming all
day in brilliant sunlight with all her aircraft stowed below and so was
caught flat-footed by the German navy. Despite heroic efforts by her
escorts, the destroyers HMS Ardent and HMS Acasta, to thwart the German
attack, all three of the British ships were sunk.
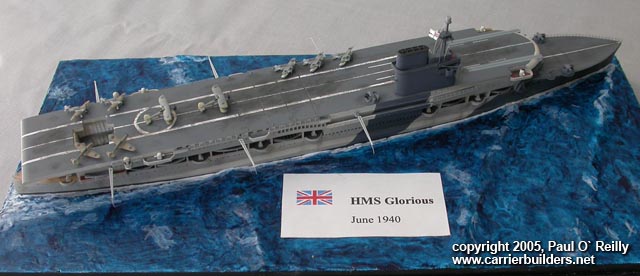
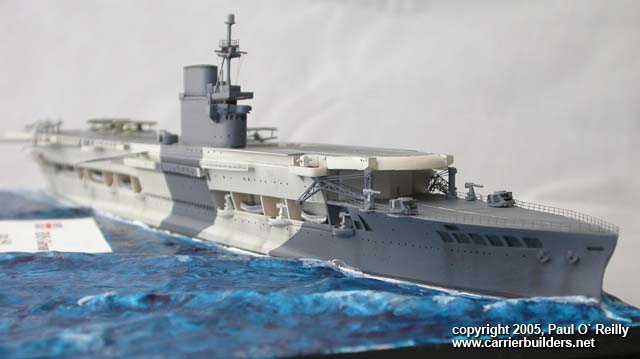
Being a resin kit it lacks bulkhead and deck detail and fairly cries out for photo-etch for the finer points that should be evident. Although it states it represents the ship in her 1939 configuration, it is actually an earlier configuration, most likely 1936 or 1937. My kit only had 4 Swordfish aircraft whereas the instructions indicated there should be 12 aircraft – 4 Swordfish, 4 Skua and 4 Sea Gladiator. The Swordfish are very well made but there is no photo-etch for them. The GMM PE set for British World War II Aircraft Carriers provided a lot of the extra detail, especially the railings, radio antennae and crane booms, and really adds a lot of visual interest to the model. Additionally, the White Ensign (WEM) aircraft PE set really set the aircraft off well.
The instruction sheet is very basic and is good for general arrangements only. Good references are needed to ensure a good period piece results from your efforts.
The hull was well cast with the gun galleries/ boat decks being separate pieces that fit into cut-outs in the ship’s side. Each gun tub is supposed to align over a corresponding sponson built into the hull. However, I suspect due to different shrinkage rates with the resin, the gun positions do not line up with the sponsons so I had to shorten the gun decks to permit proper alignment. This led to a small gap at the after end of the gun deck, which I filled with a small piece of sheet styrene. Although not mentioned in the instructions, the boats go into specific spots on the ship. You’ll have to test fit them to determine which boat goes where before you glue any boats into position. As it was two of the after boats had to be sanded down to fit. Additionally, the two boats that are located on the small deck at the extreme end of the hull just below the flight deck are a little too large for that spot. It isn’t a problem if one chooses not to put any PE railings on this small deck. If you do use the PE railings then the boat will have to be sanded down to a narrower beam.
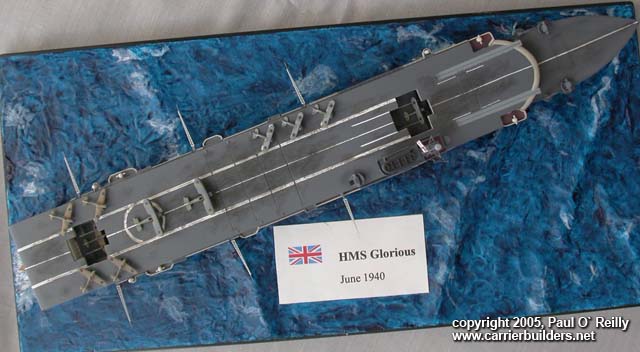
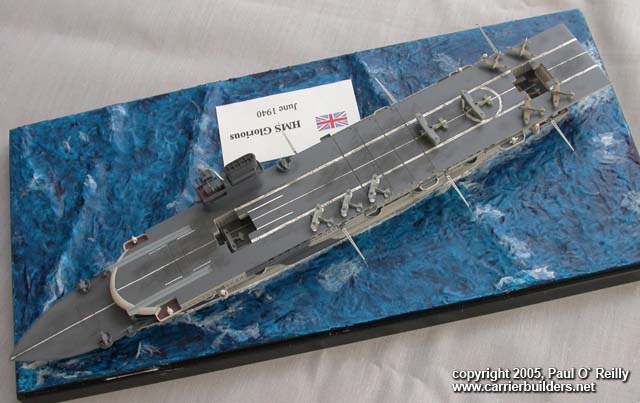
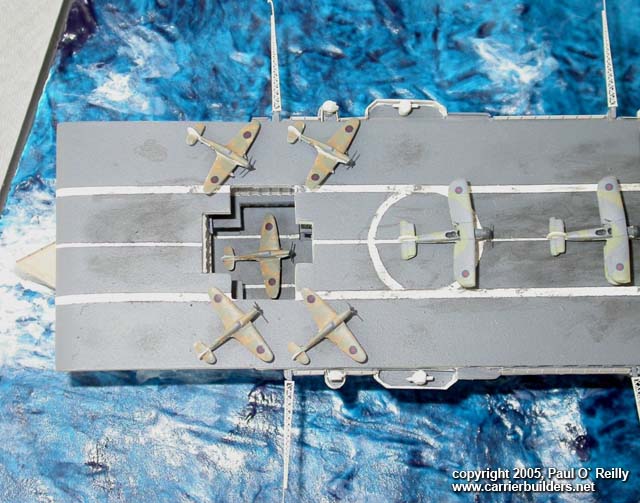
The flight deck comes in two parts. The smaller portion attaches to the main flight deck aft of the after lift. I expect this was done as a production issue as Glorious’ sister ship, Courageous, had a shorter flight deck. However, this model cannot be built as Courageous as the kit’s hull has the enlarged quarterdeck (“fantail” to our American friends). Ensure the lift wells line up with flight deck openings when you attach the flight deck to the hull. With little photographic evidence as to the real markings on the flight deck in 1940, I painted on markings I thought would be appropriate.
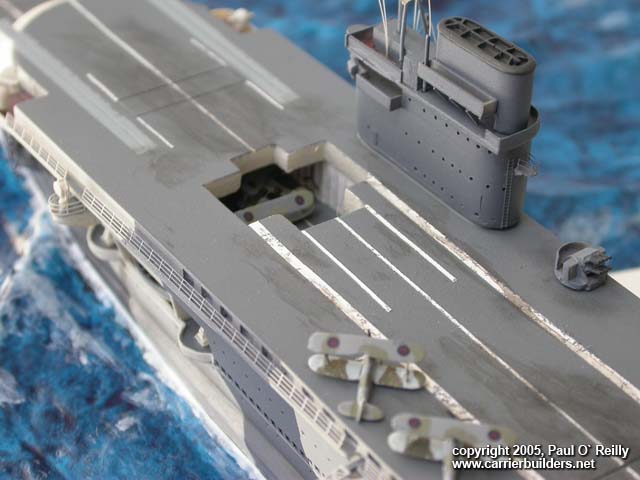
As mentioned earlier, five WEM Hurricane aircraft were placed on the after end of the flight deck and after lift. The WEM PE landing gear were added but I noticed that the aircraft stood a little too tall as a result. The six WEM Gladiator aircraft were added but these were split into two groups with one group of three being painted up in 246 Sqn colours with the other three being displayed as RN Sea Gladiators. Once the position of each aircraft on the flight deck was determined I drilled a small hole in the flight deck where the aircraft’s tail wheel would sit. T then attached a small piece of stretched sprue to the aircraft in the tail wheel’s position and, once the glue had dried, placed the end of the sprue post in the previously drilled hole and fixed it with a small drop of CA glue. This avoided the splotchy look on the flight deck that I find results if one attaches the wheels of each aircraft with glue. I have often found it difficult to get flat spray onto the spots of glue that are under the wings. The use of a tail wheel post eliminates that problem.
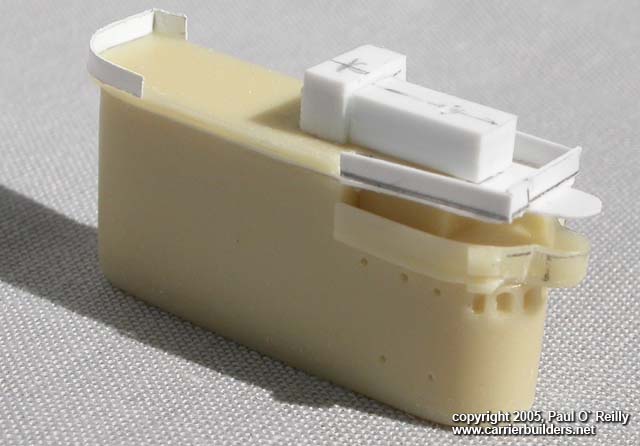
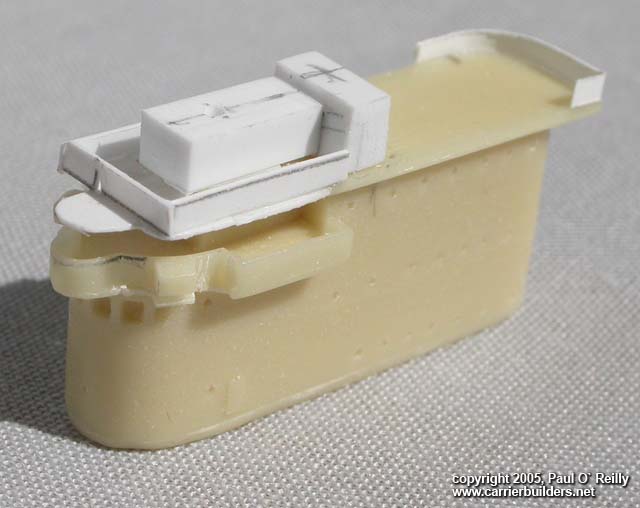
The island configuration represents a 1936 or 1937 version. With the advent of electronics additional spaces were required. There was a large shack added to the top deck of the island aft of the bridge and forward of the funnel. This was to accommodate the Homing beacon control device with the homing beacon being affixed to the top of the mast. The mast itself was made of brass rod and configured to match a photo. There was also some sort of antenna attached to the starboard forward corner of the island. Its purpose is not clear but it is evident in some photographs. Lastly, the kit includes a long catwalk-like deck that is attached to the port side of the funnel. I added five triangular shaped supports under this deck as it is quite evident in photographs. Some references call this device a flying control station. It is hinged at its forward end at a post and is swung out over the flight deck where an officer controls the operations of aircraft on the deck and around the ship. I personally think this is preposterous as the last place I’d want to be is over a flight deck during flying operations! I suspect it was a remote pilotage position used when the ship is entering or leaving harbour, thus removing the parallax error caused by the offset island.
This kit was a good build with a few problems of fit around the gun/ boat gallery decks. With good references and some photo-etch a fine example of one of the pioneer aircraft carriers can be made. Recommended.
Web sites:
Photos and text © 2005 by Paul O` Reilly May 17 2005 |
||||||||||||||||||||||||||||||