|
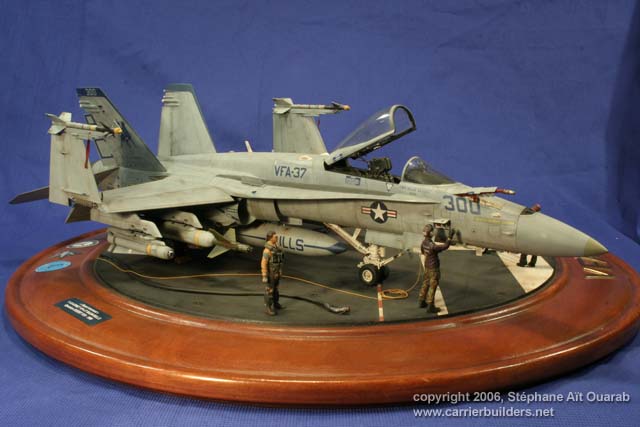
Hello, I am a
French modeller. My favorite Planes are of the French Air Force and the US
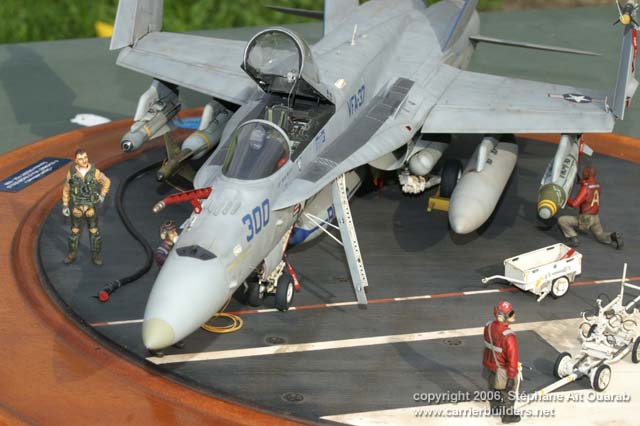
Navy … I am going to present you the assembly of my F/A-18 Hornet to 1:32
from Academy. I put almost two years to build it. The base is very the
Seine. It is the best representation of the hornet in this scale. But I
added all the same certain kits:
Eduards: kits for the cockpit and the window, the patches of instructions,
"remove before flight" to them. Blackbox: the cockpit, the outside set
(perch of provisioning, nozzles) Eagle strike for decals. And more scratch …
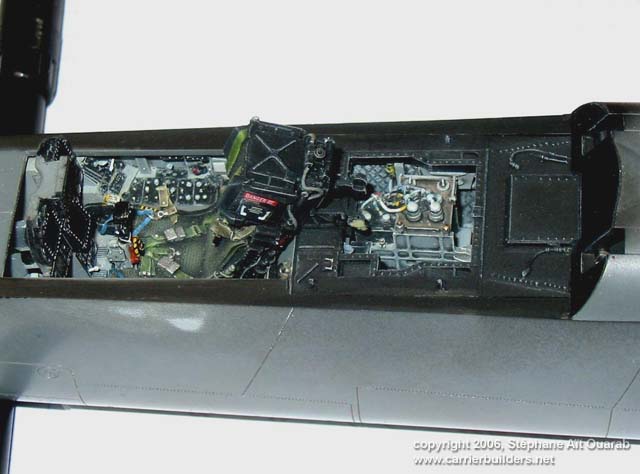
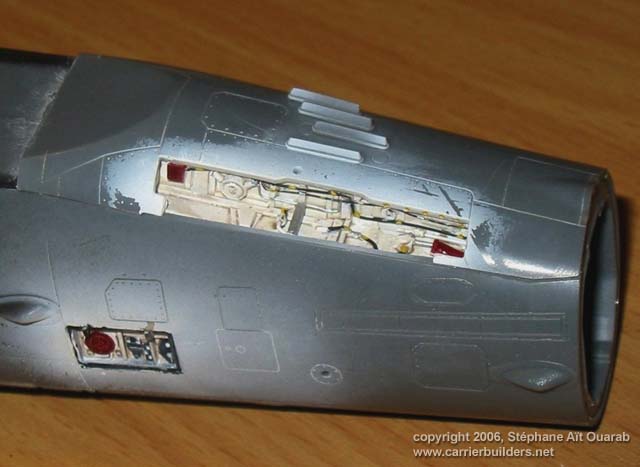
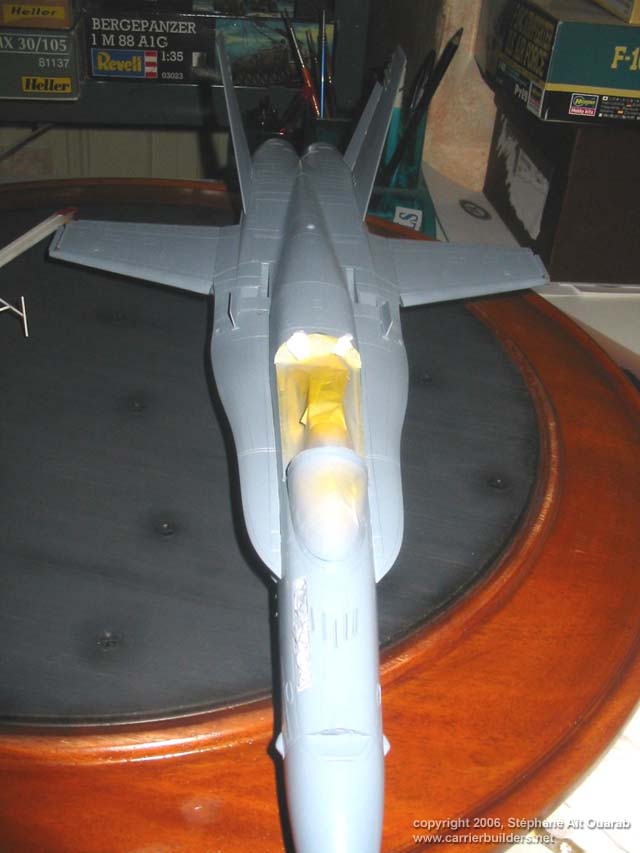
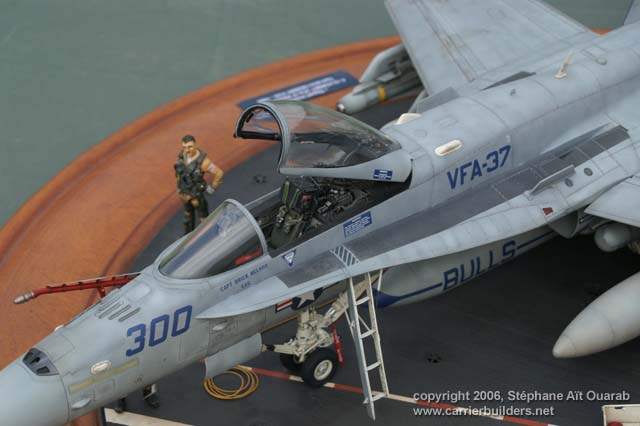
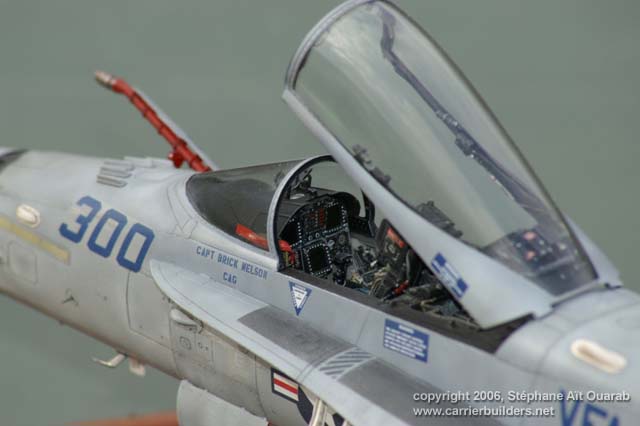
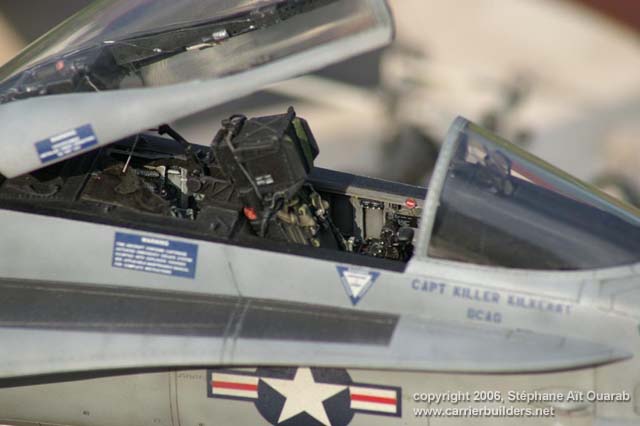
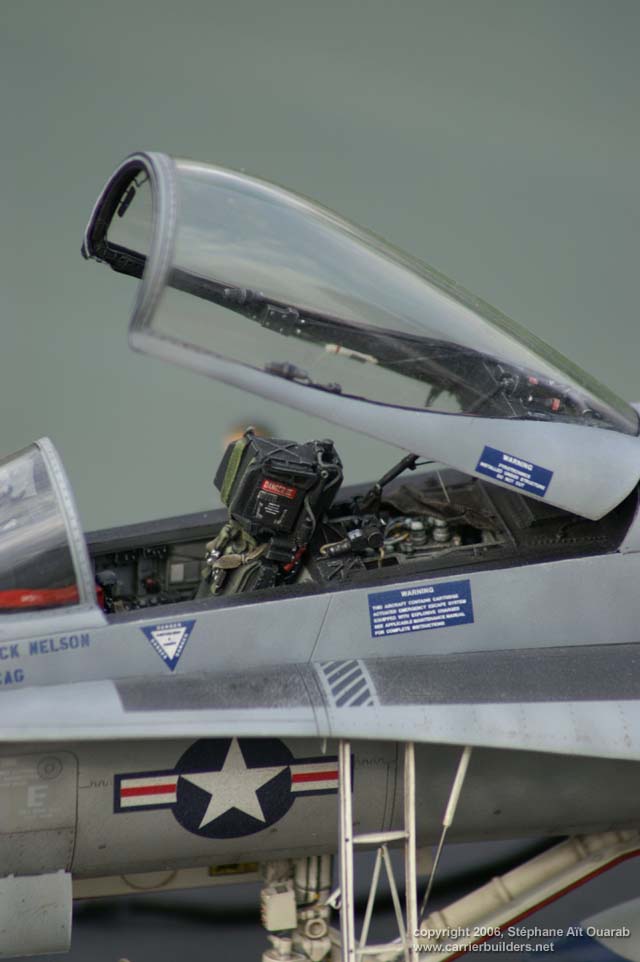
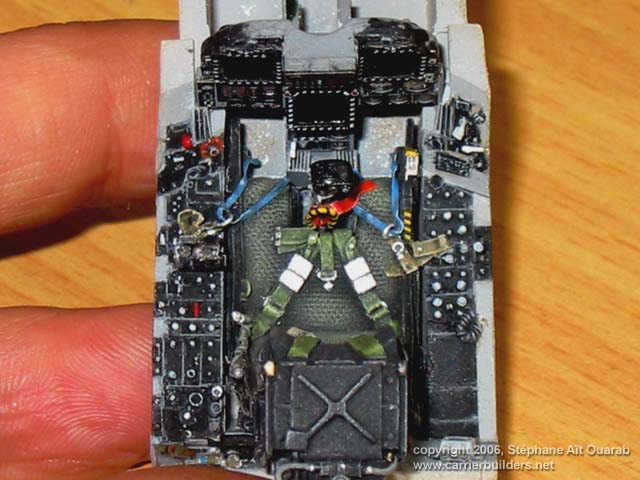
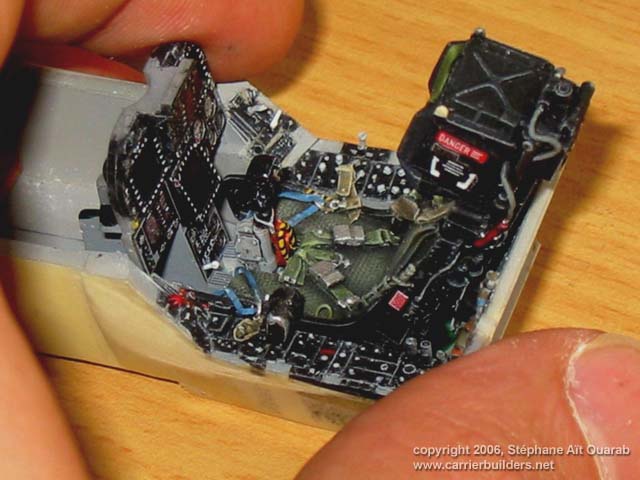
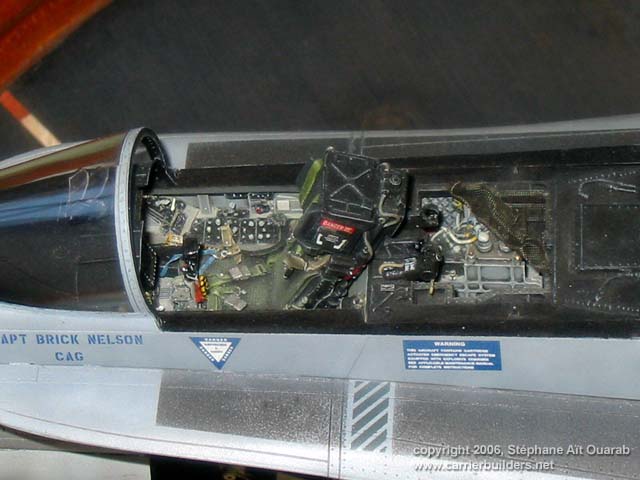
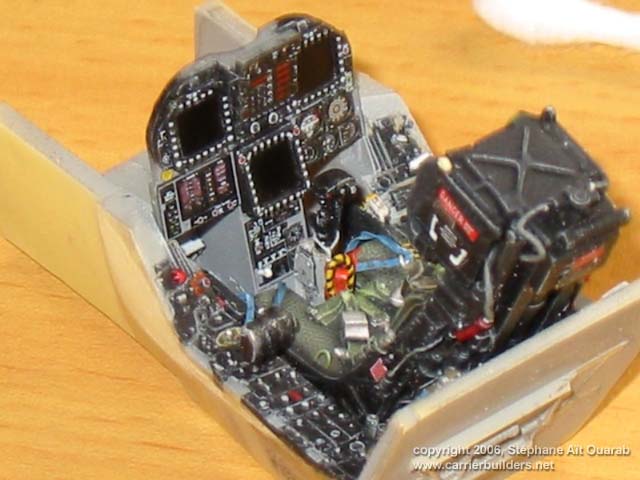
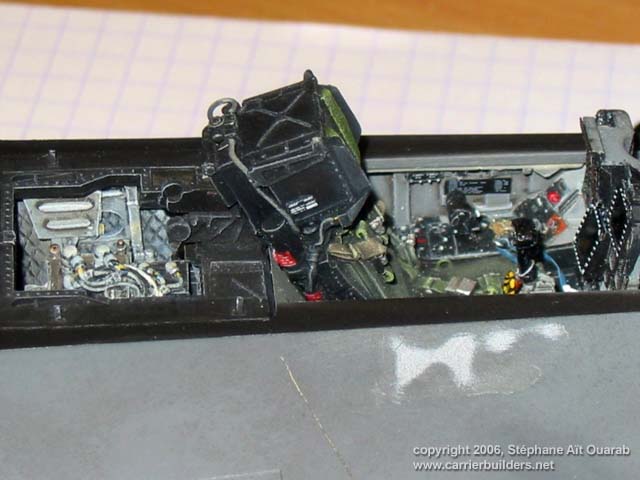
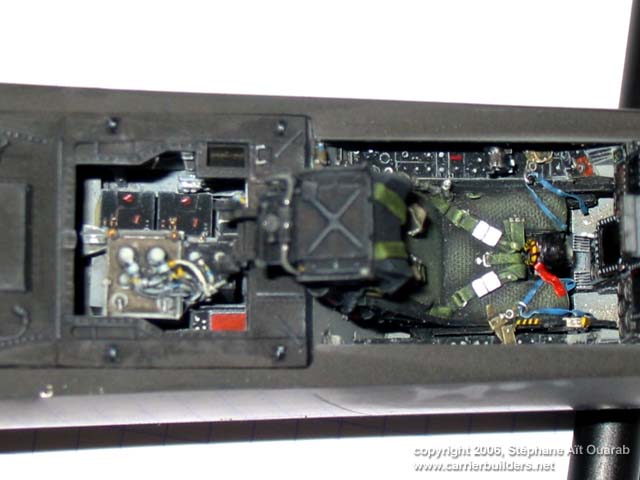
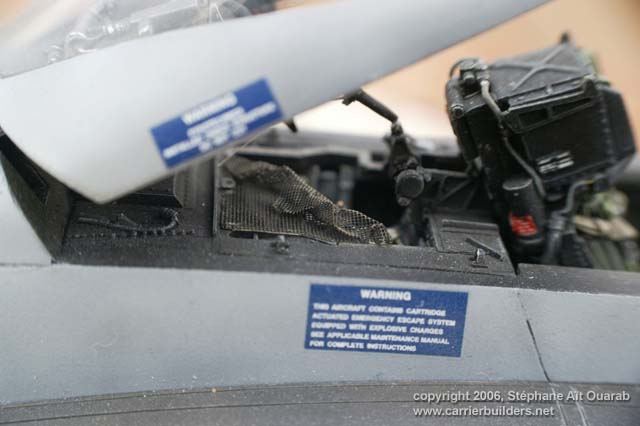
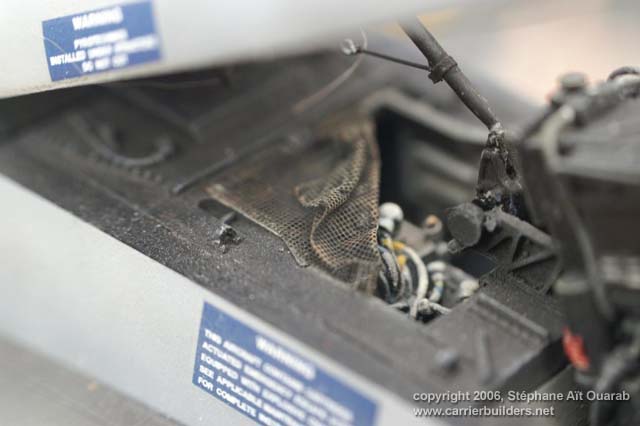
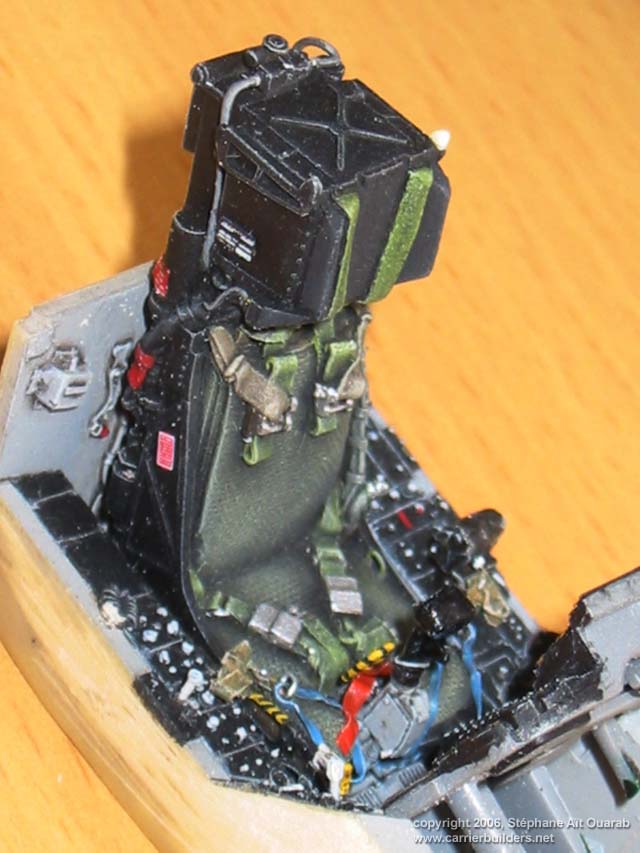
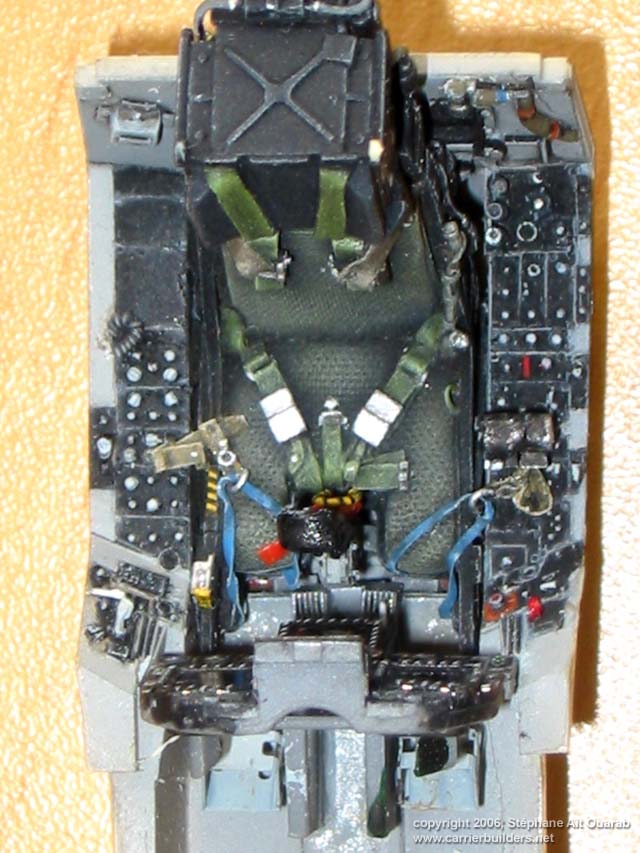
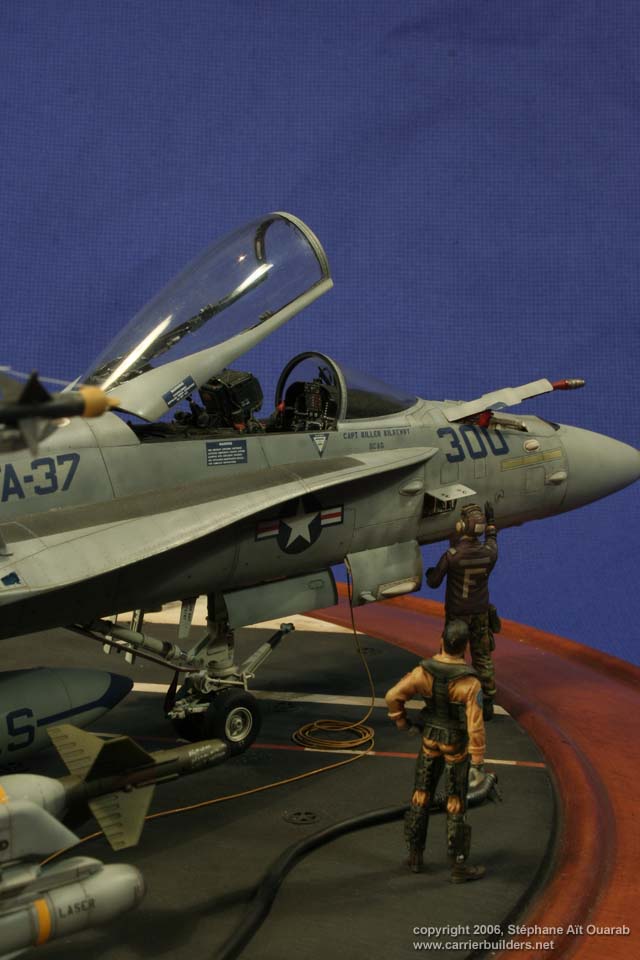
I began with
the cockpit Blackbox which is magnificent. I sanded the dashboard to put
it the set of Eduards. The only additions are the radiator hoses of the
seat and the orange-coloured flame of safety. With a well-kept painting,
this kit becomes a real model!
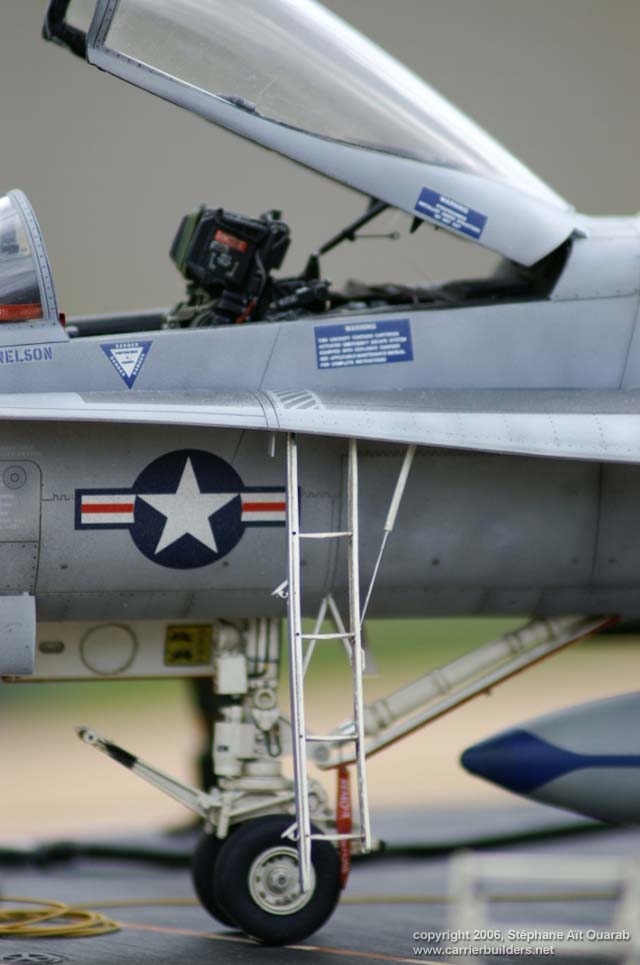
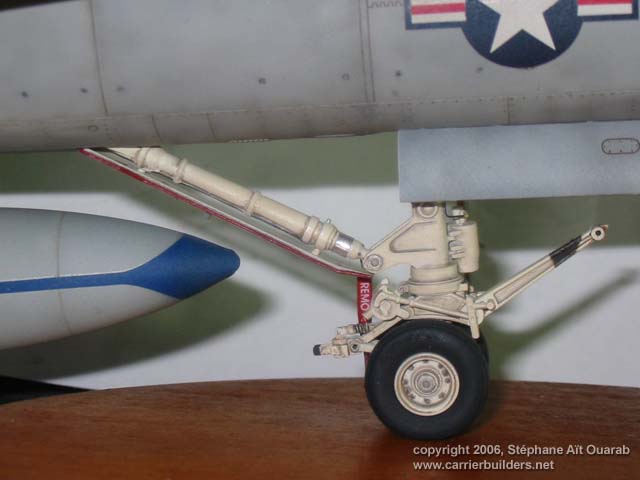
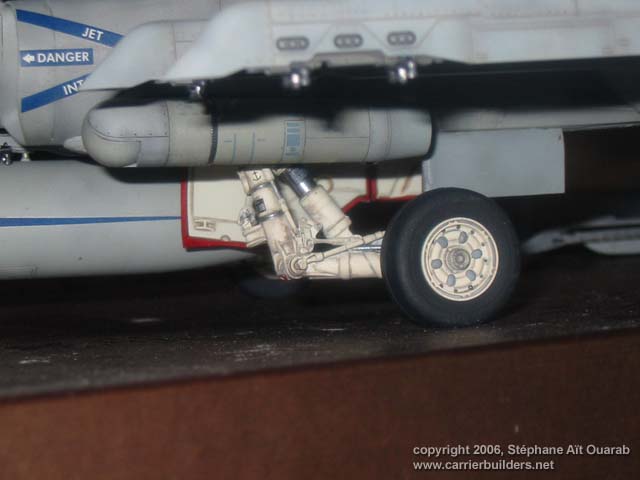
I then attacked (affected) landing gears. There similar, except for the
addition of different cable and the release(extension) of fires, a maid
skates be enough. The rest of the model amounts normally. The only met
problems are:
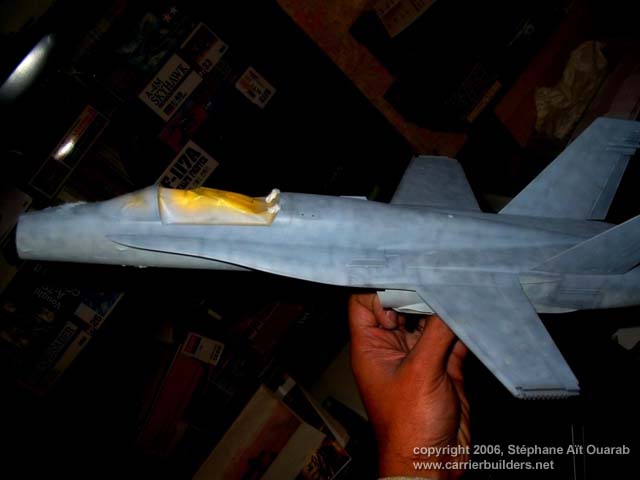
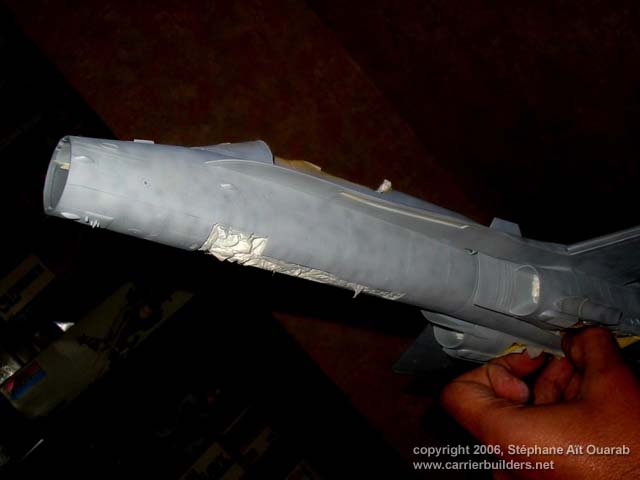
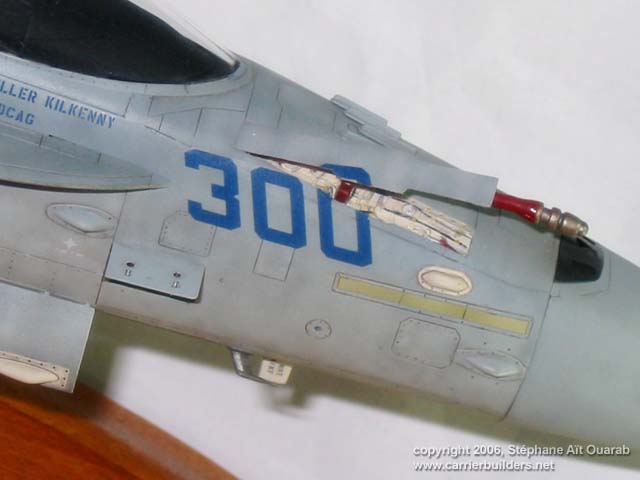
The joint between air inlets and body of the plane, to foresee quite a
lot of putty. The joint enters the part(party) before of the device
which contains the cockpit and the back part(party). Putty and ponçage …
I am
especially going to linger over the redone parts:
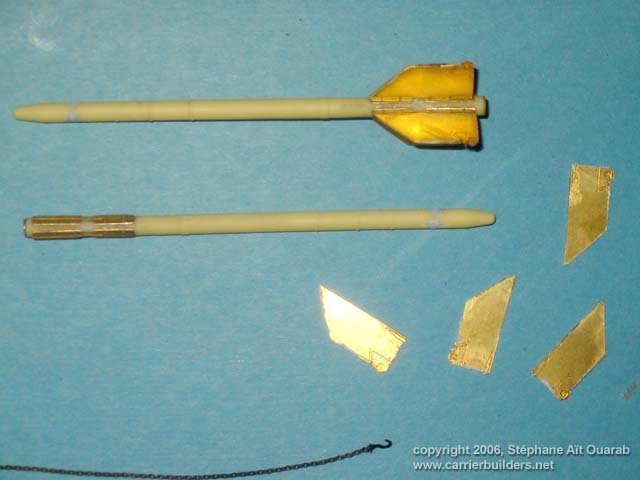
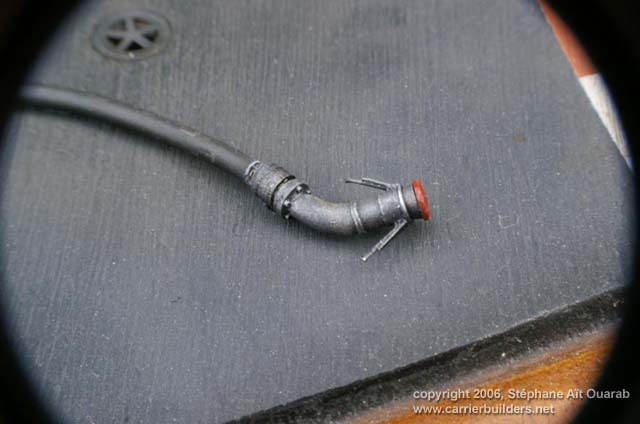
The receptacle of the perch of provisioning in flight(theft). Of the kit
Blackbox, I shall keep only the perch. I shall remove the part molded
above which feigns the sheet steel of the device because this one is
welded while really there is of the space between both. This part will
be redone in lead sheet(leaf). The flat of the perch is completely
redone because it is not rather deep. The technique used for partitions
is the same that for the fins of the armament: of the visiting card. It
is very simple to use and the box hardened in the contact of the glue.
Some plastic stretched to redo cables. For the system of control and
provisioning on the ground, detail Blackbox is magnificent. I just have
redo mechanism of opening by drilling four holes and in manufacturer
locks with some stretched plastic warmed in the rear for the flat parts.
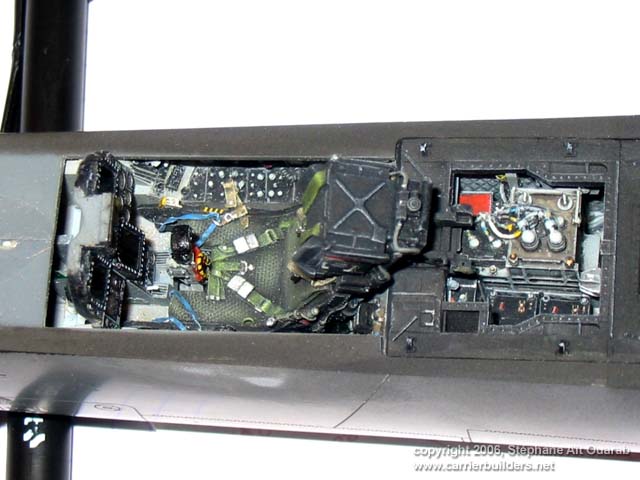
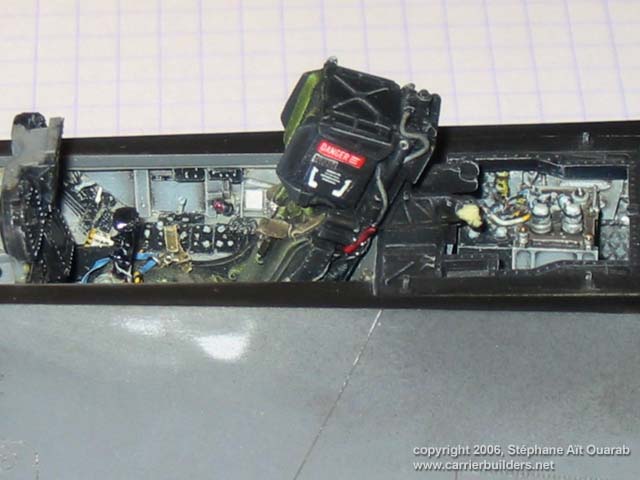
The inside of the canopée: it is a mixture of kits Eduards (the internal
walls and the patches of instructions) and Blackbox, with little of
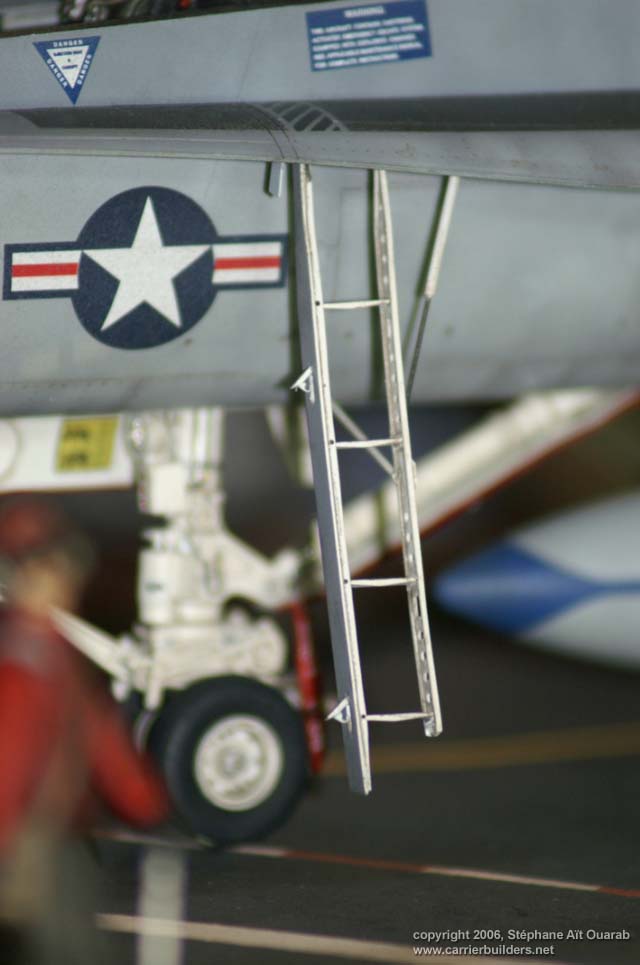
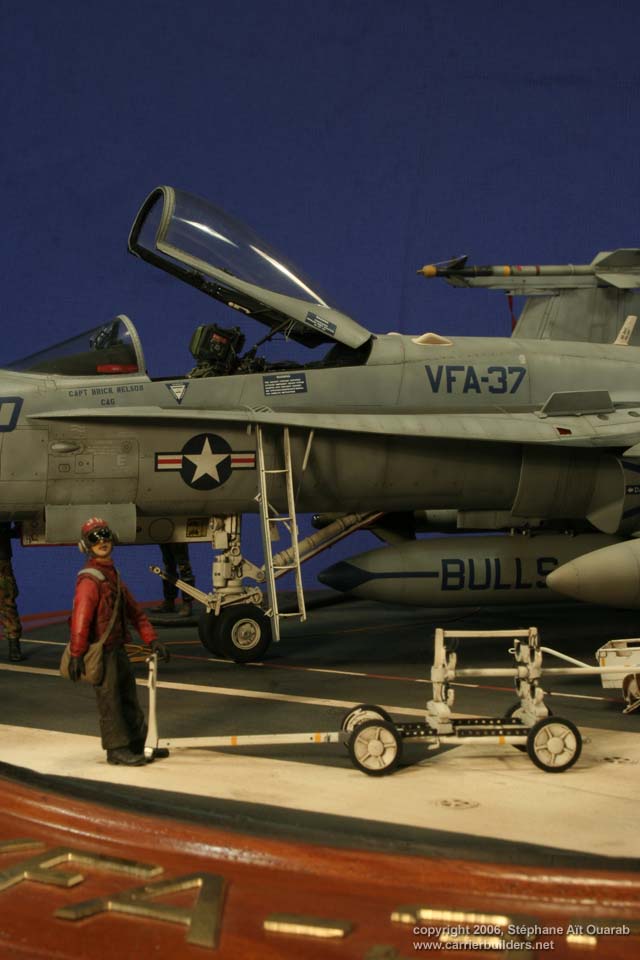
scratch plastic stretched for cables. The scale(ladder) of access: both
vertical parts(parties) are refined. The one who fold inside must be
sanded until appear even the holes of the structure. For the part(party)
external, it is necessary to drill in dedicated places both handles of
opening, to redo them as well as their hooks. The jack is redone with
the piano wire because it is too big.
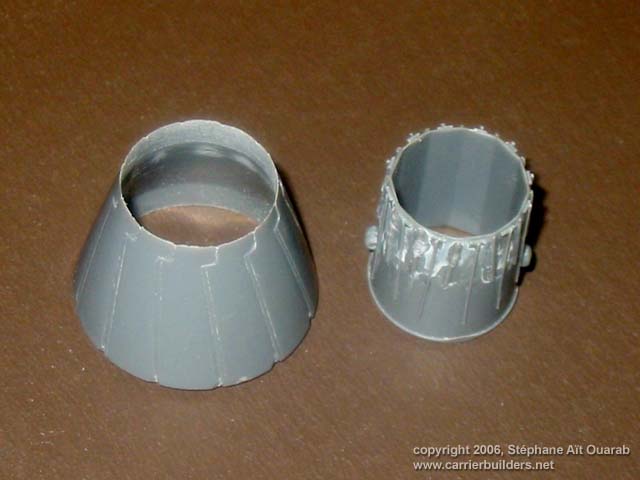
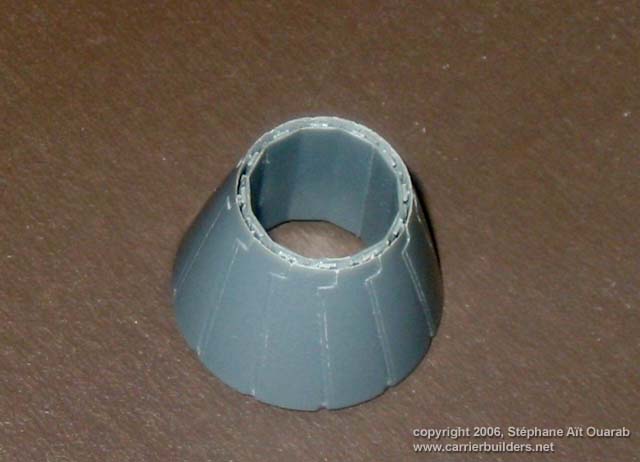
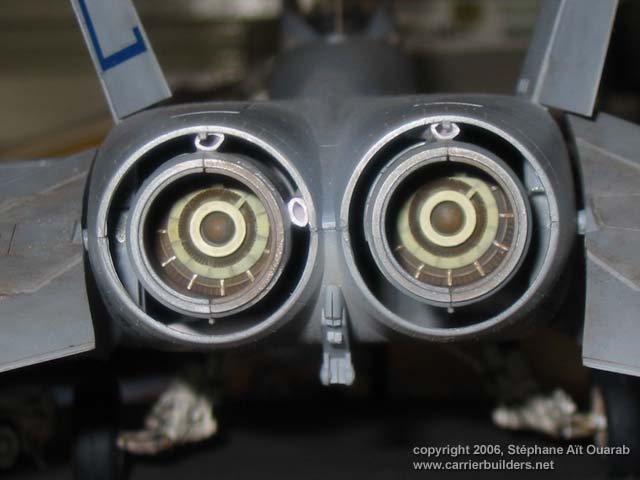
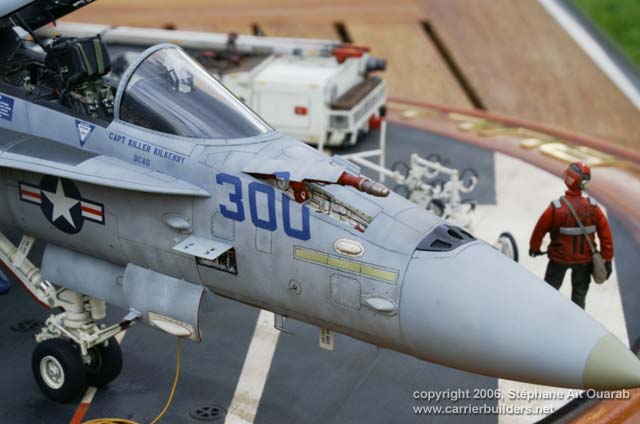
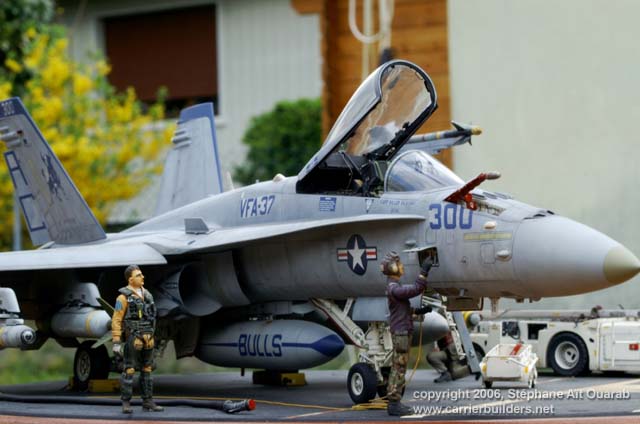
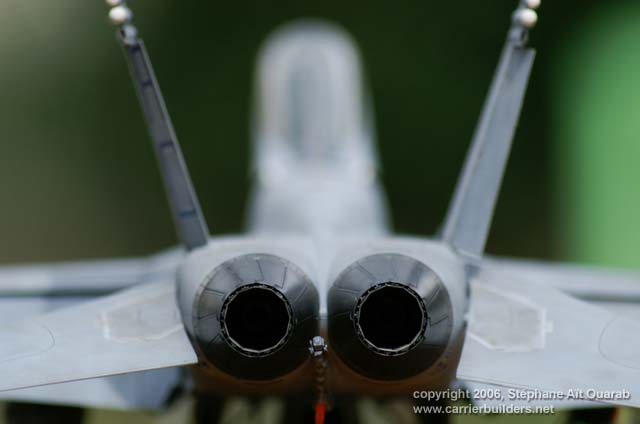
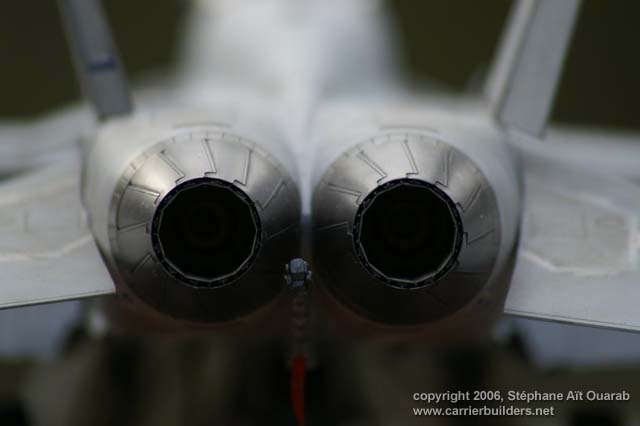
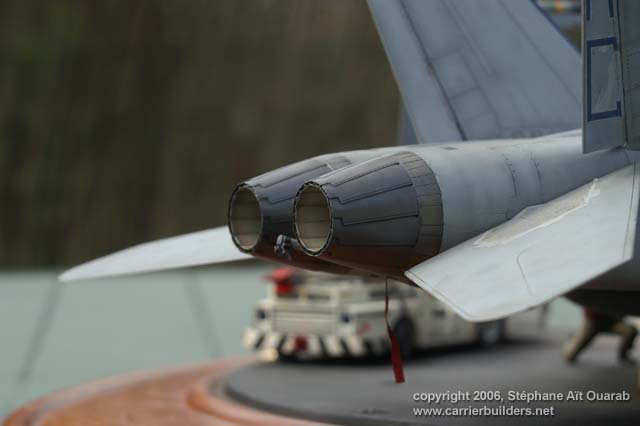
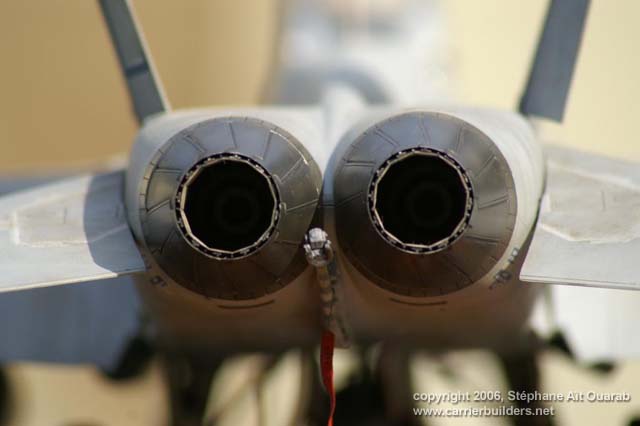
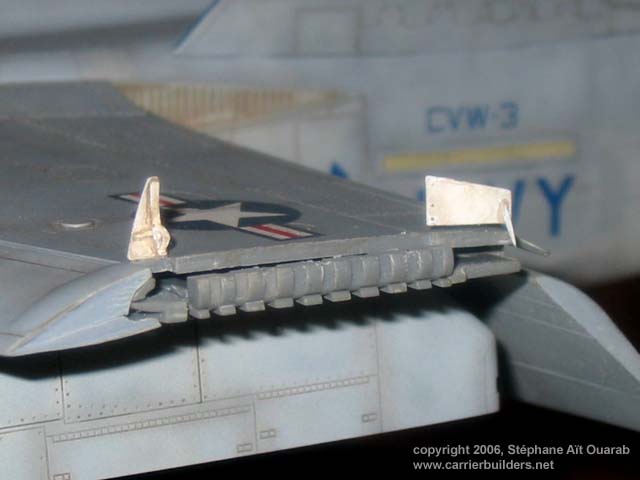
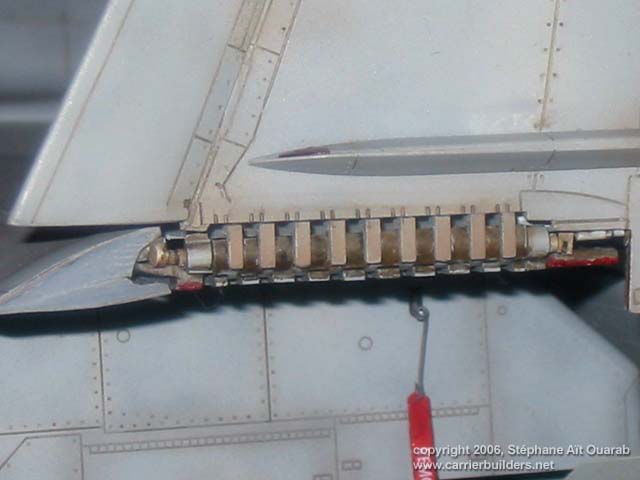
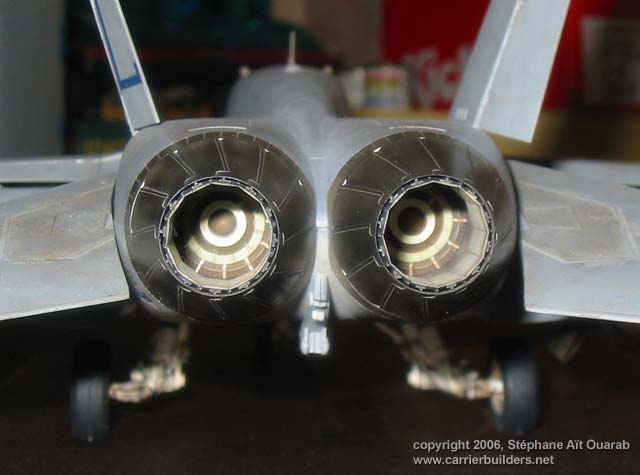
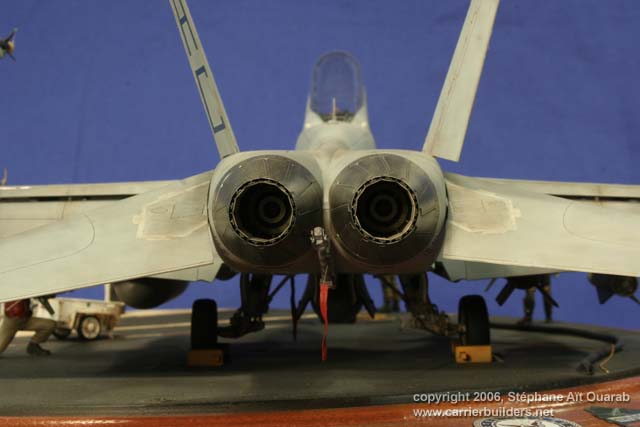
The nozzles
of the blackbox Kit disappointed me because they were full of bubbles on
the internal petals and the mechanism was non-existent! I thus resumed
those of Academy. I sanded at most the internal and outside petals so
that they are the finest possible. I then amused the mechanism with some
stretched plastic. For the painting of these I used tints metalcote of
Humbrol whom I mixed with matt colours put down (brown, green or white)
for created the nuances. After the polishing, the various effects appear
…
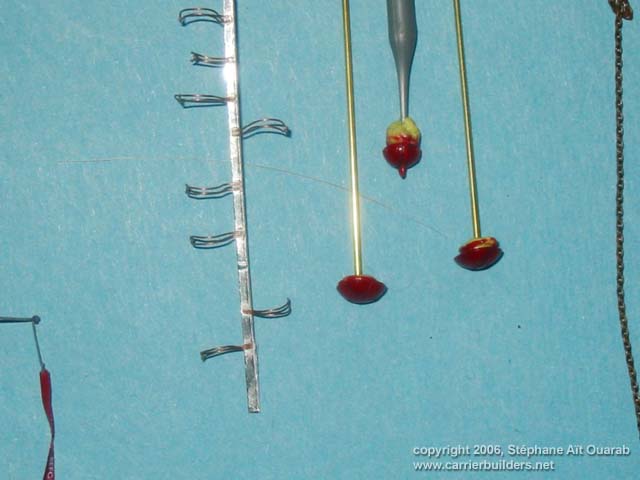
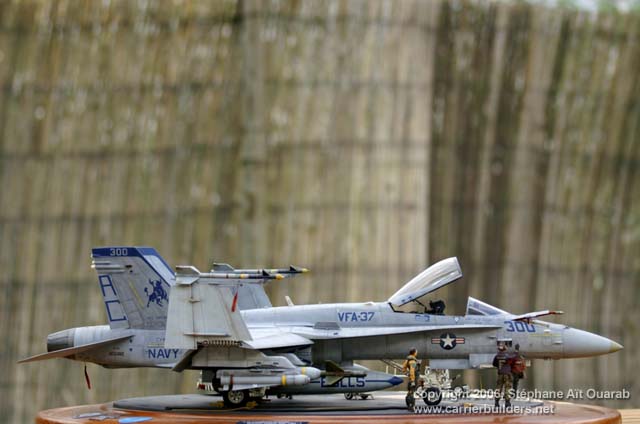
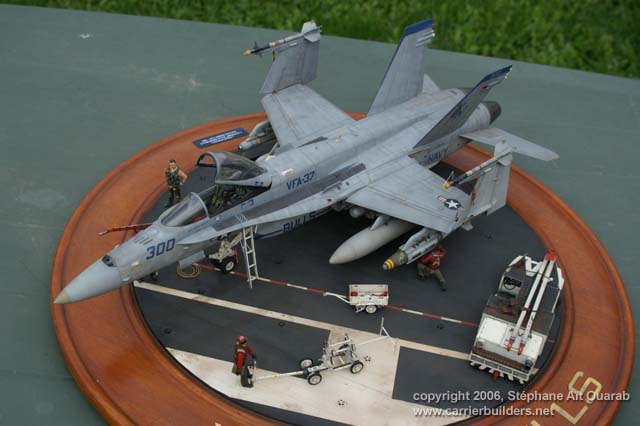
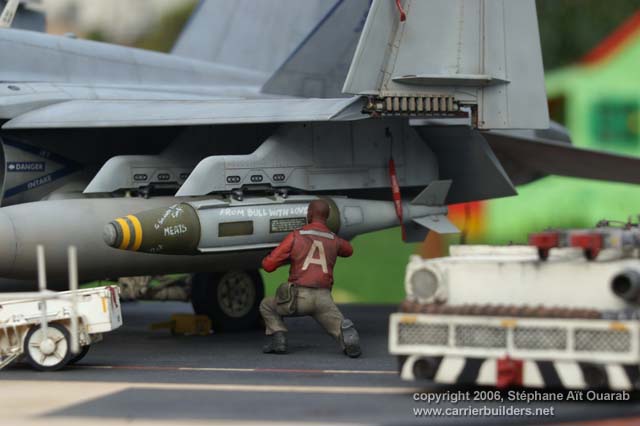
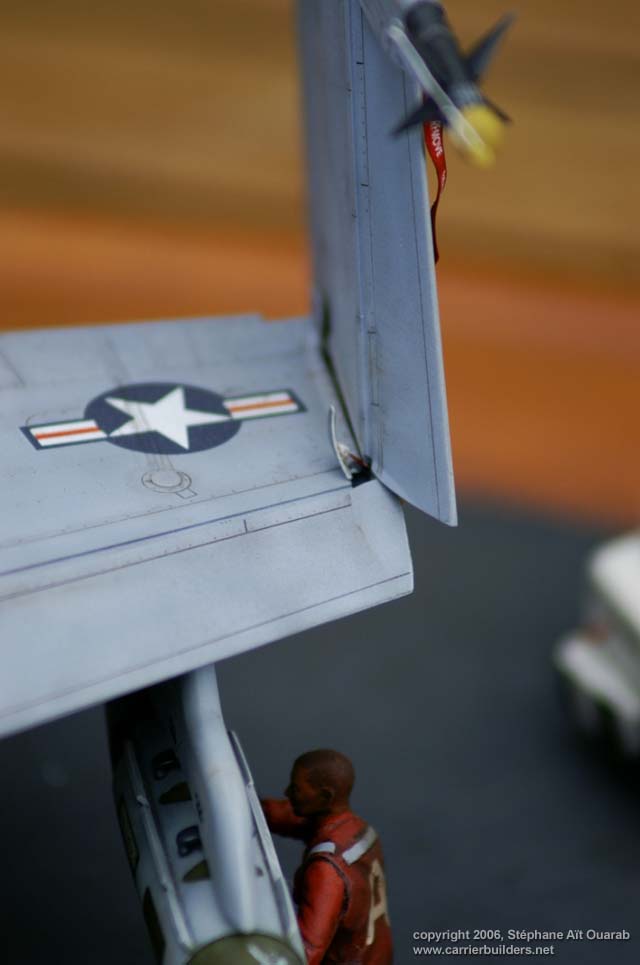
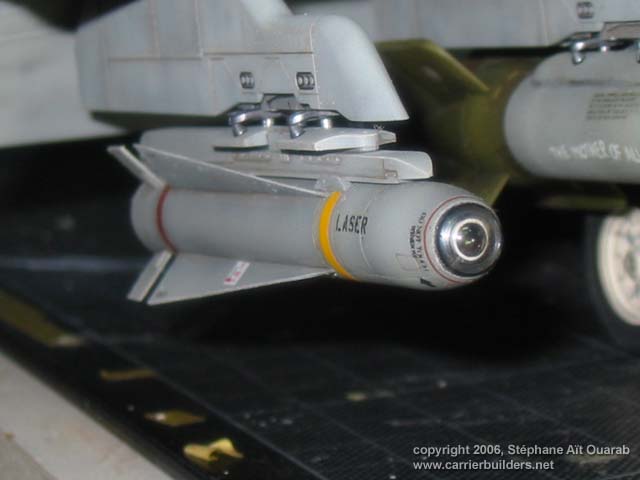
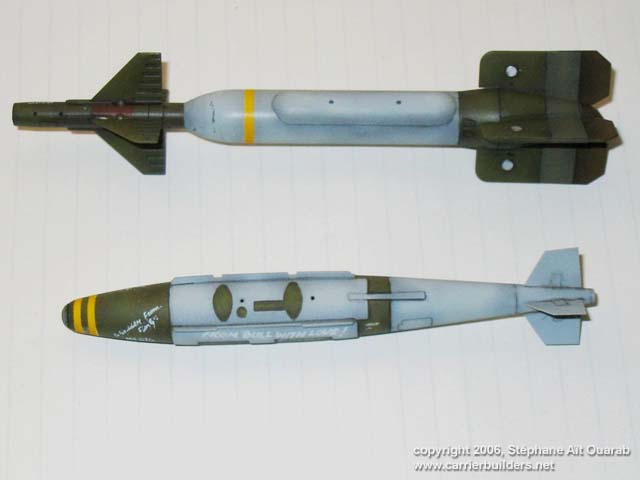
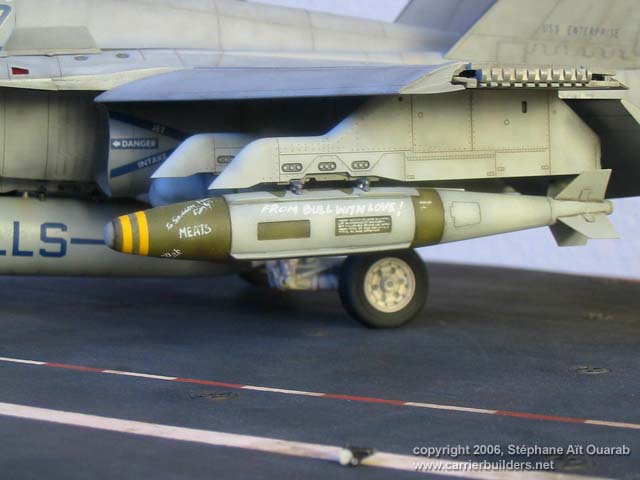
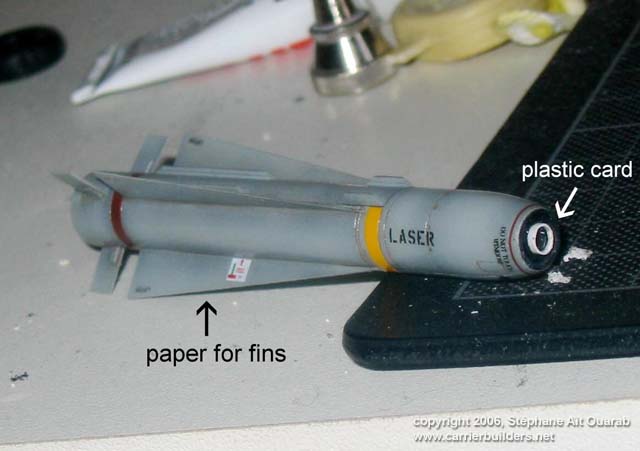
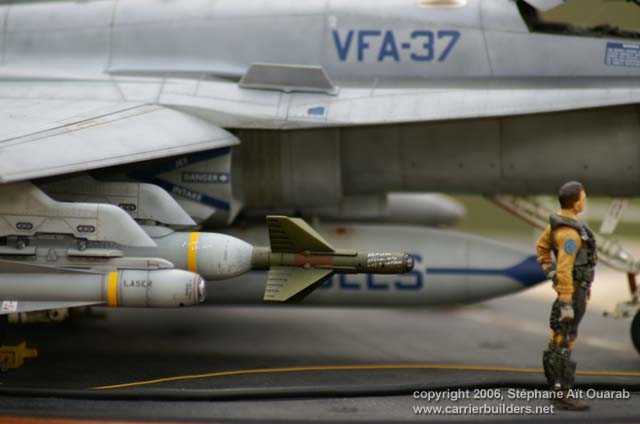
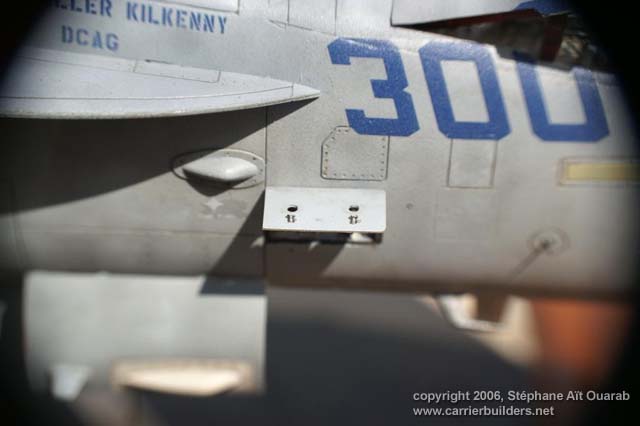
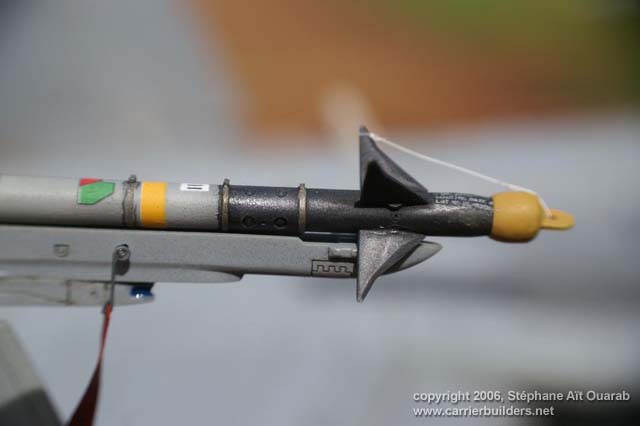
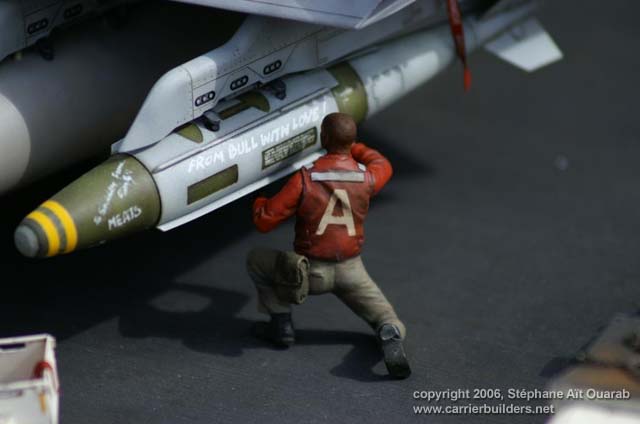
External blinds: the armament: the fins of the missile Maverick AGM-65 E
are redone cardboard of visiting card and the sensor with a slice of
plastic. The fins of the bomb GBU-31 DJAM undergo the same treatment as
the missile. The part before is also redone because the model
corresponds a bomb(spray) in service in the USAF (sharp shape in front).
The GBU-24 rose without addition except the sensor (piece of transparent
cluster stretched then warmed in front of a flame to make the ball). In
the passage, the sensor of sudden l'AN/ASQ-173 the same treatment. An
important thing : you should never neglect the painting of the armament!
The depiction of the set plays a lot …
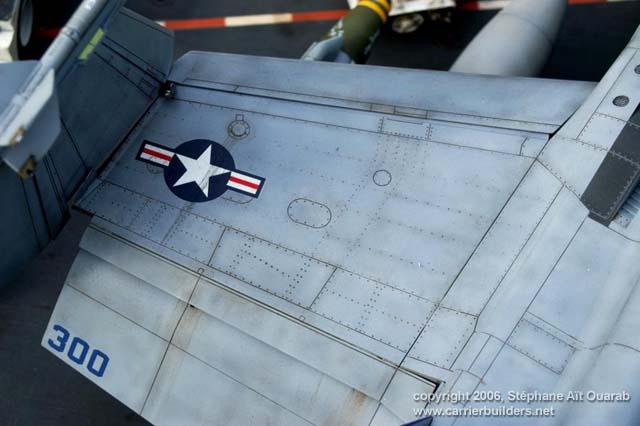
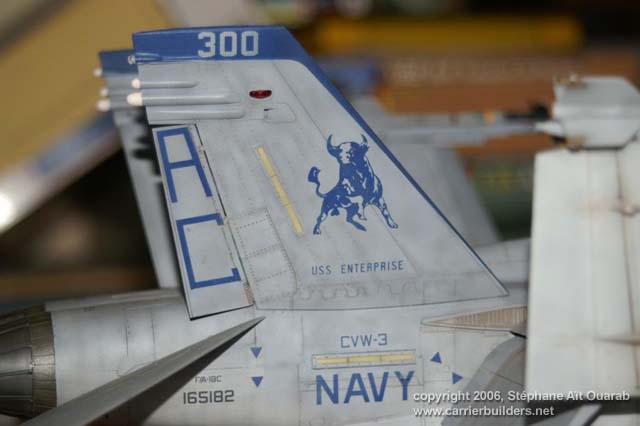
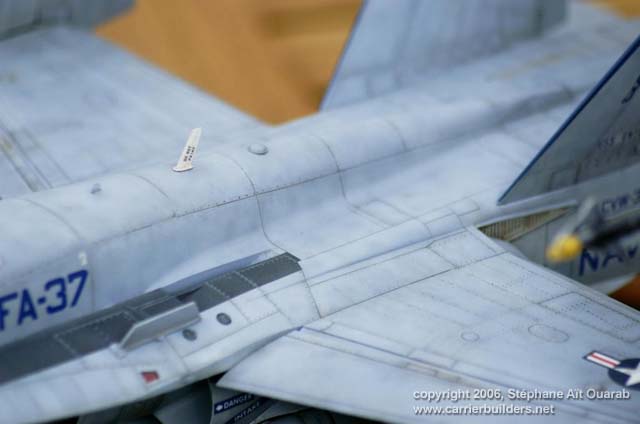
The painting:
Humbrol is 100 %. After the masking of the opened parts (parties) (the
cockpit, the trapdoors of trains, flat of the perch and the system of
provisioning) the camouflage is applied in the following way. Both basic
colours are applied according to the plan. After the drying, me aged the
device by making a pre-shade on all the lines of structures with a mixture
of the basic colour (70 %) of the chestnut (20 %) and of the black (10 %). I
realize afterward all the spots with the grey of every part more black or
the white. I add some vertical dark lines, by following rivets, on wings and
drift. It breaks a little the very long aspect of the plane. I rehearse a
fine coat of the basic colour, thus without mixture to flood the whole. I
resumes certain zones where the maintenance is regular with the basic colour
added to the white. I varnished by glittering. I put decals. I rehearse a
coat of brilliant lucky bastard. I puts afterward a juice of acrylic
painting by making vary the nuances of the black in the chestnut. All the
tracks of flight are realized with the same juice. I pass to finish lucky
bastard's matt coat. I resumes afterward certain zones with the white oil
painting which to be translucent.
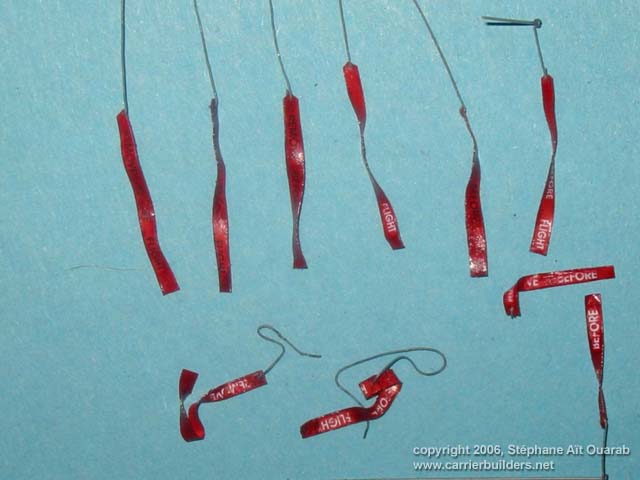
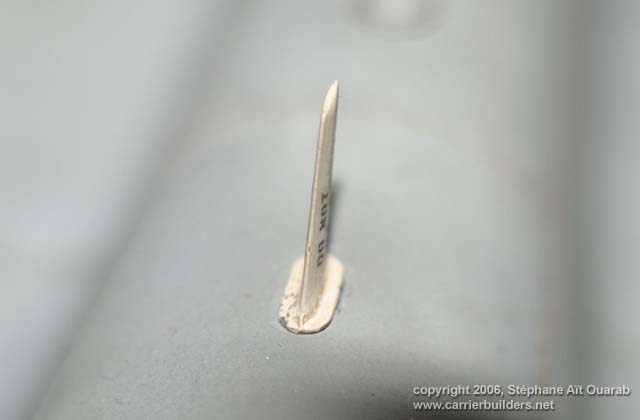
Them "remove
before flight" of Eduards are very beautiful but too wide for the scale
(ladder). It is necessary to cut them of every quoted (esteemed) and to
shorten them. Having deformed them, the painting goes away by places. It
is necessary to resume it with some darker red on edge and in hollows:
it will look of the volume.
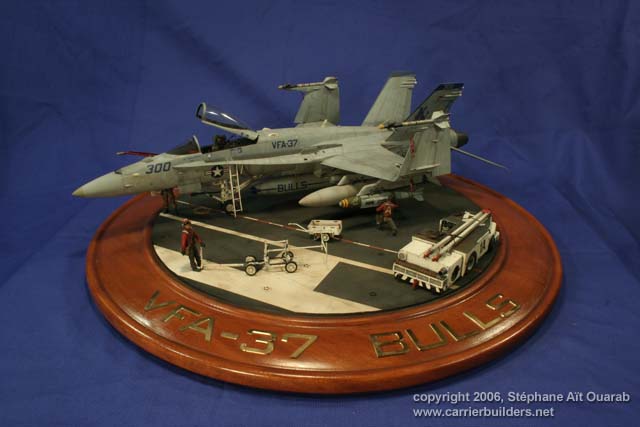
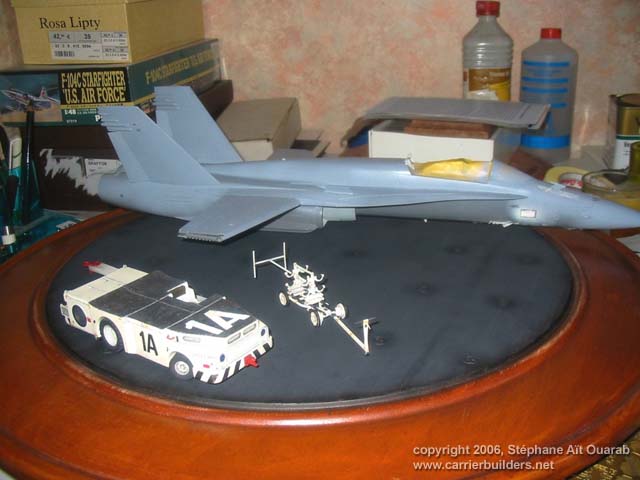
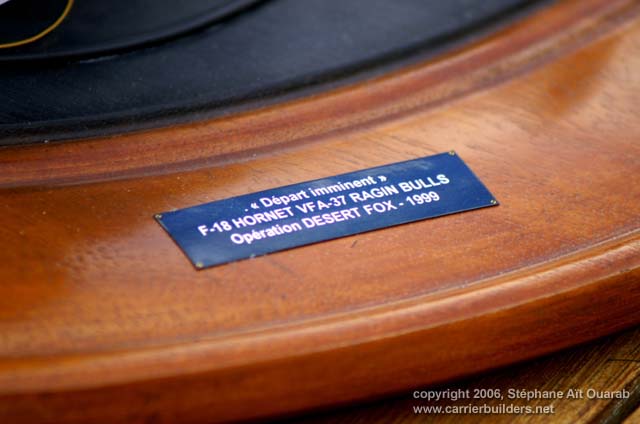
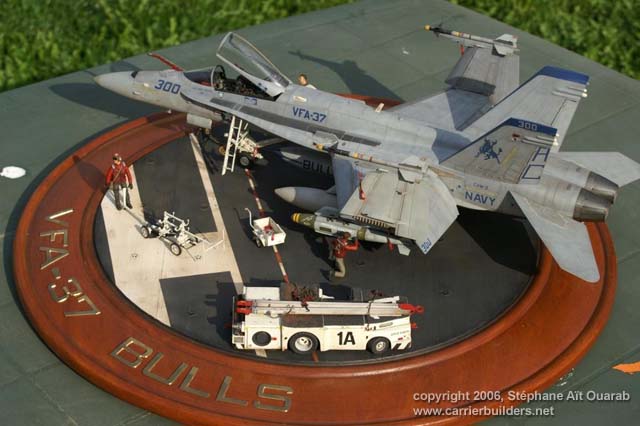
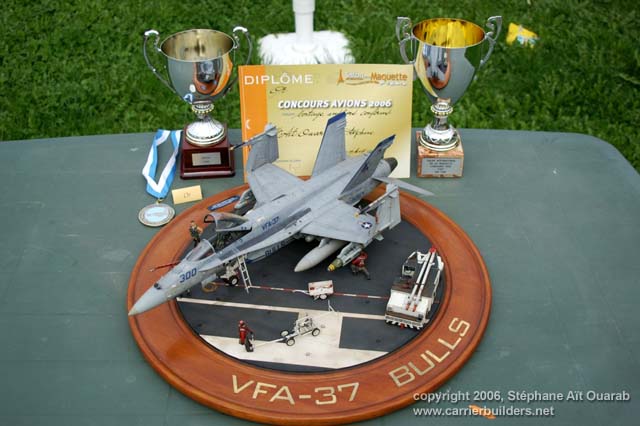
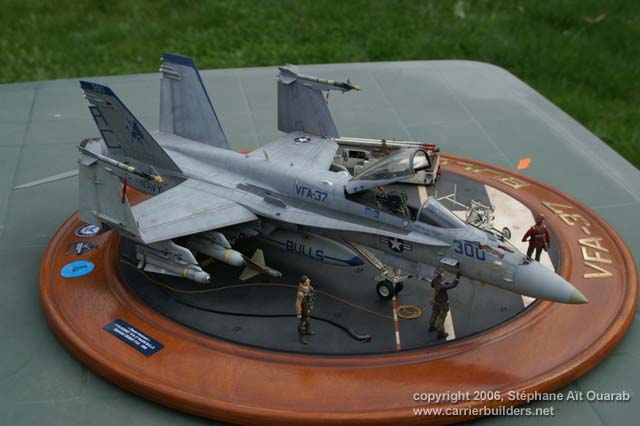
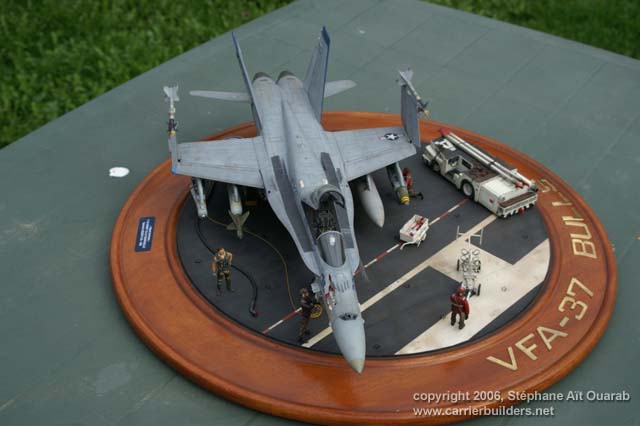
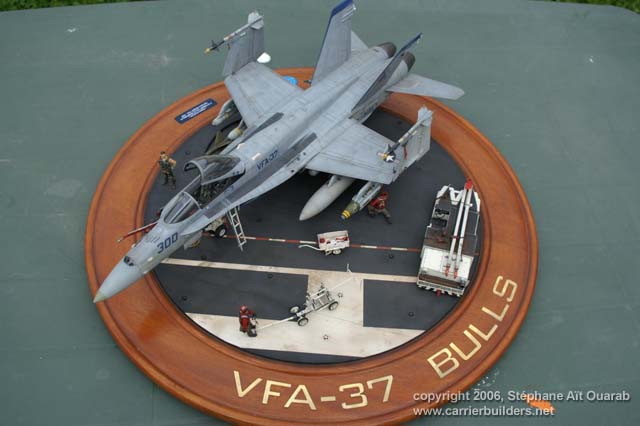
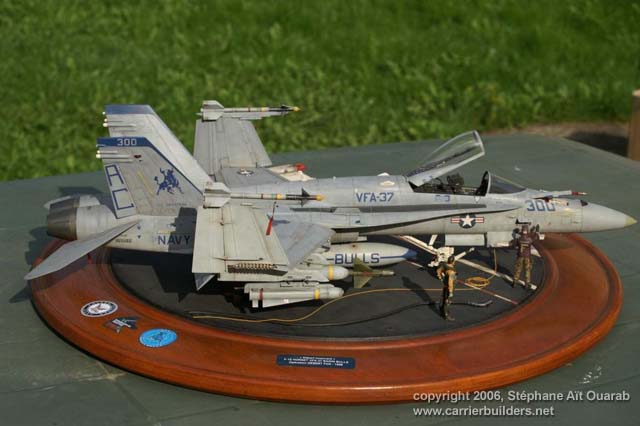
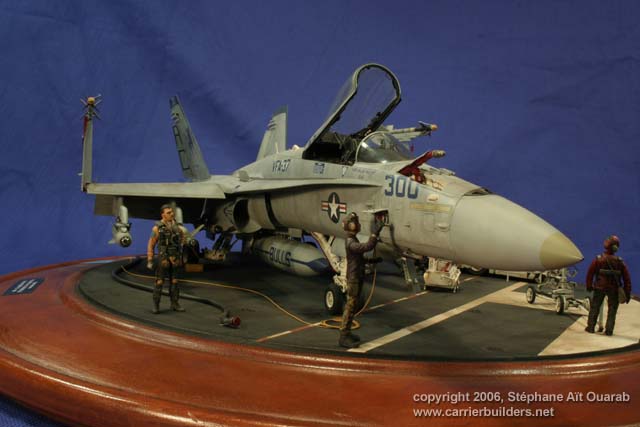
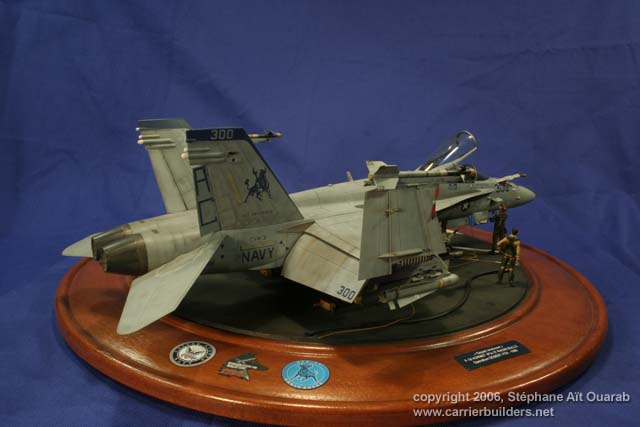
The pedestal:
it’s wooden full. To realize the bridge of carry (wear) plane, I coated
first of all with putty all the central part (party). Then with some glass
paper with very big grain (bead) fixed to a wooden hold, I crossed(spent)
him (it) two-three times with a rule (ruler) to realize very straight ahead,
the cover of the ground. I then drilled the holes into which I inserted
heads cut by ankles in lived conical. I then stuck by top eyespad supplied
in the set of Flightpath. The whole is painted with a colour " grey tire ".
I mask the rest to paint all the lines. Once makes, I rehearse (iron) a fine
coat (layer) of black and chestnut to standardize the set(group). By means
of an old paintbrush I realize tracks and different spots.
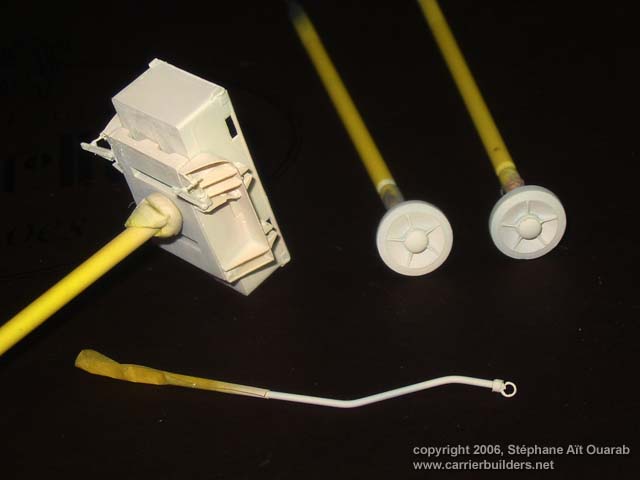
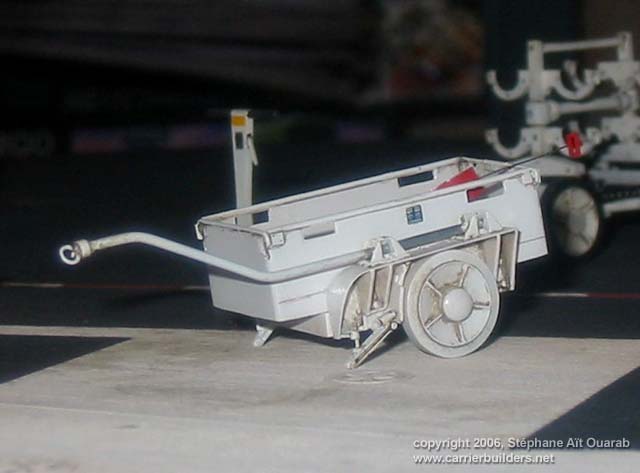
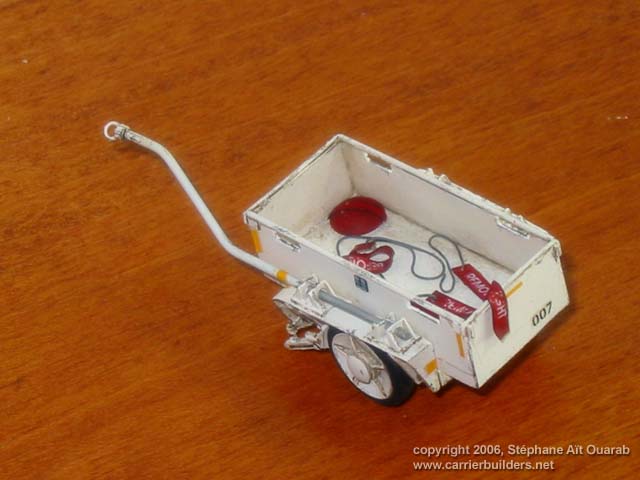
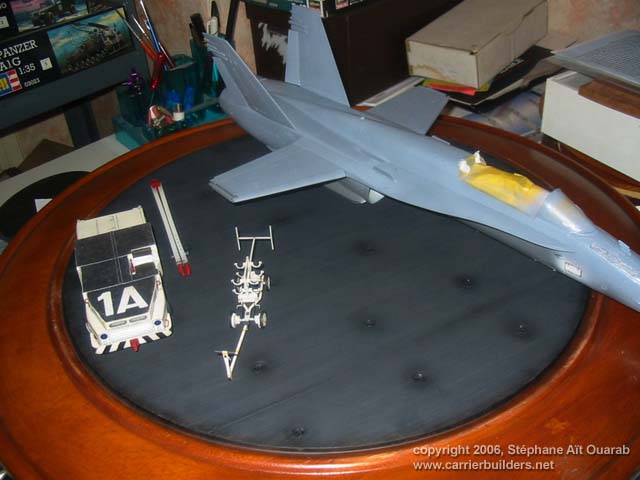
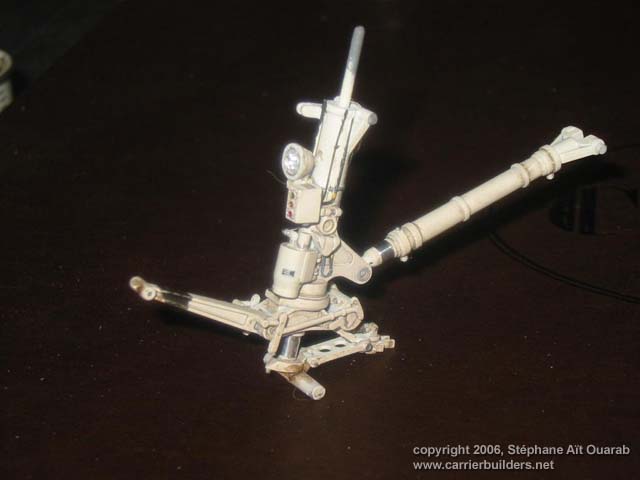
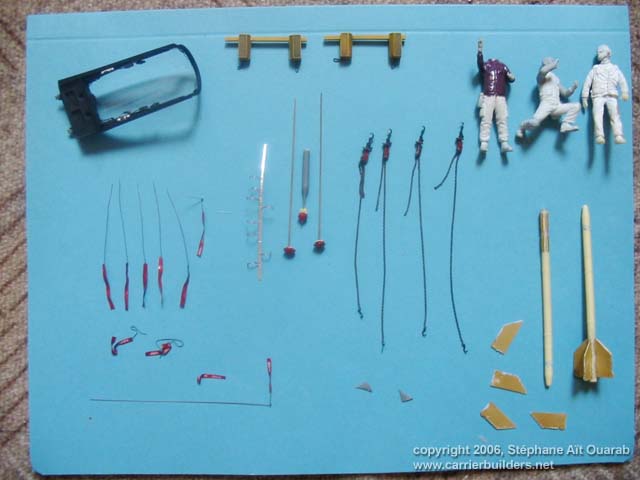
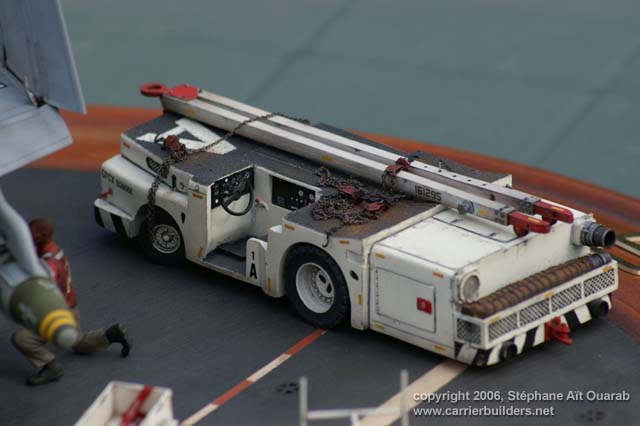
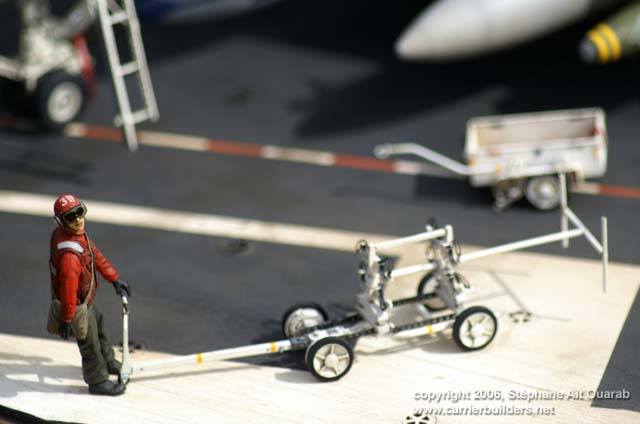
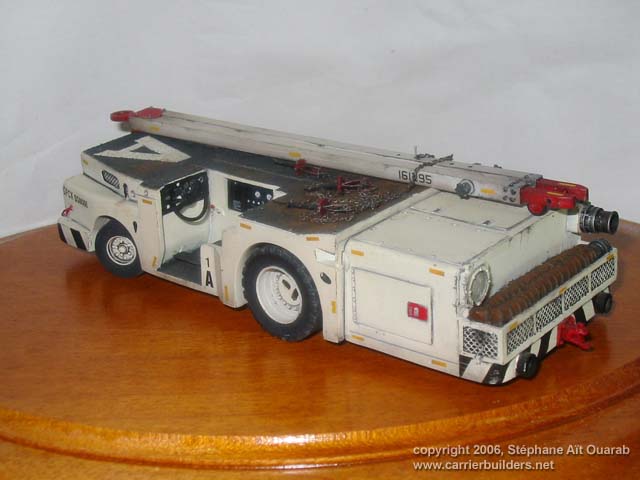
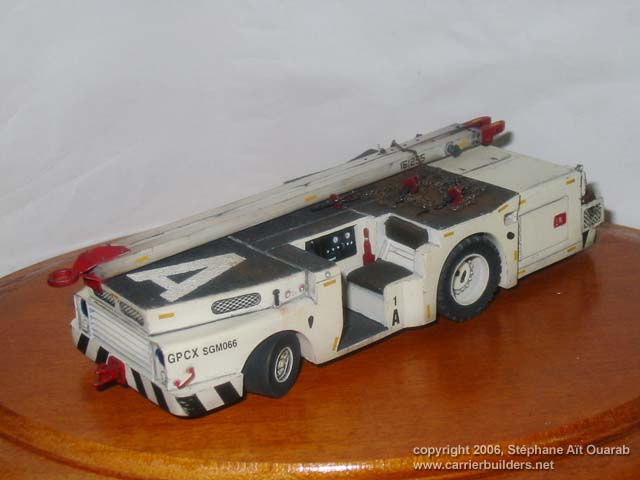
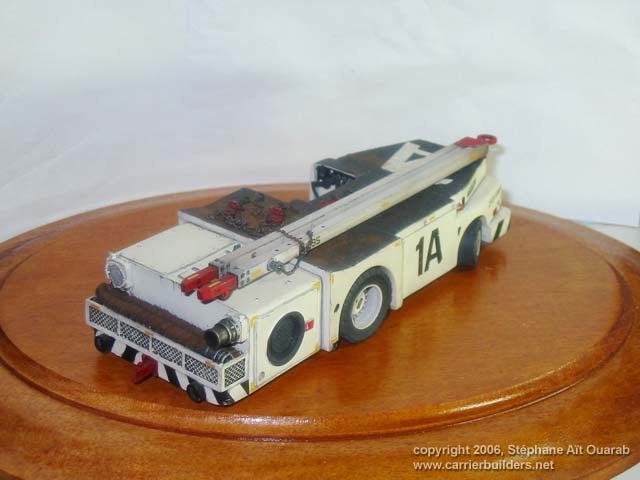
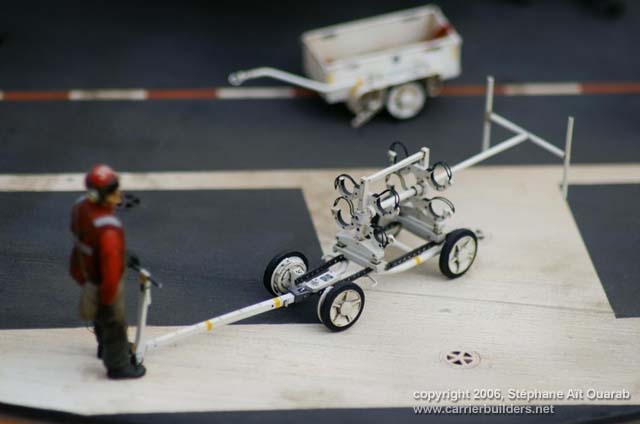
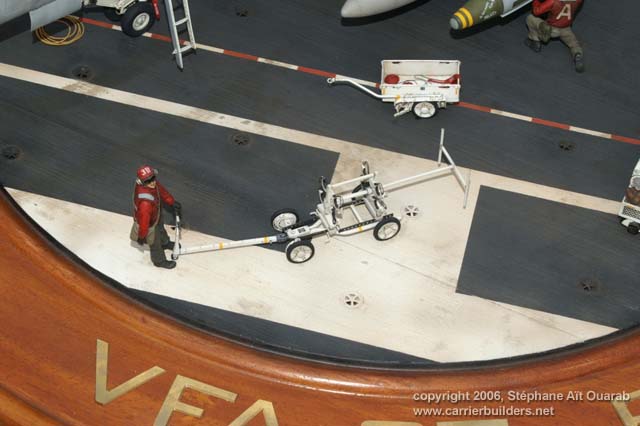
Vehicles: the tractor of track is a magnificent kit in resin of PWMP. Except
for the railings(bars) of the driving bonnet, I redid nothing of the other
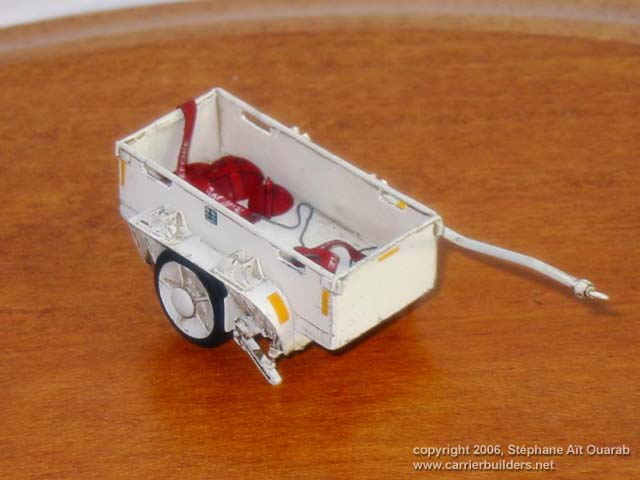
one. Quite as the duty cart.
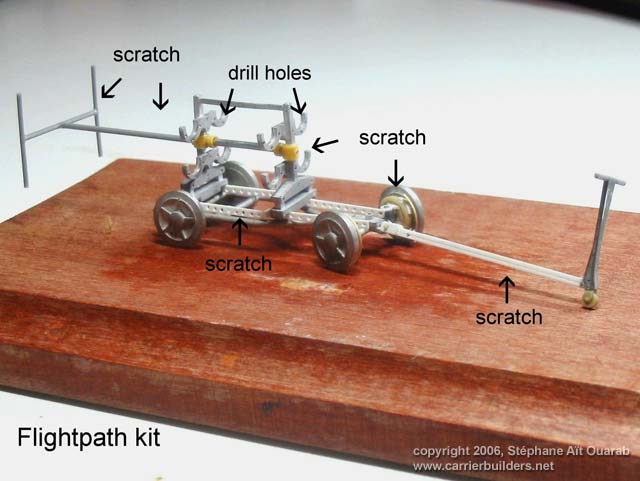
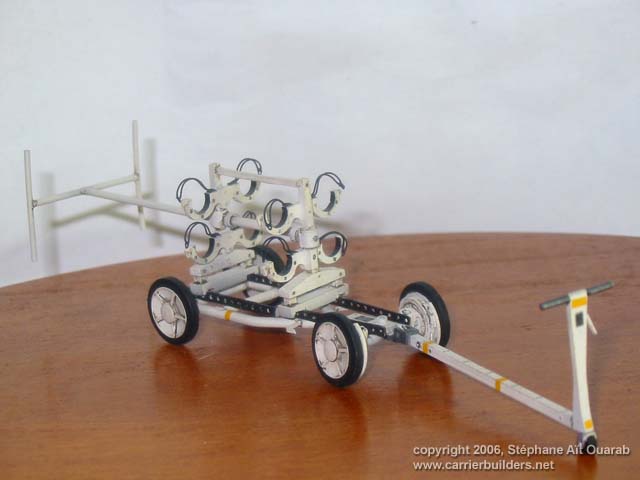
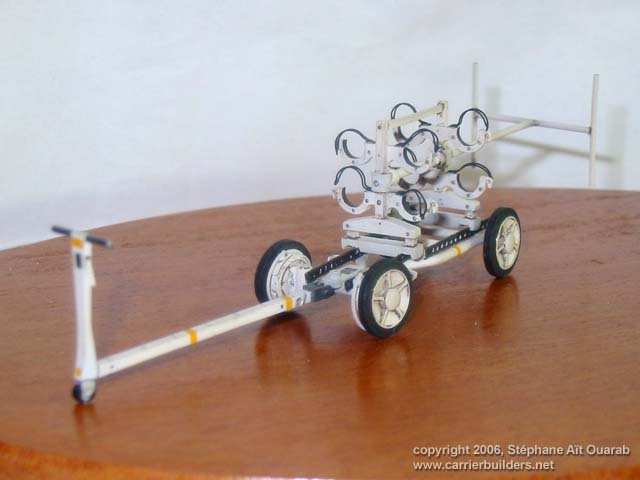
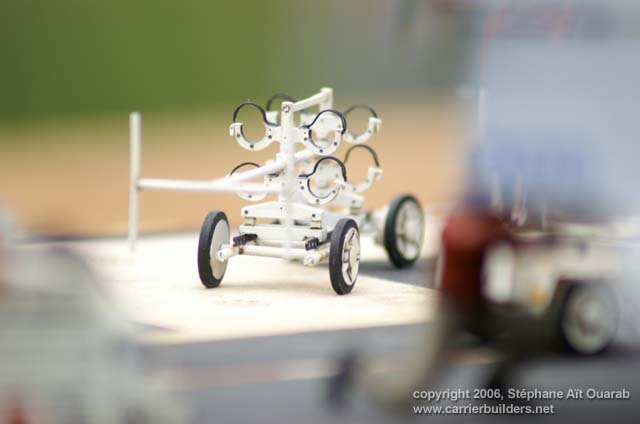
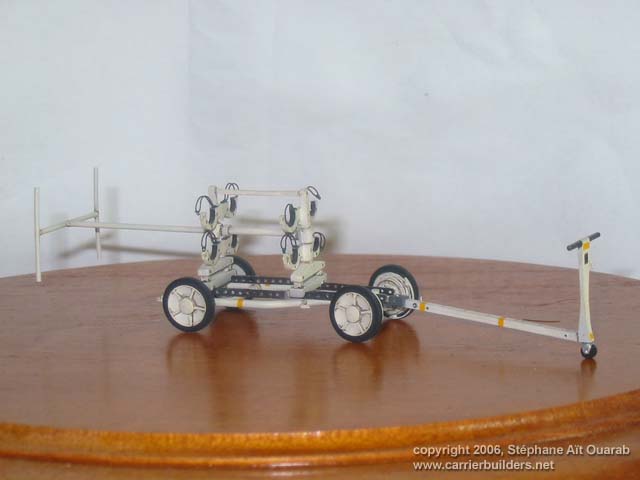
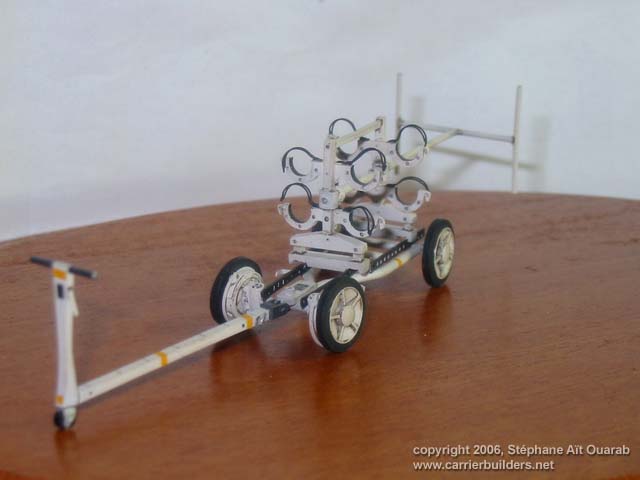
The trolley bus is of the brand fabflight. It’s also very beautiful but
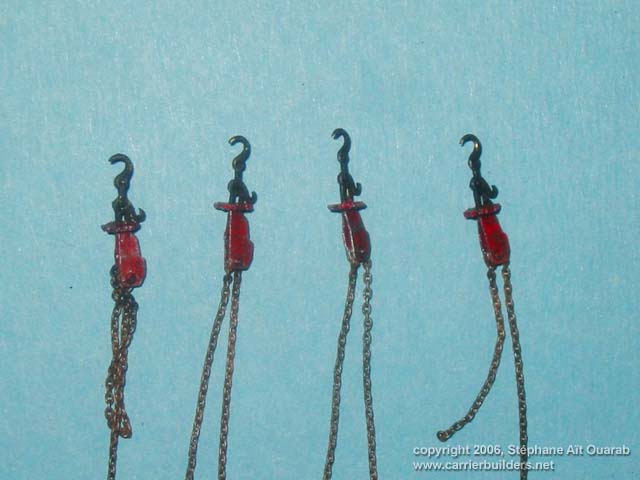
demands more work. Rails, discs of the wheel and the bar of guide notably …
Holds for wheels and bar of drive are also of Fabflight. They demand
only not enough work. Chains will be changed all the same because they
are sharply too big for the scale.
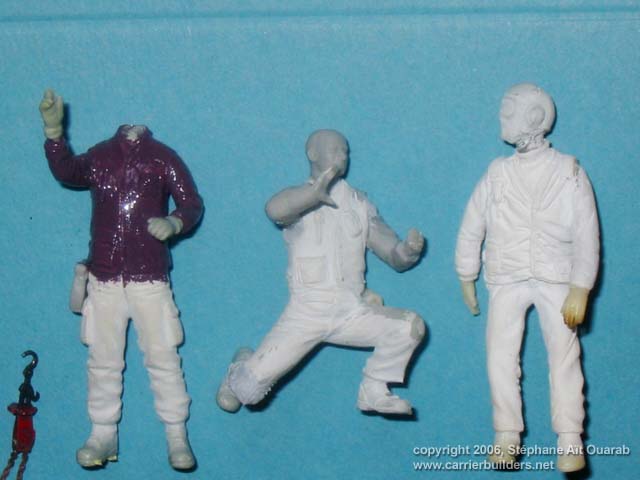
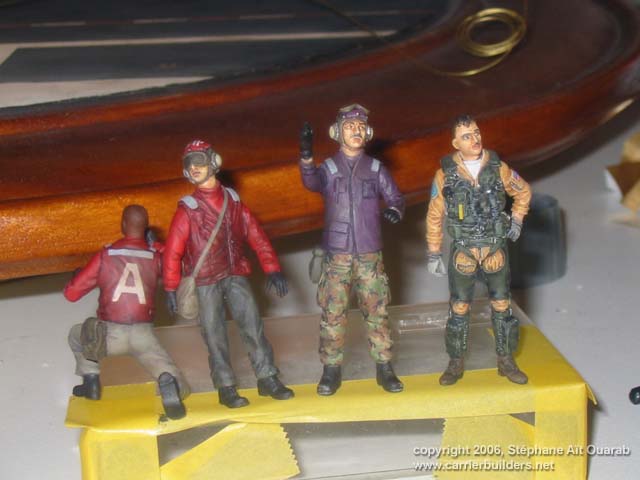
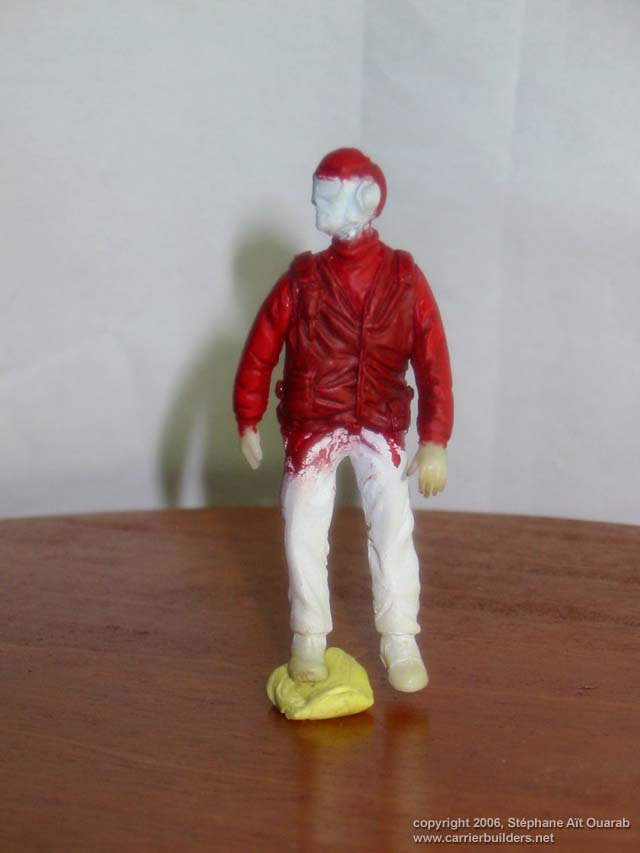
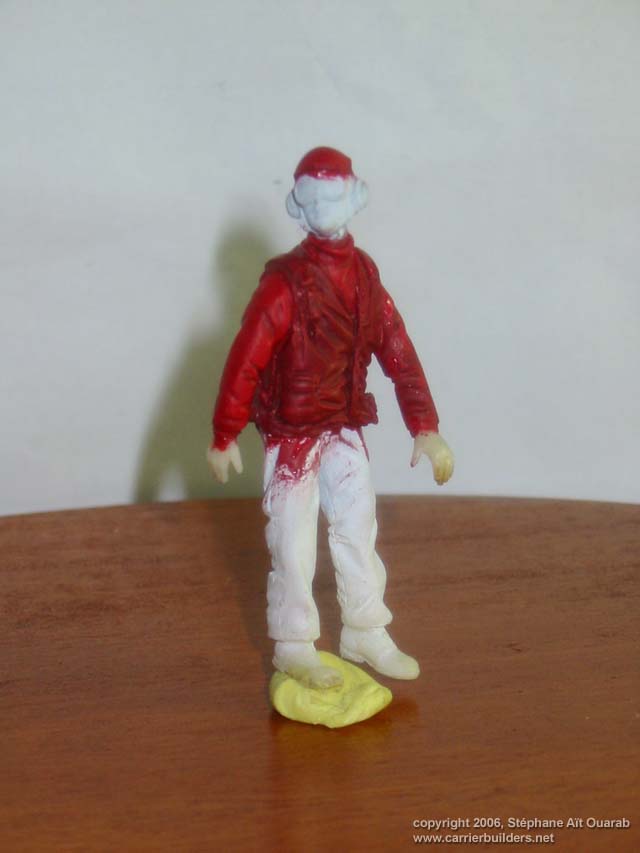
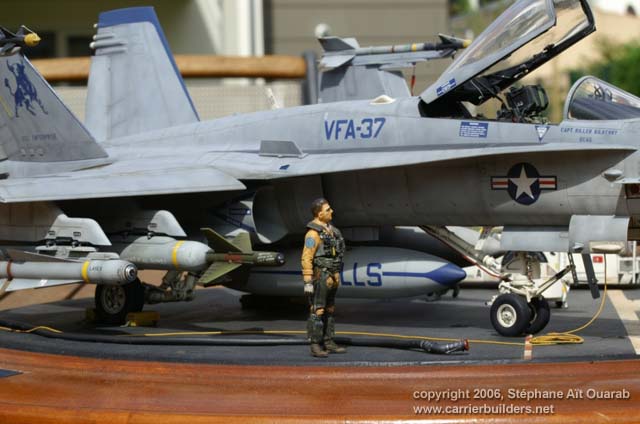
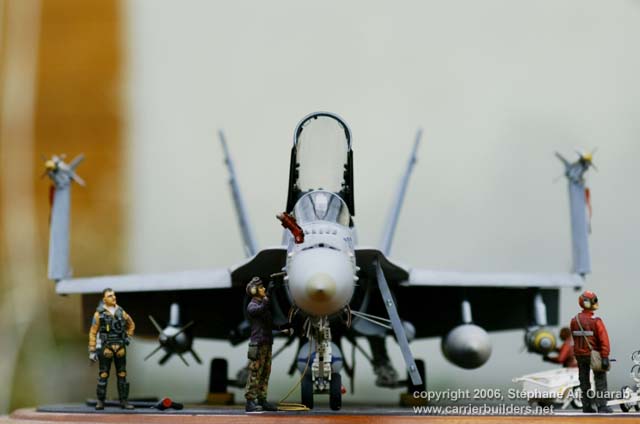
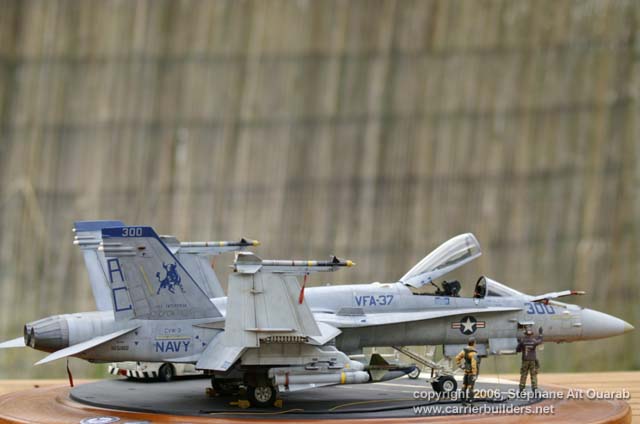
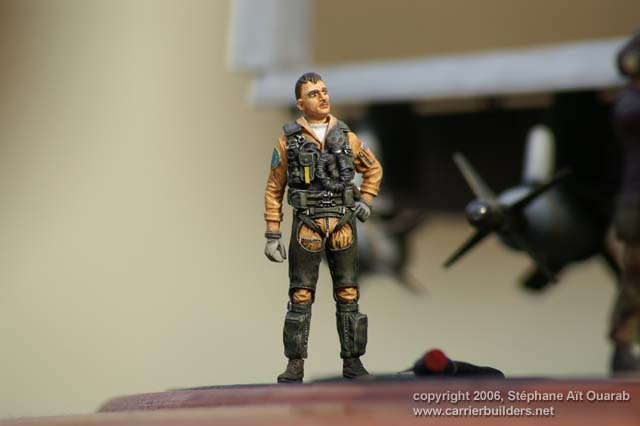
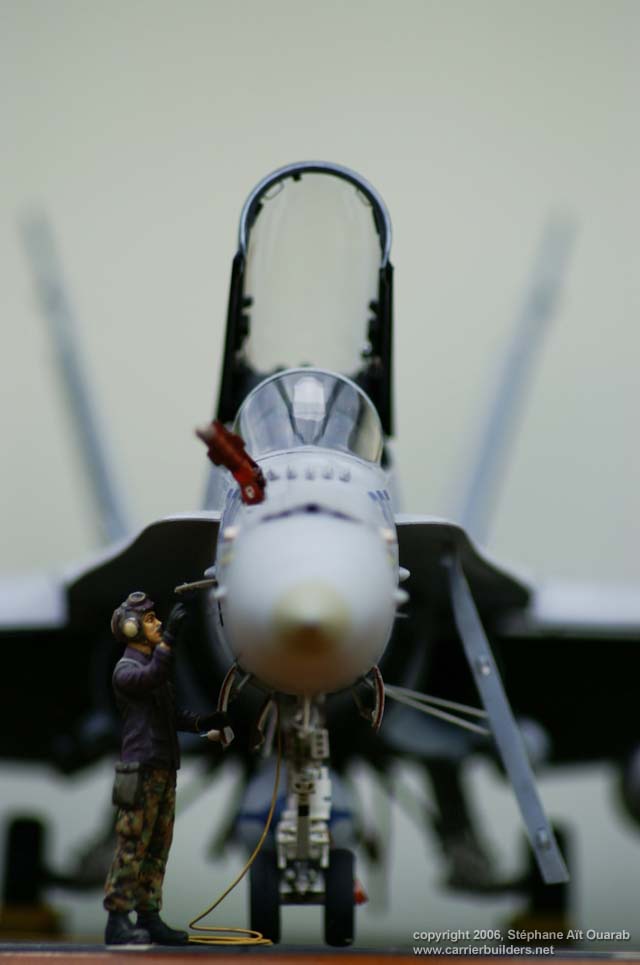
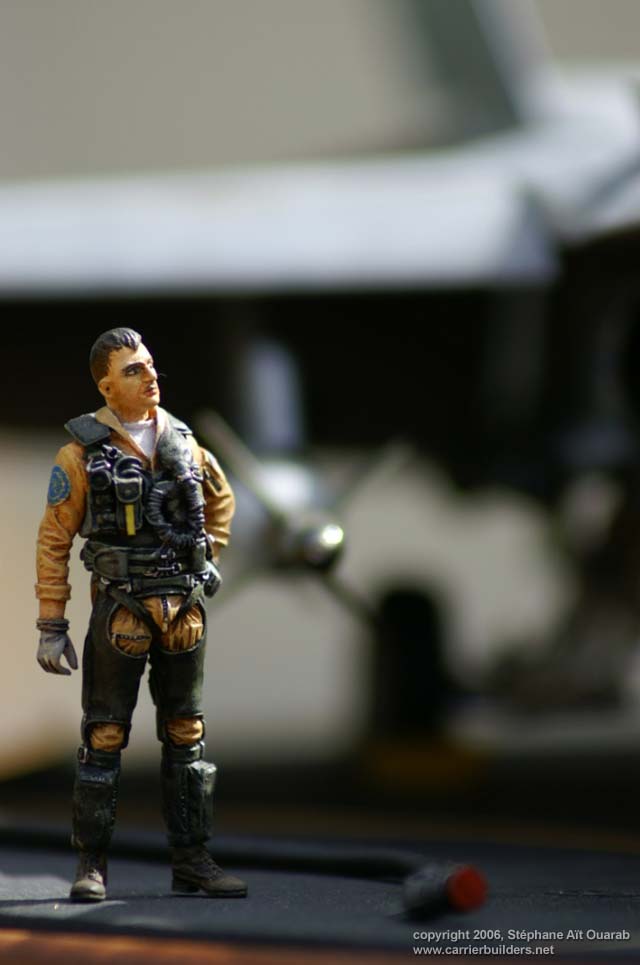
Figurines: It were all modified. The pilot is of the brand Verlinden
(magnificent!). The head is that of the pilot of Academy. The staff
pulling (firing) the wagon is of the mark (brand) PWMP. Originally the
figurine if support on a vehicle, it is the reason for which it’s tilted
behind. The head is also changed with that of the officer of catapult.
It receives a good coat (layer) of putty enter legs because they are too
fine. I have him (her) add a bag got back in one limp with figurine in
1:35 … The person of " the aviation fuel oil " is resumed of her (it)
limps Academy. I just transformed its height of grate into waistcoat.
The last figurine is also of it limp. It is it who (which) has sudden
most alterations. Initially it is the navy catapult officer. His its
right leg is cut then put in the good position. Feet are deformed with a
flame. The head results from a set "Vietnam" in 1 35 as well as the
arms. For each of the figurines it is necessary to redo with the band
(strip) Tamiya, the present thoughtful parts (parties) on waistcoats.
For the painting, all the faces are painted in the oil painting. For the
rest, a coat (layer) of white, then the colours of every part (party)
with the humbrol then varnish puts down(frosts) it. I resumed every zone
with the oil painting for reliefs and shadows. As regards figurines in
1:32, I always find them too big. The only one really in the scale is
that of Verlinden and it is 1:35!
I hope that you will have
taken so much pleasure to read these some lines in my English incorrect
that I shall have had of it to go(take) up this diorama.
Photos © 2006 by
Stéphane Aït Ouarab
September 11, 2006
www.carrierbuilders.net |