The kit is nothing special at
all but a good representation of the A-1H Skyraider. The quality is Tamiya
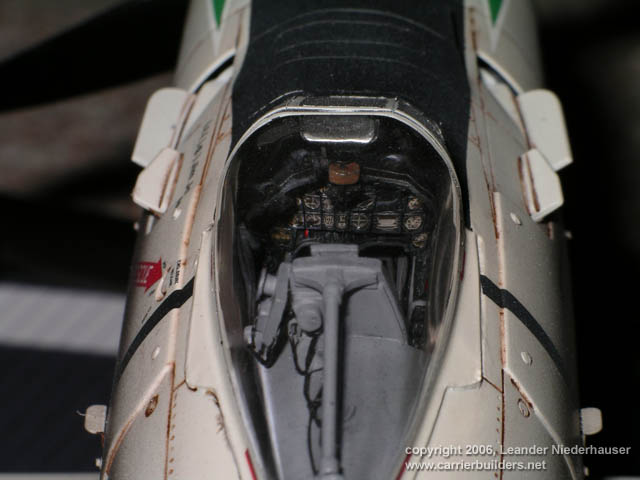
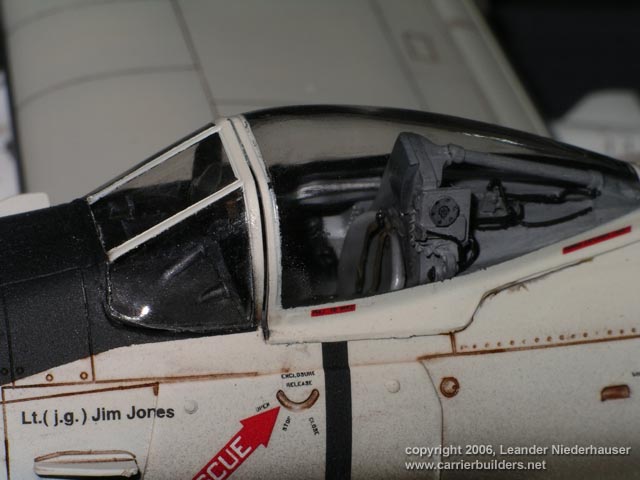
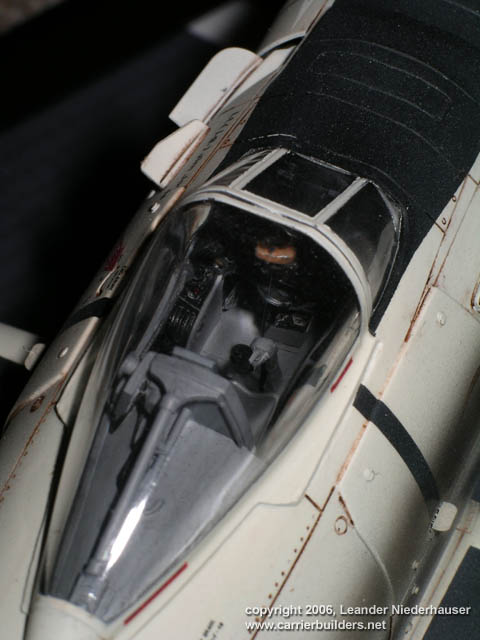
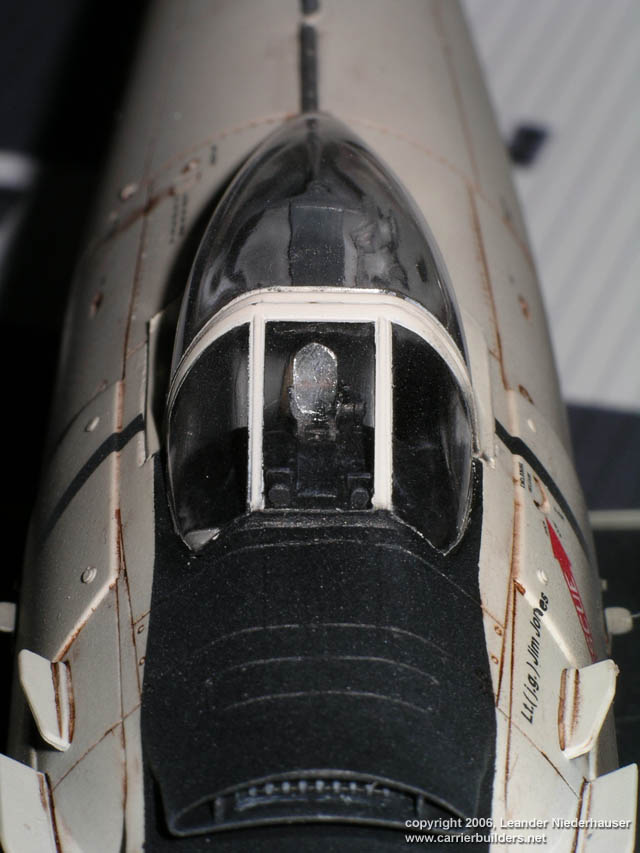
like; it could almost be build over night. I added a Resin cockpit from
Aires, to improve the kit parts. Unfortunately
I ordered the Cutting edge version first, learning that the version I wanted
to build has NO Yankee extraction seat. So I had to go for another one. The
Aires cockpit is of very high quality, but any instruction how to
install it in the kit is missing. The most difficult parts to install are
the sidewalls. I cut them to shape, and sanded the sidewalls close to
transparent. That's the way to go if you want to have them installed. One
could also consider leaving them off, as they almost can't be seen when the
cockpit is installed.
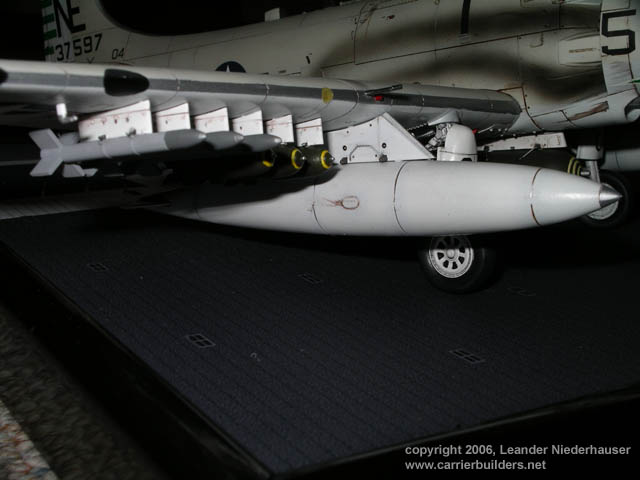
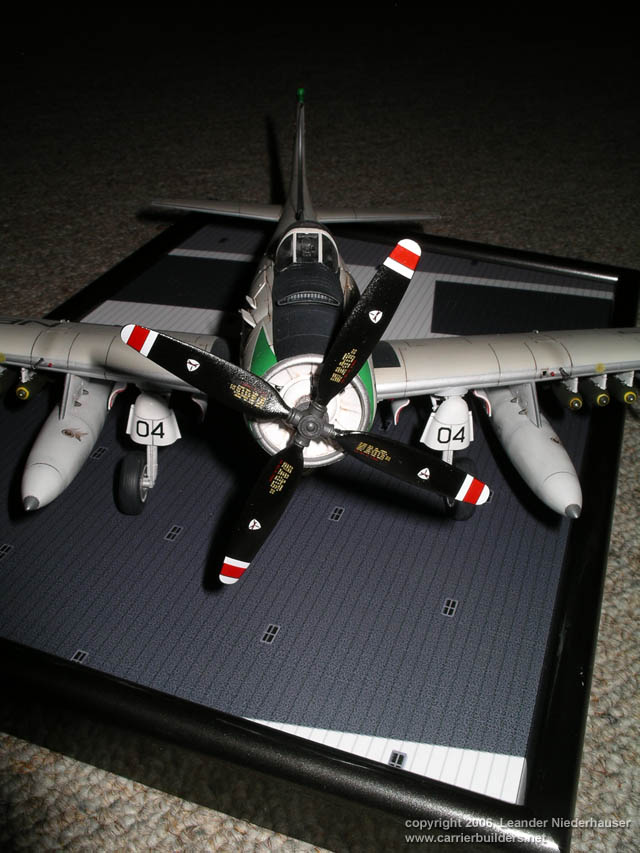
The wheel bays from CMK are very fine detailed. Compared with my references
100% perfectly designed. Only 1-2 Hydraulic lines are missing. To install
them into the kit you have to sand them down a lot, again almost to
transparent. But afterwards there is no further trimming required, and they
fit perfect. The tail wheel is also supplied, and it's much more correct
than the original Tamiya one.
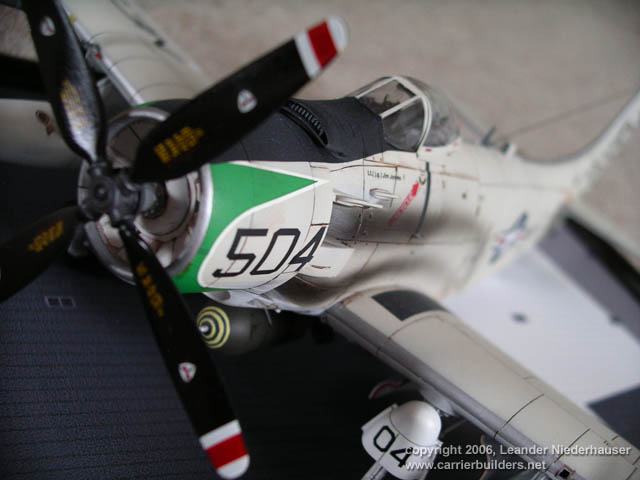
The perhaps most difficult part to "get right" was the propeller. The
separate blades have to be glued to the governor section. This must be
done very carefully. Once they are installed you can't turn or twist
them anymore. And if one blade is looking a bit too much to the left or
the right, the whole prop looks ugly. Compared to the original Tamiya
one and again both together compared with some pictures, you immediately
see why CE made a corrected one. For me a must add!
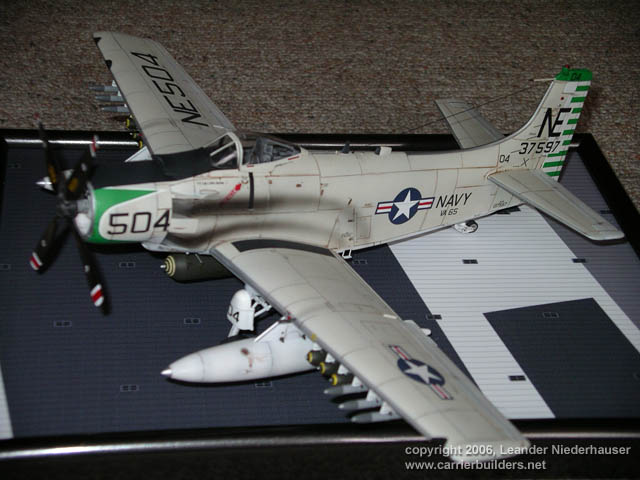
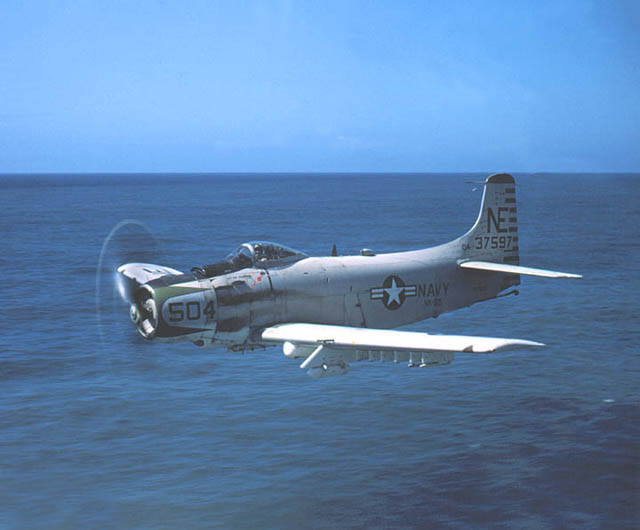
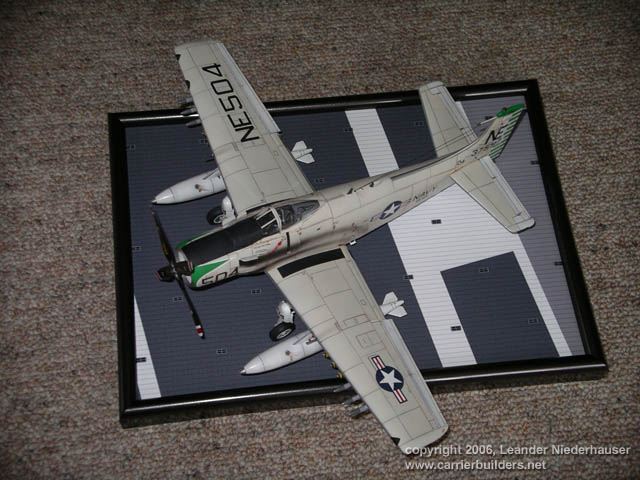
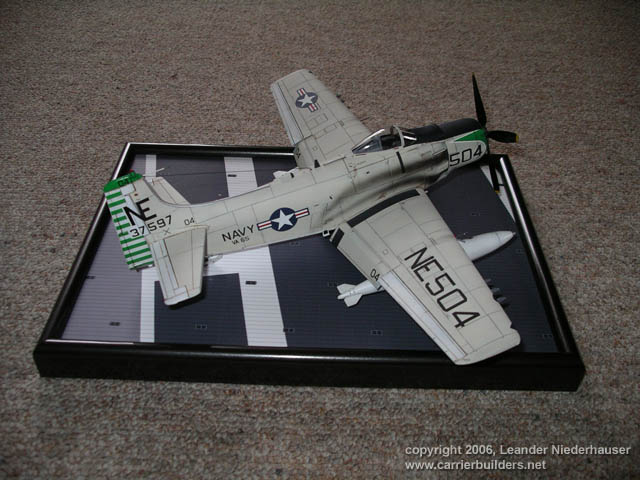
I wanted to build the A-1H from VA-65 piloted by Lt. Jim Johnes, because
I found some pictures of the original one on
www.skyraider.org. So it was easy
to build the model as accurate as possible.
The aircraft
I painted with Vallejo Model Air colors, witch I use since quiet a long
time with high success. I preshaded the panel lines with black,
and sprayed the metallic colors afterwards. Those I covered with Tamiya
tape, and then I finished coloring the model. The panel lines have been
highlighted with a brown - black mixture of water based colors. After
they were dry I got the idea the mixture was a bit too brown, but after
some days I was used to it, and now I like it. The exhaust strains were
airbrushed with Tamiya smoke. I passed about 60x for one, so I had very
good control of the shape and the darkness. Oh, I just remember,
the exhausts are from Moskit, and they are a MUST!! I have never seen
something more realistic on a model than those.
To start decaling I used my old "trick", and sprayed Future on the whole
model. This gives it a very gloss and smooth surface, where the decals
stick very well, and the decal film is invisible after they are dry.
Afterwards I airbrushed matt, satin and gloss varnish on different
areas, depending what was used on the real model (White is gloss, grey
is matt, dirt and oil is semi gloss ...) To finish I added some leaks
and oil strains where I could see them on different pictures I have from
Skyraiders.
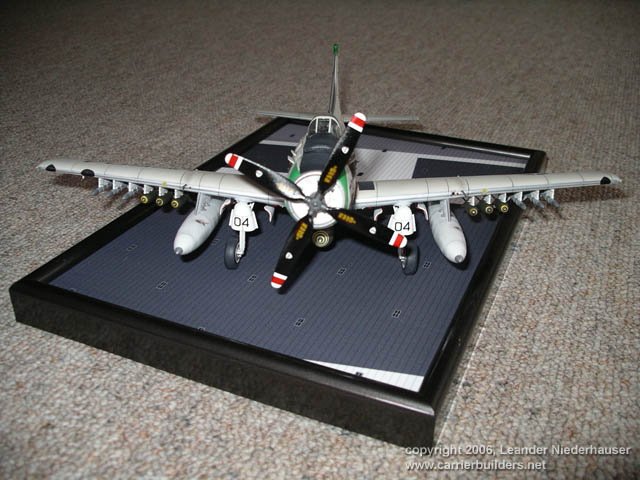
The represented model is one of the earlier A-1H, and dates between
Korea and Vietnam. VA-65 IIRC never flew the A-1 to war, so my aircraft
is "very clean", or as clean as a Skyraider can be. They had the time to
wash them on a regular basis ;-)
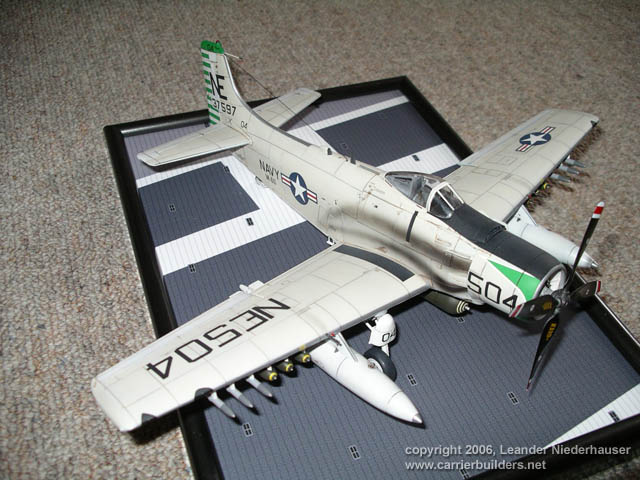
The ordnance is from the kits box, and I hung as much as possible to my
Skyraider just to show what gave him the name "flying dump truck".
For me it was a pleasure to build this kit. I will again add the prop
and the wheel bays to my next Skyraider (USAF A-1J), but the cockpit
will get the cutting edge version, witch is the only one available with
the Yankee
extraction seat. For the other versions, I could suggest the Aires one.
And yes, the Moskit exhausts will be there, too. The Eduard PE s not
really necessary, I used about 4-5 parts only.
Enjoy building!
Leander Niederhauser
Photos © 2006 by
Leander Niederhauser
July 22, 2006
www.carrierbuilders.net |