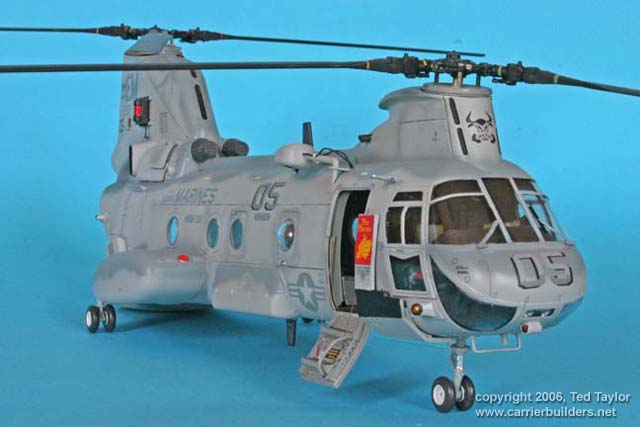
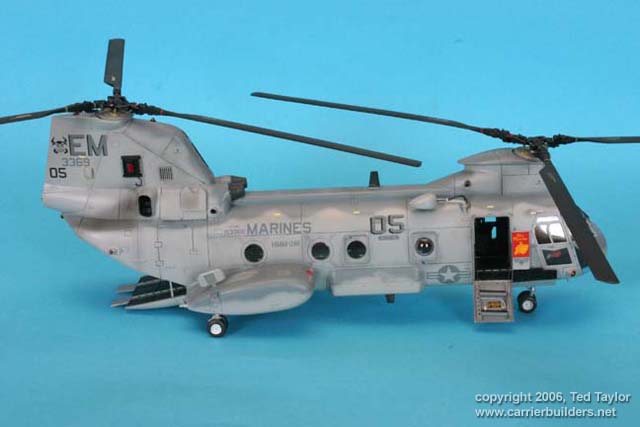
This kit is a treat, an unusual choice
but one that is welcomed by most Helo fans. There is a surprising amount
inside the box as you get a full interior fit with enough detail to suit
the most discerning modeller. There are two sub types provided and
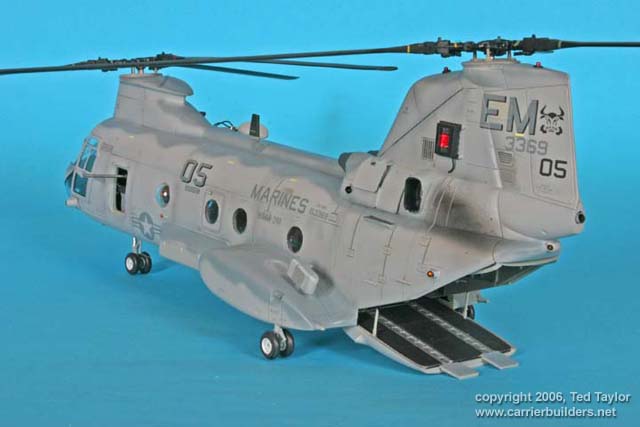
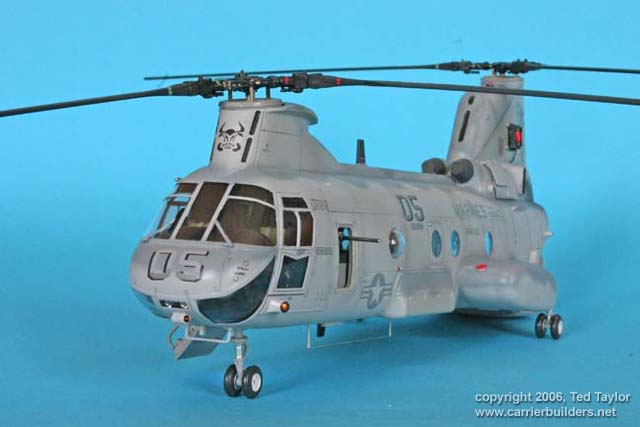
markings for three machines, one being the presidential carrier of MCS 1
Nighthawks out of Quantico and the other two are standard service
machines from MCAS New River, Squadrons 162 Golden Eagles and 261 Raging
Bulls.
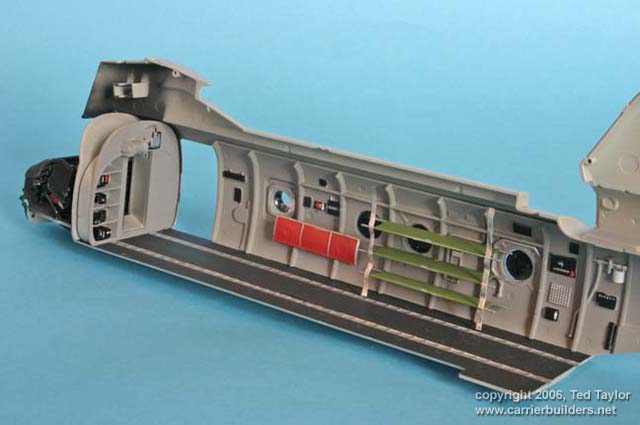
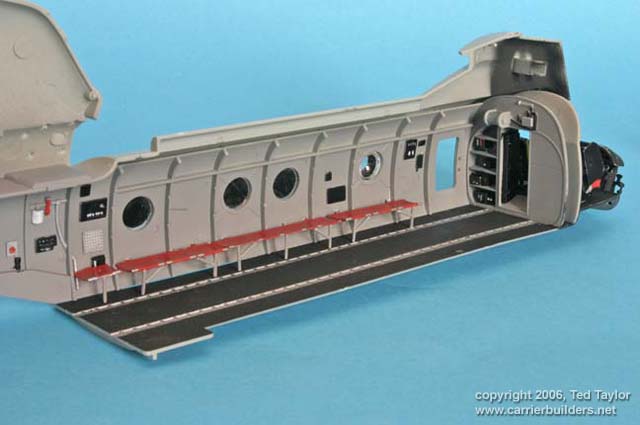
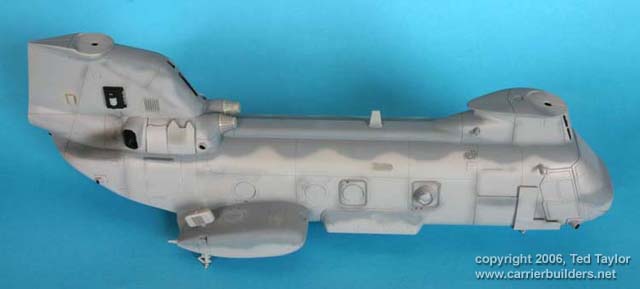
The interior consists of floor, side walls and ceiling, dealing with the side walls first there are a number of holes to be drilled out depending on you choice of fit. Full painting instructions are given and there are at least 30 decals for each side to be applied. The seats can be set out or folded away but the tiny legs need support, so I assembled the floor and cockpit first with the separating walls in position and held in place with a lump of Blu Tack, this can be easily done.
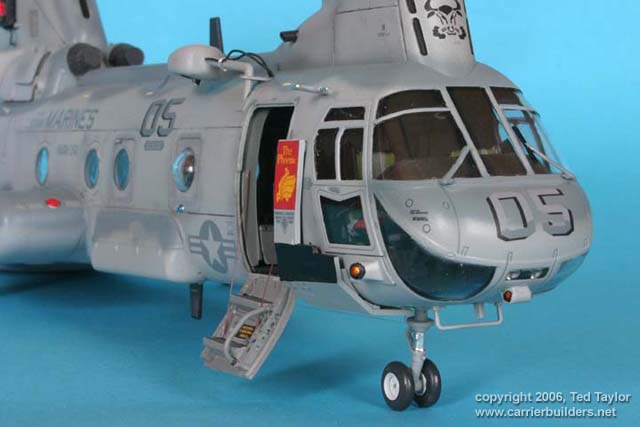
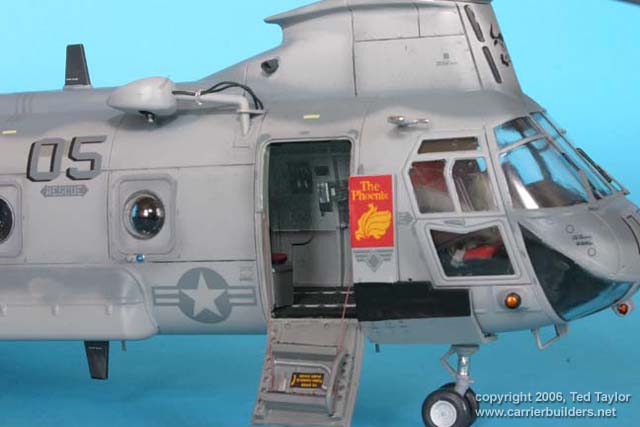
I have put some stretchers on this side just to show what can be done here, the support straps were made from foil from a scalpel blade packet (a very useful supply). The remainder of the assembly was straight forward and the parts fitted well with the exception of the main undercarriage section onto the fuselage, here I had to cement one side first then leave it to harden before cementing the other side this pretty well cured the problem. I made one or two mods to the parts, the entry door on the stbd side has a blob of plastic where the hand rail should be so I cut this away and made a rail from fine wire. The winch above that door has another blob of plastic where the support bracket should be so this also was replaced with a "D" shaped bracket from 20thou card and a couple of cables were added to the head of the winch for realism. There are photographs throughout the instructions sheet to help with all these details, I also cut a couple of tiny discs from 15 thou card for the fuel filler tops on the sponsons using a leather punch.
Before painting I masked up using Cutting
Edge Black Magic set 48555 which fits perfectly then all the doors were
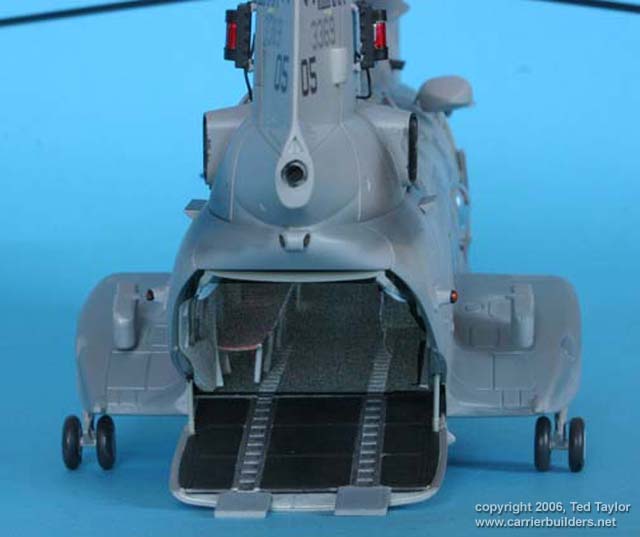
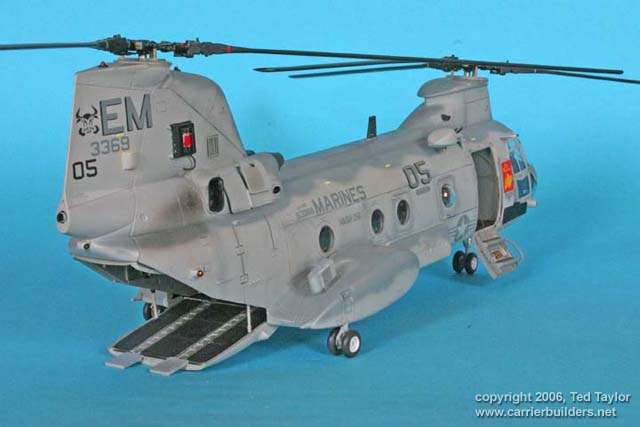
placed not cemented in position and the rear end had the large rear door
(part A5) held in position with a bit of Blu Tack to protect the
interior. I used Humbrol paints for this model as they dry so quickly,
the colours used were #127 FS 26375 and #145 FS 35237 both sprayed with
my trusty old Badger 200 airbrush. The decals I chose were for no other reason than the last four numbers were the same as the fleet number of one of the trucks I used to drive, I have not put every single data decal on as a number of them disappeared against the background colour and again in many photos, I see some not applied on the real thing but most of the important ones are there.
There are decals stripes for the rotors but these were so thin and weak I decided to paint the stripes on the blades so they can be seen, when all were dry the whole model was resprayed with Johnsons before I added a coat of flatting varnish, I have used a mix of 4 parts Klear and 1 part Tamiya flat base which was lightly dusted on to give a slight sheen Next day all the masking was removed and final touches were added plus items like lights painted by hand, the doors were removed and positioned as appropriate and the individual rear doors were set up to be in the lowered position.
This was one model I thoroughly enjoyed making and I
think you might too if you are a chopper fan Reference material Photos and text © 2005 by Ted Taylor February 15, 2006 |