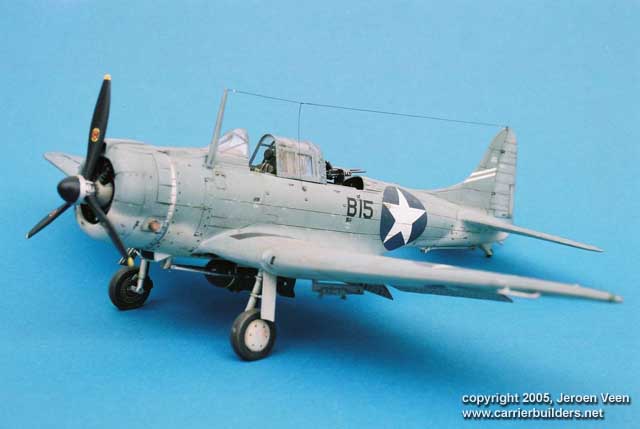
This is the 1/48 Dauntless from Accurate Miniatures. It has been the first it of this manufacturer that I've build, and what a joy it was. I have to be totally honest: I am relatively new to this kind of modelling and I am not familiar with all models and brands that are available to us, so it might be that I'm not in a position to be a fair judge. Without judging on other efforts, I think that everybody who has build a kit from AM had to have the feeling that it really is something else.
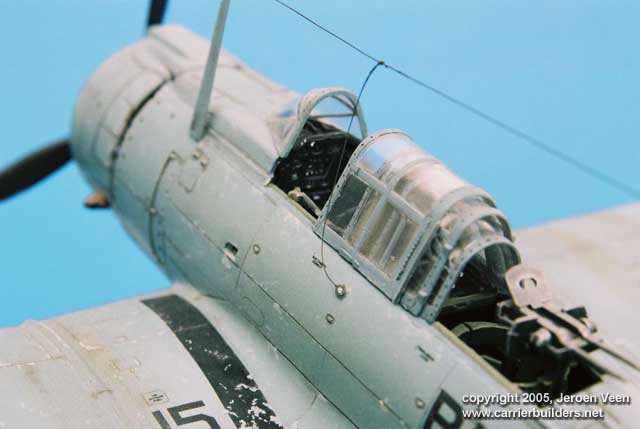
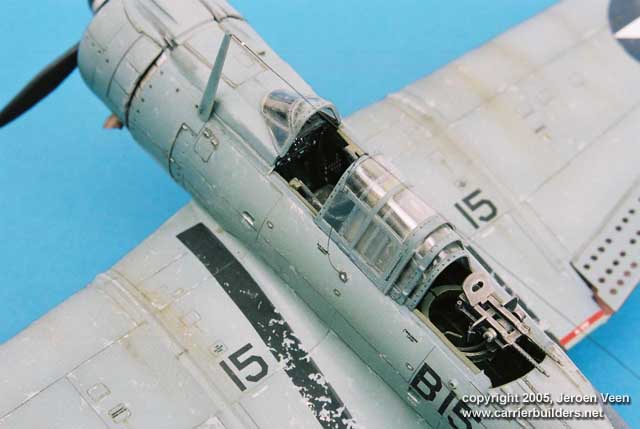
Of course this kit also started with building the cocpit. As always I paint this with Humbrol paints. I think they are best for doing the weathering and drybrushing job I like in the cockpit. They are a bit rough for this scale but the weathering can easily be exaggerated a bit, which I like in the dark surroundings of the cockpit interior. Lots and lots and lots of detail in this area, straight from the box. Great! And anybody who really wants to go to town can now get a cockpit update set from Aires. I didn't use it though at the time I was building this kit.
Although the kit has a somewhat complex breakdown in parts, in the end it is really easy to build and all parts fit together exactly. I think I never had to use filler. And because of all that detail it was very enjoyable to paint. I first gave the kit a grounding from Humbrol, over which the appropriate colours (Xtracolor gloss paints) were airbrushed.
This is the two tone scheme (yes, I already have another kit of this which I will do in the three tone scheme). I used the decals from the kit and they went on beautifully. Matt varnish was next, and after a couple of days drying time the weathering started. The usual washes of diluted oil paint brown and black went on, the chipping of paint was painted on with a brush and small details were painted. Last details were glued on the kit and a final round of matt varnish all over completed this one. The masking of the canopy came off, putting the cockpit in full view again. That was it basically. I hope you like the pictures.
Photos and text © 2005 by Jeroen Veen June 20, 2005 |