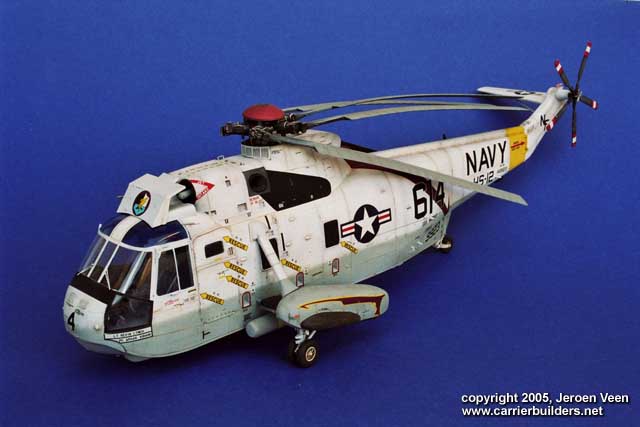
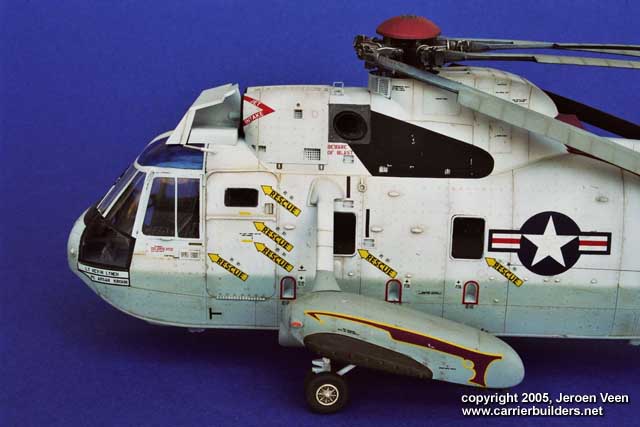
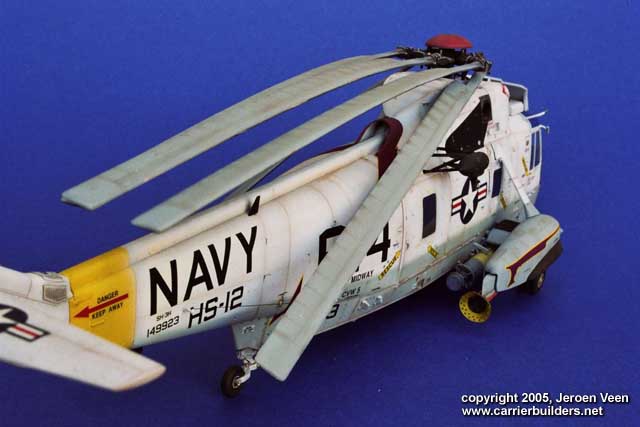
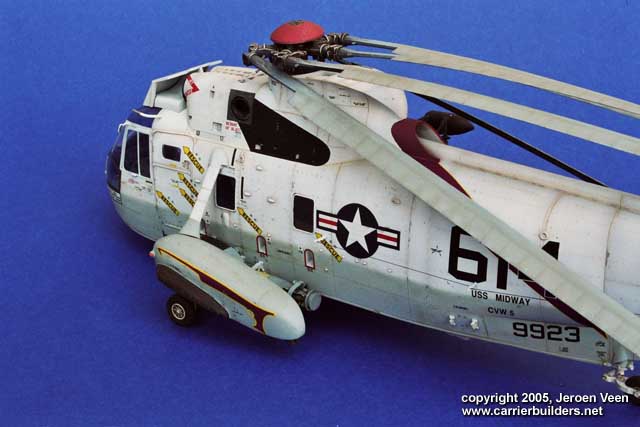
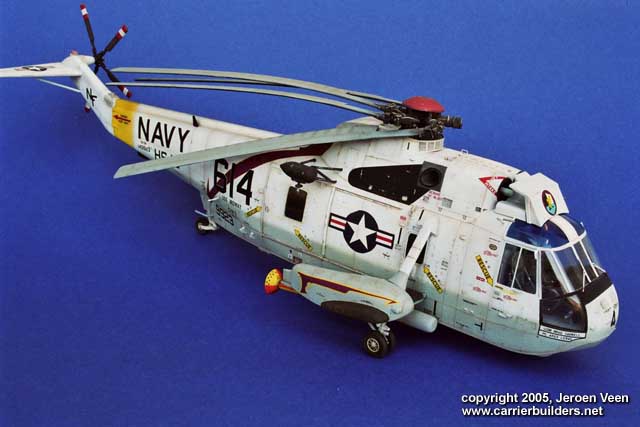
This is Hasegawa’s 1/48 SH-3 Sea King. The kit is really special to me. I have been building military models since I was a kid and used to do diorama’s with all kinds of vehicles. After years I got fed up with all those green, grey and sand colours and wanted to build something more colourful. How could I resist airplanes? Not at all, but my modelling skills were not suited for this branche. So aviation model after aviation model disappeared in the dustbin. Up till this one; my first finished aviation model, a helicopter, and a colourful one, I think. This was two and a half years ago and only now I am at the point that I dare to show the models to anyone else as my closest friends…I built this kit almost straight form the box. I added some Eduard etchings though, mainly around the motor housing (the perforated screens), the sonar equipment and the front cockpit window (wipers, screens). I remember it to be a fairly easy build. I have always been impressed with the outline of this machine and I knew how it should look in the end, but I wasn’t sure at the time if I would be able to make it look like I wanted to. But the fit of this kit is I think very Hasegawa, which means overall less to non problems.
For me painting and weathering is what it’s all about. To be honest: I want a good representation of the subject I’m building, but the very last details to make it completely accurate do not interest me very much. To me the feeling of the subject is more important than the last nut and bold. So after masking all windows out came the airbrush (at the time a ‘normal’ Aztec). I base coated the entire model with Humbrol primer and after that had dried I preshaded the panels lines with Aeromaster gloss black. I don’t know why but I use gloss ever since,I think mainly because it is a harder paint than the matt paint, which means the misting in the next phase is easier. Because the next phase is indeed misting, both gloss white and grey. In this phase I try to work panel by panel, from the middle of each panel to the outsides. The result is a white or grey panel with almost dark edges towards the outsides. After that I mist also over the outsides of the panels, in a way in which all black preshading fades away and is barely visible. Now is the time to let all the paintwork dry properly.
After that:decalling! I had been searching for aftermarket decal sets because I felt the Hasegawa decals were a bit thick and I wasn't sure whether they would settle down nicely. But since I had no other option I used them anyway and in the end, with a fair amount of Sol & Set it turned out ok (at least: good enough for me).
On to the weathering process. After the
decalling I airbrushed the whole model with Aeromaster flat varnish.
This needs to harden for a couple of days. A nice test of patience? Or a
good time to kick off another model? Guess… But no kiddin’, after the
varnish has hardened weathering started. I had been building tanks and
stuff in 1/35 which required heavy weathering. Because naval planes have
a very beaten look I felt I would have to go for the heavy weathering on
this plane. But form experience (and the pile of models in the trash
bin) After the washes there came the
drybrushing. I think I don’t have to explain this technique. The only
difference might be that I don’t use it that much to highlight details
but more to
Last steps approaching now. I glue on all the small details and give the model one final coat of matt varnish. This way all glue spoils which tend to be glossy will ‘disappear’ under the matt varnish. Then the tape comes of the windscreens and that’s it basically. I'm not the fastest of model builders
(and why should I?) and I think this kit took me about 45 hours to
complete this kit. It gave me a lot of fun, I am very happy with the end
result and I sincerely hope you like the pics.
Photos and text © 2005 by Jeroen Veen June 08, 2005 |