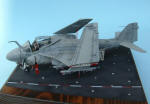
This is Italeri kit 1/72 scale updated with eduard photo etched parts. I
started this model about 4 years ago and then stopped, don't know why
actually . The model was 75% completed and , as I didn't have camera at
that time, I don't have any in-progress pictures from that time. Few
months ago I decided I should finished it. When I started the model I
immediately bought Eduard interior and exterior photo-etched sets.
Unfortunately, those sets are a long time out of stock. Impossible do
find these days. That's a pitty.
The kit itself is quite good, and beside some fit problems, especially
with canopy, it is probably the best in this scale. Only real rival
would be Fujimi kit. Fujimi kit has dropped slats but no wingfold. Panel
lines on Italeri are a bit too deep, but that is more or less a standard
for the most of the Italeri kits. I did two major improvements on the
kit and numerous small improvements. The first one is on the cockpit
area and the second one is one the wheel bays, wheel legs and wheel
wheel doors. Maybe I should invest more time in detailing wingfold
mechanism but I couldn't force myself enough, I suppose.
Let's start with the cockpit. Cockpit on the kit isn't very bad, but it
needs a a lot of modifications if you want to do it properly. I used
eduard pe parts, styrene and some wire, plastic rods and small pieces of
metal to update the cockpit. Are behind the cockpit contains electrical
junk boxes, electrical conduits, canopy hydraulic jack, other hydraulic
lines and a lot of other wires an lines, first aid kit, etc... For the
best results the whole area beside the cockpit was cut off and done all
over again from styrene and plastic rods and wires, as you can see on
one of the in-progress photo. Left side of the instrument panel is
eduard pe part with clear film and the left is part from the kit. MK
Gru-7 seat is a kit part (very good and quite accurate in shape) with
addition of pe seatbelts and some parts made by me, RBF flags, for
example. If you have seatbelts there is really no need for resin seats,
as in Hasegawa kit, where all the pe parts in the world wouldn't make it
to look like gru-7 ejection seat. Center canopy frame contains, among
others, pe manual canopy release lever and the bow frame has pe mirrors
on it. The pilot's optical reflector sight was made of pe parts and
clear film.
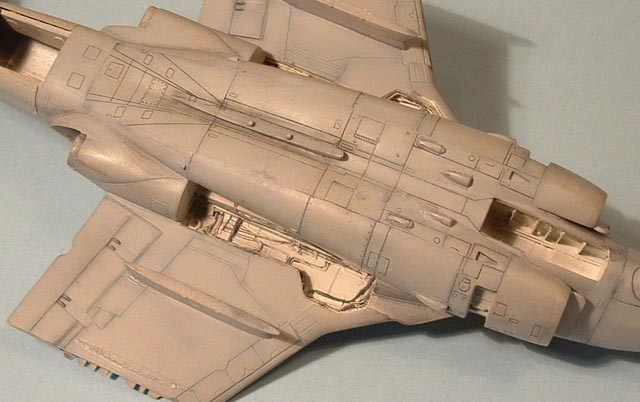
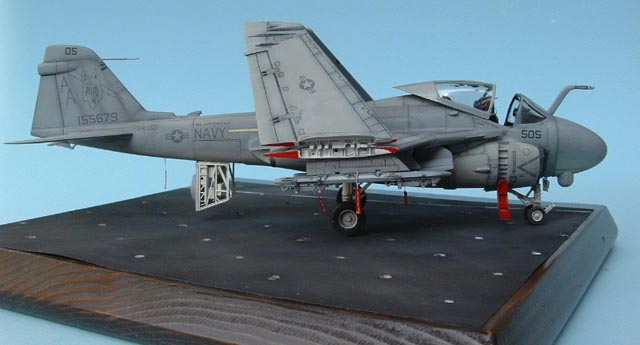
Another major improvement was on the wheel bays, wheel legs, and wheel well
doors. Nose landing gear wheel bay was not deep enough so it was cut off from
the model and replaced with eduard pe part, and that means that you need too
lengthen the nose gear and the part for that was included in the set. Landing
gear nose wheel was improved with various wires (also included on the main gear
legs and wheel well doors ) and I made nose wheel steering mechanism, which is a
large circular object attached to the right side of the strut. Further, a lot of
work was required on the wheel bays of the main landing gear. It is very bad,
there is hardly any detail and the worst thing is that there is no side panel
between upper and lower part of the wing, only a hole. I solve the problem by
scratcbuilding that panel and adding a lot of wires and other lines. Very
extensive wiring was done there. Opening mechanism on the wheel well doors is
missing, I simply couldn't find the part from the kit after all those years and
the eduard pe part was impossible to fit. Eventually I left it without it, I
will probably add it eventually.
The large box that is hinged at the rear is Extensible equipment platform. It
hold avionics equipment, video recorder, chaff/flare dispenser controls and
maintenance ladder and it was included in eduard pe part. I've scartcbuilt the
port side fuselage equipment bay that which used to be fuselage mounted speed
brakes on early A-6As. Fire extinguishing system supply bottle is missing cause
it fell of somewhere.
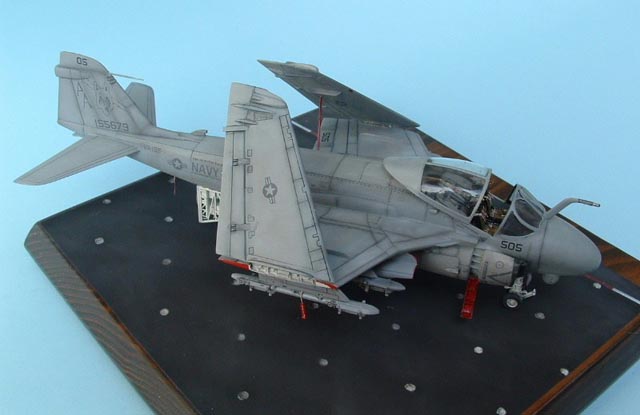
To paint the model I used gunze sangyo H307 i H308. I weathered it with enamels
and pastels. It was first time I used pastels and I'm quite happy with the
result. Kit decals are thin and nice, but the problem is that the colour of
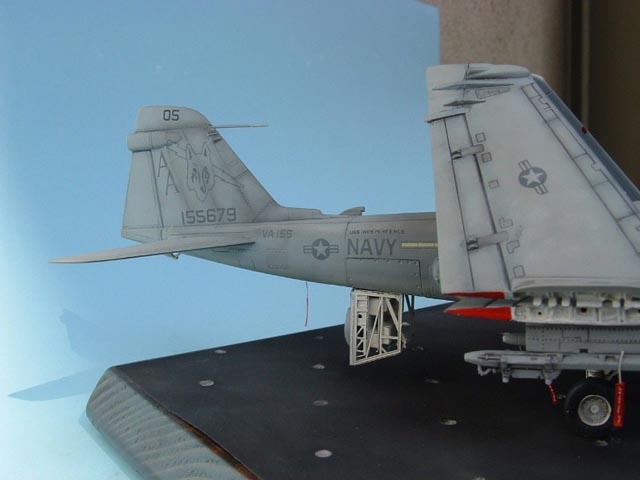
markings seems to be wrong so I decided to use Superscale decals 72-590, VA-155,
''Silver foxes''. There are some decals missing, like number on vertical
stabilizator on the left side because it broke in few pieces when I've put it in
the water, probably a drop of thinner touched it before. A decal missing is also
danger arrow on the the left intake, I had a small accident with this one. Fod
covers were made of ordinary plastic bag which we use for shopping every day.
Italeri kit is very nice and detailed and as I said before the only real
rival is Fujimi kit. I have to mention that I base this on reviews and
''rumors'' since I haven't seen Fujimi kit jet. Both of the kits are
very hard to get as far as I know, although Fujimi kit is easier to
find. If you ever come across this kit, buy it immediately.

Marko Skukan
Photos and text © 2005 by Marko Skukan
April 20, 2005
www.carrierbuilders.net |