AircraftProfilePrints.com - Museum Quality Custom Airctaft Profile Prints
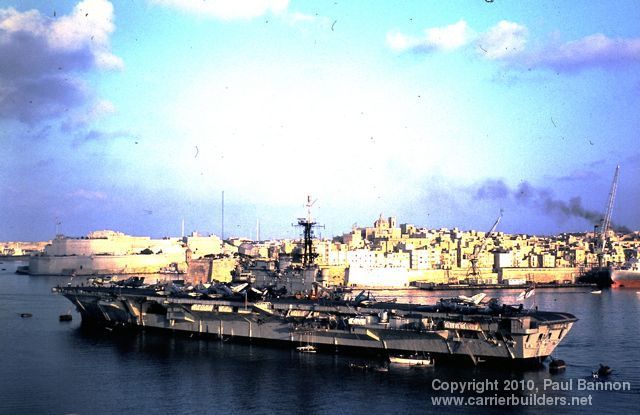
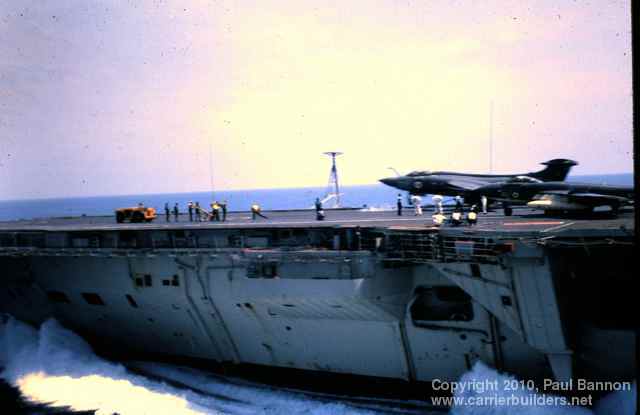
After the Truman, Hermes may not appear a logical progression yet in a peculiar way it is. The Truman was inspired by my visit aboard the USS America whilst serving on the Hermes in 67. I well remember being impressed with shear size of the America, not least the space there was on the flight deck relative to Hermes. I also remember the exercise we had just completed with her and despite the disparity of size and equipment, Hermes had been the first to find ‘ the enemy’ and got off the first strike ! In ’67 Hermes was into middle age at twenty four years old and despite being classed as a Light Fleet carrier she was a fairly well integrated all British ship. 849 Sqdn B Flight provided early warning that was capable of being fed back to and integrated with the ships 984 three dimensional radar. 892 Sqdn’s Mk2 Sea Vixens provided a day/night multi role, reliable capability, being the first British aircraft with a fully integrated weapons system. Along with 809 Sqdn’s Buccaneer Mk2’s, originally designed as a Low Altitude Bomber (LAB’s) but now sporting wing pylons and capable of carrying a variety of light stores, and 826 Sqdn.s Wessex Mk1 anti Submarine helicopters, Hermes had a capable, if small,(thirty aircraft) Air wing. As a vessel she took a long time to come into service. She was laid down in 1943 at Vickers Armstrong, Barrow in furness as HMS Elephant, was not launched until 53 and finally commissioned in 59. During this time she went through many alterations as the change to jet powered aircraft came along and got progressively heavier requiring various up dates to items such as Catapults, angle decks etc. After the second commission her catapults were upgraded again to handle the Buccaneers. She reliably served the Royal Navy for many years as a Strike Carrier, Commando Carrier and VSTOL carrier before being sold to India to become INS Vikrant and is due go to her final resting
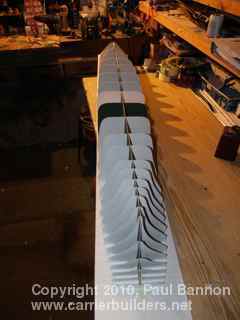
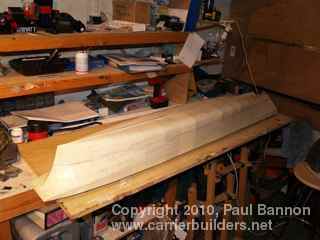
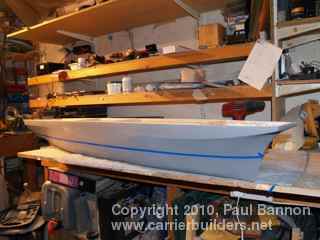
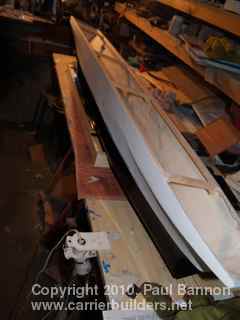
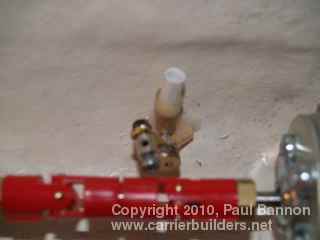
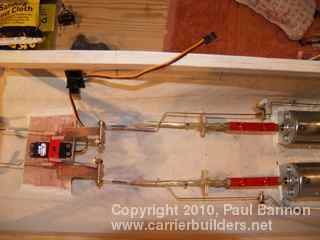
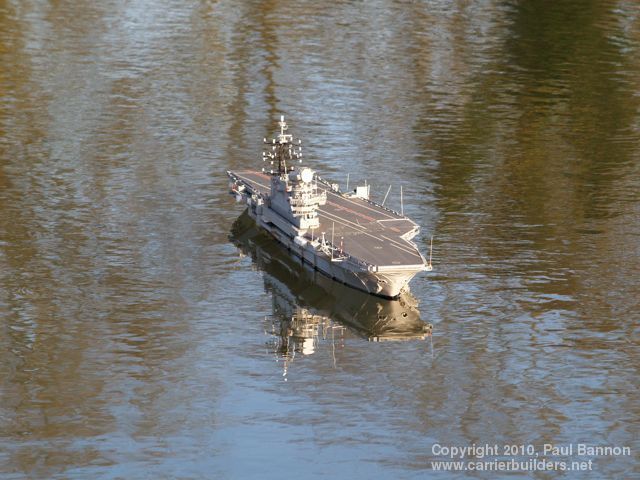
Hull - Up until the Hermes I have always built my hulls as plank on frame from drawings I have done myself. As there were plans available for Hermes at a reasonable price I decided to purchase the two main sheets that gave hull profiles, general layout and superstructure shapes and this has made work a lot easier. Although not of the correct scale and showing her as per fifth commission as a Commando carrier was not to great a problem, simple scaling up took care of the size and pictures I had and some gleaned from the Net would make up the shortfall. Approach to hull construction was also different. There are, unfortunatly, some mistakes, some down to poor observation on my part but many an inability to actually tie down a specific picture to the required time frame. She was under almost constant update and modification during her life. A friend was having difficulty constructing the hull blisters on his 1:200 Hood using plank on frame and decided to use Fibre Glass, but not in the normal way. Normally a Plug would be made, then a mould and finally the actual hull. If you want to go in to business making hulls this is the way to go but he only needed a one off. He came up with a simple answer. He followed normal plank on frame as far as the point of actually starting to plank and instead used masking tape as a form of Papier Mache - this gave him the shape of the Blisters. Fibre glass was then laid up on the masking tape and no more work was required to produce a good finish than with plank on frame. I took the idea a step further and used card for the deck, keel and frames on which to put the masking tape. This was painted with neat water based Adhesive as a release agent and then the glass fibre laid up, TRYING very hard to achieve a uniform thickness - I failed - but still produced a strong one piece hull after all the card and masking tape was simply torn out from the inside of the cured Fibre Glass. The rough hull was washed with hot soapy water to remove any traces of adhesive and was ready to work on.The usuall amount of time was spent in filling, sanding and undercoating. Half inch square timber was bonded into the sides along with some cross members as the hull flexed - normal I think with this type of hull. As is my normal practice, once I am happy with the hull finish I establish the waterline and paint up the bottem of the hull. It is almost standard practice amongst warship moddellers to have a red bottem to the hull. I had serious doubts about this and looked at as many pictures as I could and none showed this configuration. So, at risk of much future discussion she is black from the waterline down. It was a conscious dicision with the Truman to build in two halfs to enable transportation, even at 1:144 Hermes only comes out at about five feet long removing the need to construct the hull in two halves to transport it and simplifying the build. Propulsion - Hermes has only two shafts, each carrying a five bladed prop which to scale are 25mm. Being unable to purchase this size and type I made my own based on a brass collet with five slots cut in to it into which were soldered the five blades cut from sheet brass. The blades are placed in the slots, wrapped around with a thin strip of aluminium which was clamped tight allowing the whole unit to be placed on a large soldering iron and all the blades soldered to the collet. Once cooled the blades were cleaned and trued. An advantage of using a collet is that the prop, once on the shaft with the grub screw tightened, has almost no chance of being lost during sailing. Believe me, clamping all the blades to the collet resulted in many colapses. Shafts are standard shop bought items as are the universal couplings between them and the motors. The motors are large, relative to the ships size and are capable of operating between 6 and 36 volts - I use 12 volts. The beauty of them is that running at 12 volts, flat out on the bench, currant draw does not even register on an ammeter. I estimate that draw is in the region of two Amps when in use with a 4600mAmp NiCad pack and I get about an hours sailing. Also fitted at this time are the rudders and the stabalisers. These are linked to the rudder operation to work against the roll as the ship turns. I looked at retro fitting the system employed by Daniel Gallardo to operate the stabalisers but ruled it out as I wanted a full width and length hanger and using his system would have prevented this Oilers are fitted to both shafts and all fourstabaliser shafts. It might seam overkill for the stabalisers but it prevents seisure of the shafts. I also favour oil over grease for the prop’shafts as they can filled AFTER sailing as well as before to flush out and residual water. Radio Control - This is exactly the same as I use on the Truman, a Futaba F14 Navy, although without the extra decoder as there are not so many working parts and not the need for as many channels. Apart from motor and rudder control the only other working parts are two lifts (elevators) wip aerials, anchor, radar, nav lights, camera and weather deck lights. The last 4 using an Action Electronics four way controler operated by up and down movemment of the rudder stick
Photos and text © 2010 by Paul Bannon December 1, 2010 |