AircraftProfilePrints.com - Museum Quality Custom Airctaft Profile Prints
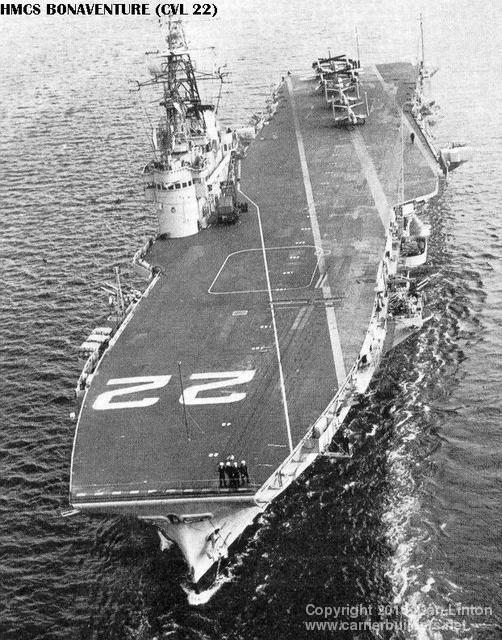
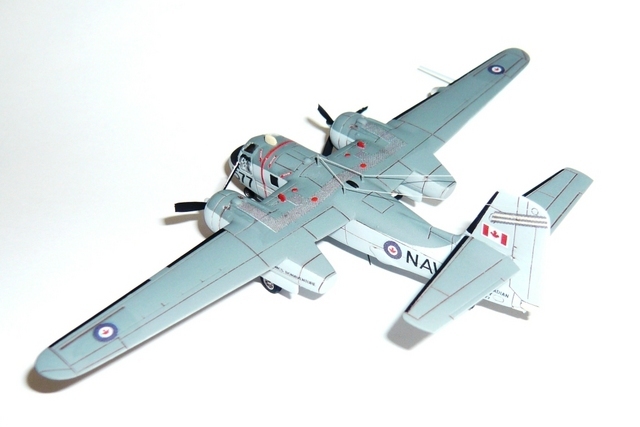
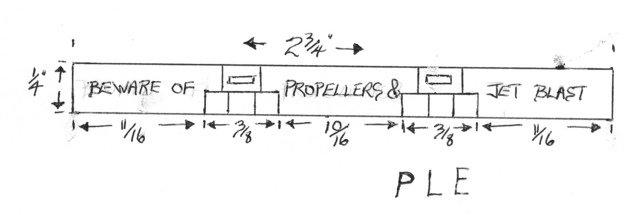
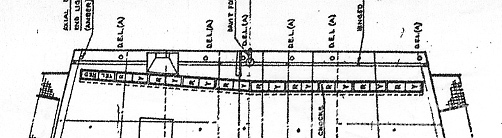
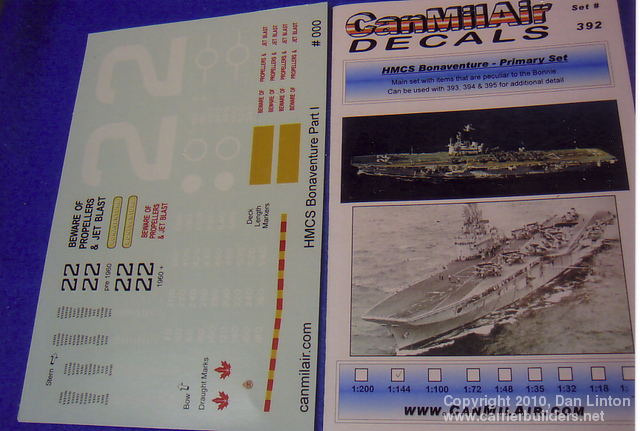
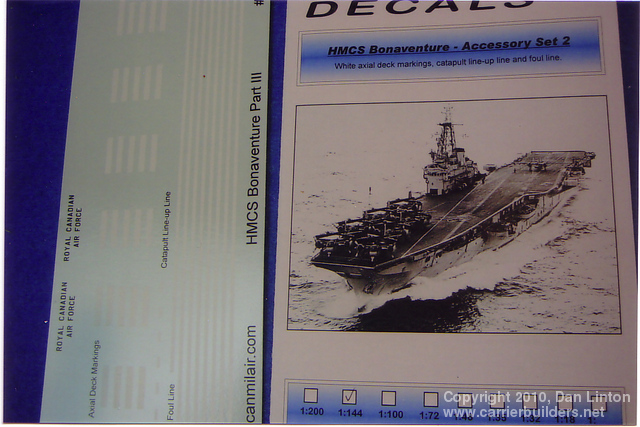
I have always wanted to build a model of HMCS Bonaventure but it wasn’t on the top of my list so it was not until 2007 that I began serious work. I had a decent set of plans from a fellow teacher (but I have long since lost contact with him) years ago but what made a renewed effort possible was being given directions to the National Defence Image Library in Ottawa. In March, 2008, I made an appointment view almost 800 pictures of Bonaventure, her air wings, her crews, her commanders. I was set up in front of a computer monitor and began viewing. As I viewed I selected the ones I wanted for modeling purposes and two weeks later, the 51 images I had selected were sent to my home on a CD. No charge. Wow! Canadian tax dollars in action! Between Christmas and New Year’s of 2008 I was again in the Ottawa area and again visited the National Defence Image Library, this time viewing over 1100 pictures (more than half of which I had not seen in March) and selecting a further 64 images. (picture 1) When my daughter bought a new laptop, I took her old one and use it exclusively for modeling: the ability to enlarge any picture on those two CD’s from National Defence has proven to be invaluable – although it does temp one to try to model the tiniest, often unnecessary detail. Other good news has come in the form of Radek Skoumal of the Czech Republic whose company MiniWings makes resin kits that have happily covered Bonaventure’s air wing (more on this in a later part)(picture 2). The main website for information on the Bonaventure is www.underthecat.com and through this website I managed to contact some of Bonaventure’s crew (young men back in the 1960’s) who gave me some advice on painting. And finally, I spent many hours researching, drawing, and helping Bill Burns of CanMilAir decals to produce a set of decals for the Bonaventure. (pictures 3 to 6 show information that I sent him that he transformed into great decals). Bill is based in London, Ontario, about 200km from where I live and when the set was produced, I drove to meet him and purchase the four sets he produced in 1:144 scale. (pictures 7 to 10). They are available in a number of other scales as well.
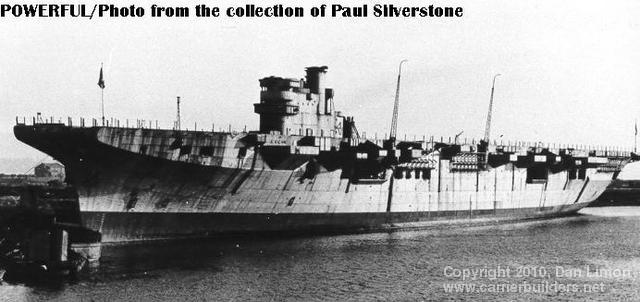
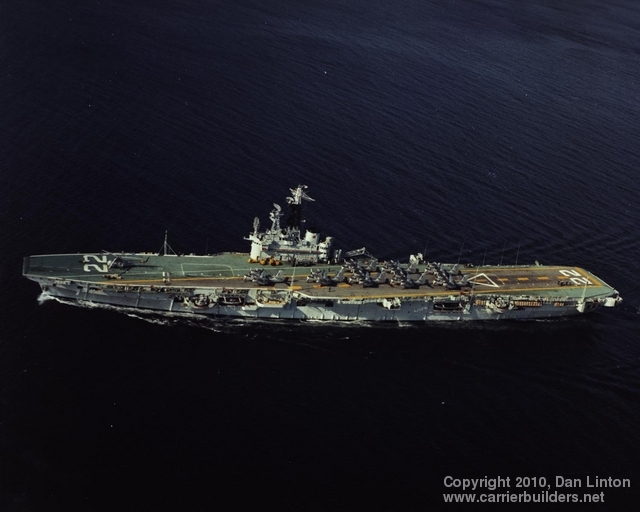
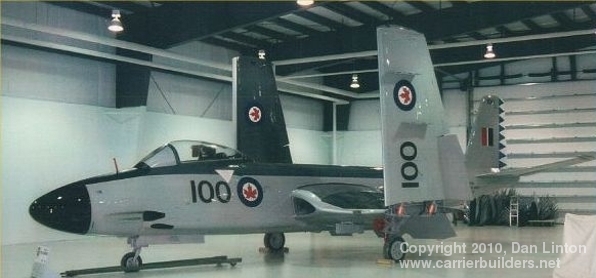
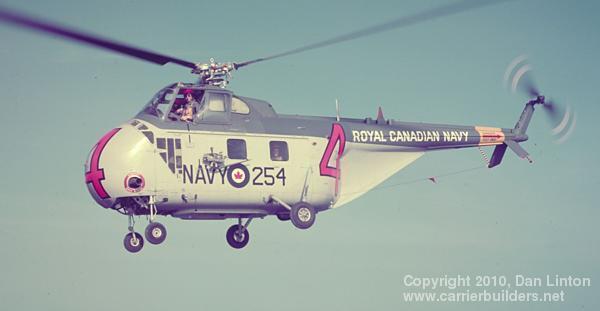
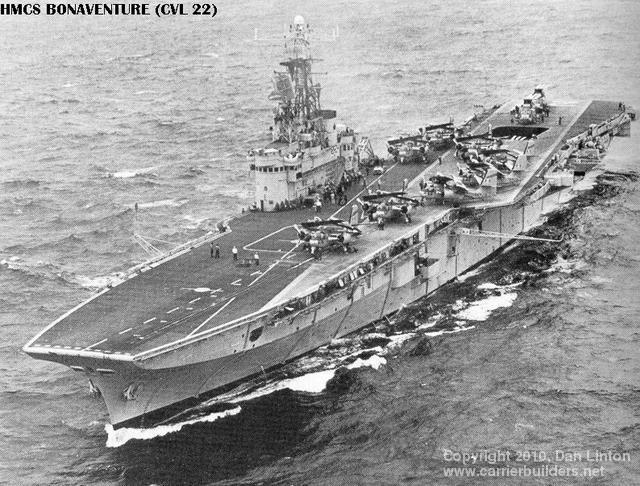
Besides hunting plans and materials for the model, one can’t help doing research about the ship. Bonaventure was the former Majestic-class British carrier HMS Powerful, begun in WWII but never completed. These ships were part of an emergency program to get carriers into the Royal Navy as soon as possible so they were built in commercial yards with non-armoured commercial hulls up to the hangar deck. A single hangar, a single catapult, and no armouring on the flight deck. It was expected that each ship would have a service life of 2 or 3 years and that after the war all would be scrapped. It was hoped they could be constructed in less than two years but HMS Colossus (the Majestic class was a modification of the Colossus class) took 30 months and as it turned out, none of the Majestic or Colossus carriers participated in combat in WWII. So the Royal Navy had a large number of hulls it had neither the funds nor manpower to operate post-1945, thus many countries came to operate ex-British carriers in the 1950’s and 1960’s. When HMS Powerful (picture 11) was purchased outright by the Government of Canada in 1952, no carrier had angled decks or steam catapults, thus her modification was more complex than expected, and the work was further delayed by a strike in the Harland and Wolff dockyards. She commissioned as HMCS Bonaventure in January, 1957 in the yards at Belfast. (picture 12). She was 704’ long, with an 80’beam and a 24’ draught (216.6m x 24.4m x 7.5m)(picture 13). She carried F2H-3 Banshee fighters, H04S helicopters, and CS2F Tracker anti-submarine aircraft (pictures 14 to 16) when she entered service. The Banshees would be removed in 1962 and never replaced; and in 1964 the then-new Sea King helicopters entered service (picture 17). She entered the yards in 1966 for her ‘mid-life refit’ (for a ship originally designed to last only 2-3 years, this is an interesting term), emerging in 1968 with new radars, a more streamlined hull, and only half her original eight 3”50cal. guns. (picture 18) She was paid off in 1970 and scrapped in 1971. What? Read that again. A refit from 1966 to 1968 to make her serviceable for the next 15 years, then paid off in 1970 and scrapped in 1971!? I am reminded of the old comedy routine put on by Bud Abbott and Lou Costello – Abbott asks “How stupid can you get?” and Costello answers “I don’t know. How stupid do you want me to be?” On the Under the Cat website there is an article by Stu Soward called ‘The Tragedy of Success’. It is a long and sad article if you are a Canadian for it is a litany of folly. Did you know that in June 1946 Canada could have purchased 50 new and unused USN Hellcats for $500 each but instead ordered British Sea Furies for $80,000 each? In the spring of 1953 the USN offered to loan an Essex-class carrier to the Royal Canadian Navy for $1 a year – and the offer was rejected! In 1962 a fully modernized Essex-class carrier could have been purchased for $5-6 million according to this article. And at no time was it ever policy to operate only one carrier – and Canada never did operate more than one carrier, despite official policy. The entire article reminds me of the line from the playwright Schiller: “Even the gods struggle in vain against the willfully stupid.” But …. enough ranting….let’s move on.
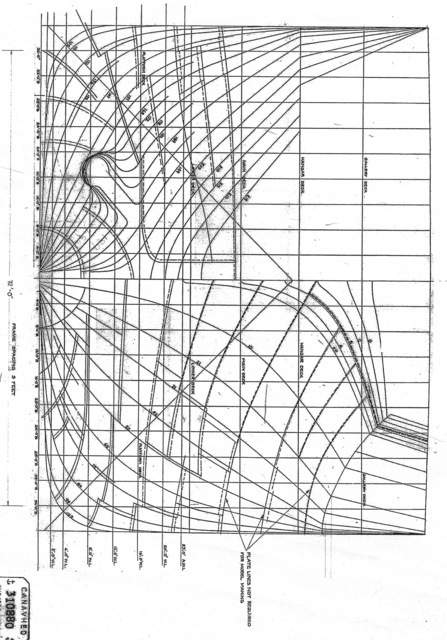
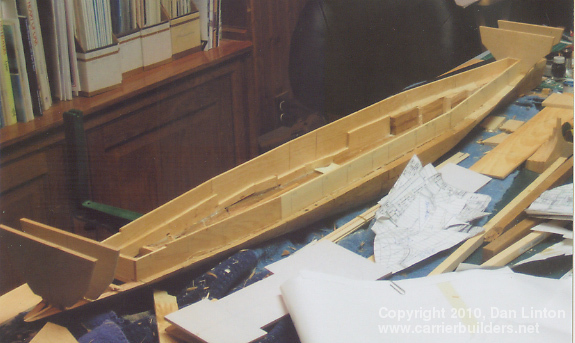
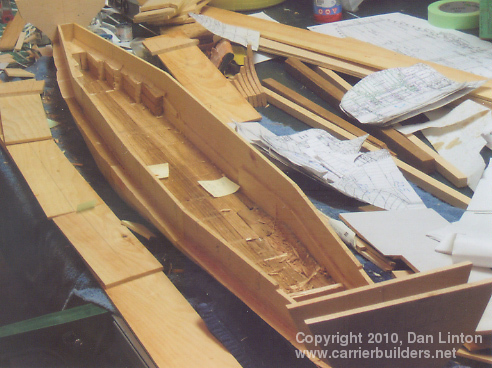
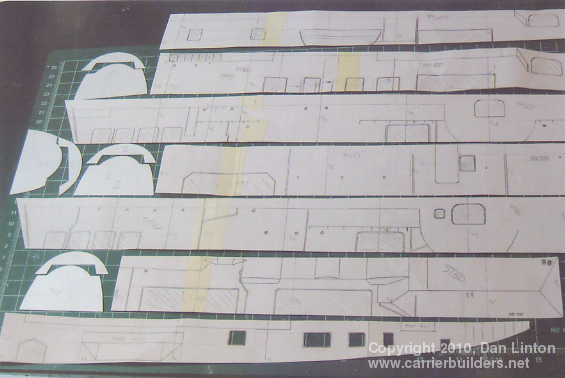
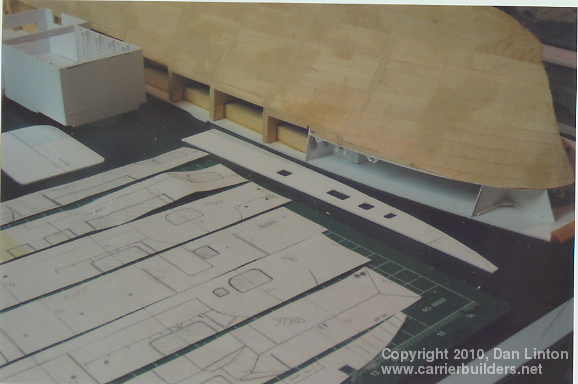
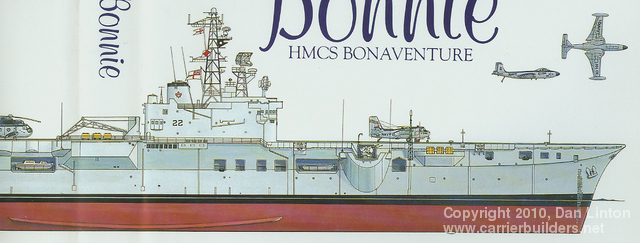
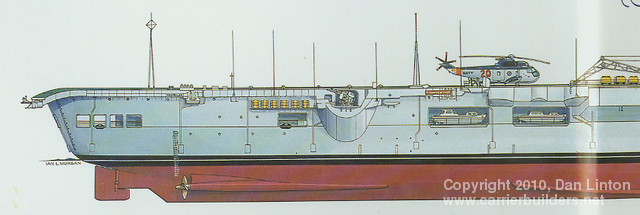
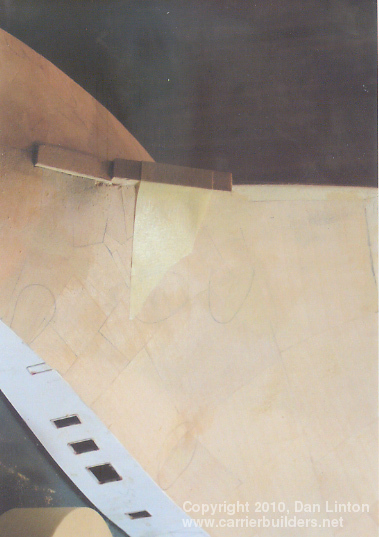
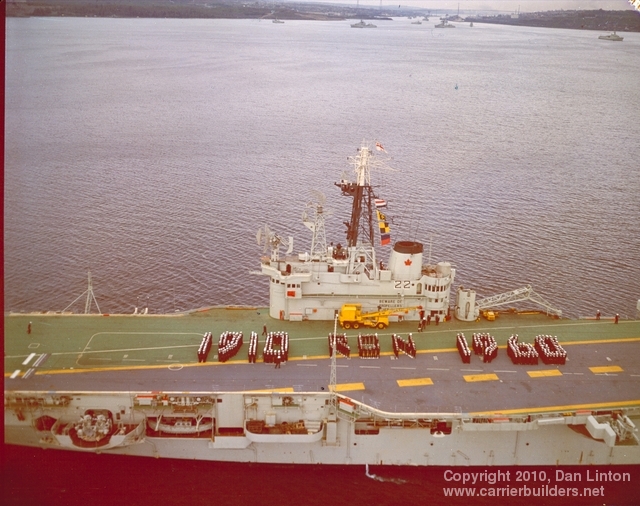
I began the Bonaventure build with cross-sections taken from J. Allan Snowie’s book The Bonnie. These cross-sections (picture 19) were scaled up to 1:144 and were made of pine, glued to a keel of maple. The intervening spaces were filled with pine and everything would be sheathed in 1/32” basswood, my preferred method of construction. I had the brilliant idea of not making the flight deck removable as I had with the Nimitz (a chore with a single 91” flight deck – it needs two people to remove it) but of making the hull separate at the water line. The hull above the waterline would slip over – snuggly – the hull at the waterline with its upward extensions (pictures 20 and 21). Two wood screws from the hull bottom would bite into cross-pieces near the bow and stern to hold the hulls together at the waterline. Gasket material (as you find in car engines) would be at the place where the two hull sections met and some petroleum jelly could also be squeezed in to prevent water from entering. A great idea – quick access to the motors, controllers, and batteries. However, after a few months, I realized that I couldn’t make it work – my skills simply were not up to the task. In the end I decided upon …. making the entire flight deck removable. At only 58” it can be handled by one person. It was quite a relief to go back to the tried and true but also a disappointment not to have succeeded at something different. Picture 22 shows the hull turned upside-down on the flight deck (60/1000” styrene) The gaps seen in this picture would be filled in at the hull knuckle with styrene – the diagrams for them are seen in picture 23 and picture 24 shows a number of them in place. Notice the large number of openings in the hull. I decided to do Bonaventure as she was before the streamlining done in the 1966-68 refit. This meant that the model was more complex and would take longer but it allowed me to display all four of the types of aircraft the ship operated in her brief career. The plans I had were for the ship after the refit: luckily, Snowie’s book that I mentioned above has a dust jacket that has excellent drawings of the Bonaventure before the refit. (seen in pictures 25-28) One of the more difficult tasks on the hull was to make the forepeak very sharp yet tough, so hardwoods were used. Picture 29 shows small pieces of hardwood glued on before carving and picture 30 shows the carving and preliminary sanding done in this area. There was much more work to be done on this hull and it will be described in the next article. Note the final picture below: It was taken a half-century ago when the RCN was itself a half-century old. Part 2: Completing the Hull and Sponsons
Photos and text © 2010 by Dan Linton October 27, 2010 |