AircraftProfilePrints.com - Museum Quality Custom Airctaft Profile Prints
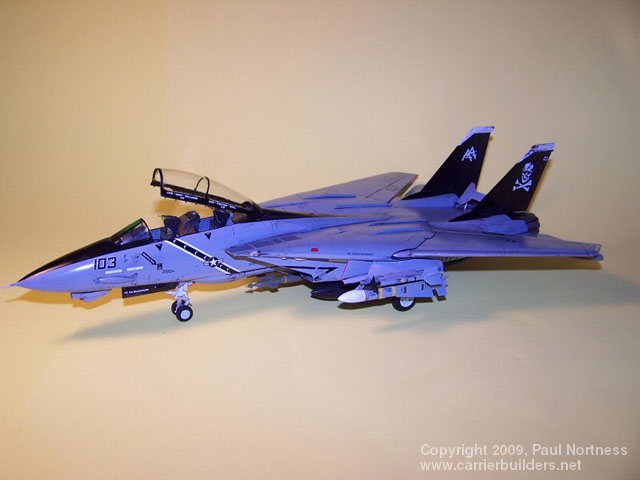
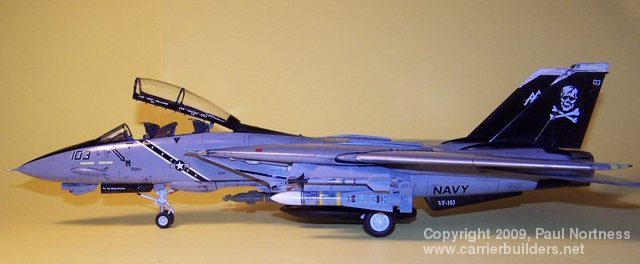
The purpose of the build is to show how easy it is to get a decent representation of the F-14B out of the kit without any resin and with relatively simple scratch building using the newer Bombcat boxing. The kit already includes many of the newer updates including GPS dome on the spine, ECM bumps on the glove vane, nose gear doors and the tail stiffener plates and NACA gunvents. This conversion is something even a beginner modeler can accomplish.
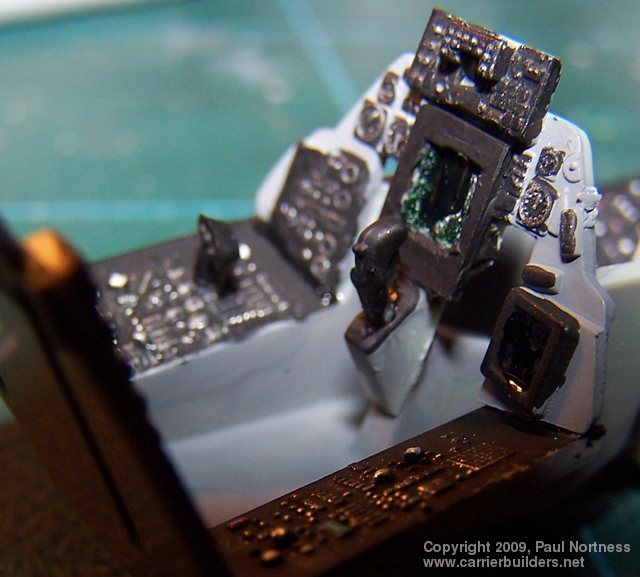
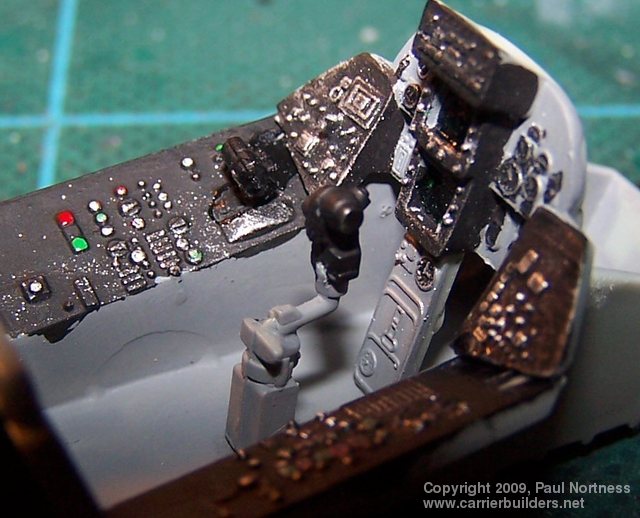
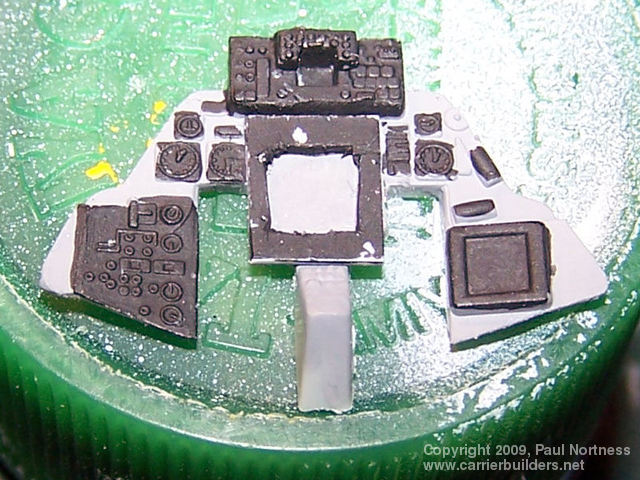
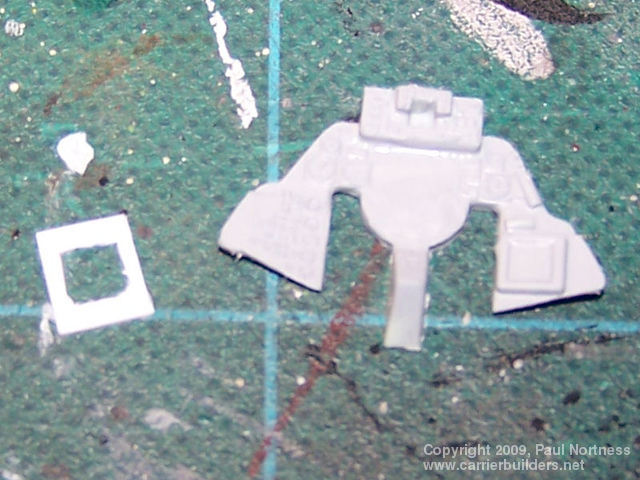
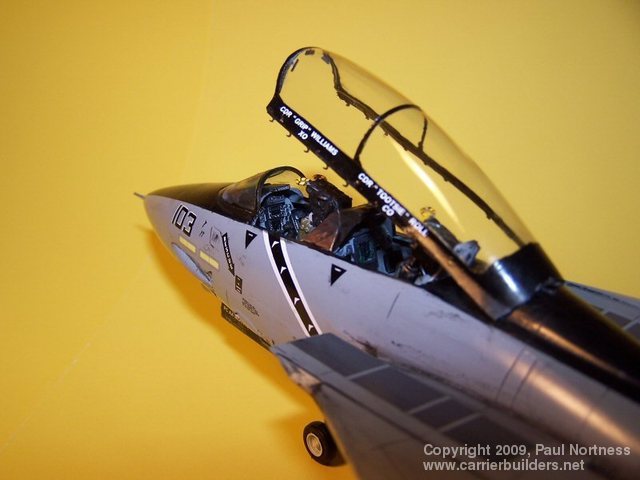
For the most part, the Academy Bombcat kit has the correct cockpit for a F-14B. The one thing that needs to be changed is the center console in the backseat. The F-14A uses a circular screen. Most (not all...so make sure you check your resources) F-14Bs have a square PTID screen in the middle console. This is actually a fairly easy bit of scratch building to get a square screen. First off, I took out my trusty rotory tool (in this case, I used a battery powered \\\\\\\"Self Manicure\\\\\\\"...low RPM, does the trick without eating into the detail you want to keep...and you can get it from about 7 bucks at Wal Mart). Grind the circular screen down so it is completely flat. Once I have a nice smooth surface, I cut out my square screen frame. This one was cut from an old lid of a cottage cheese container. Then cut out the center of the frame. Paint the instrument panel where the old screen was with flat black, then go over it again with Tamiya Clear green. Once the green dries you can attach the new square PTID screen. The Academy kit does suffer from some lack of detail, so to spruce things up a bit I used some spare parts from a R/M F/A-18C. I added a throttle to the driver\\\\\\\'s seat and a LANTIRN control stick in the back (again, check your references as not all F-14Bs had the LANTIRN stick)
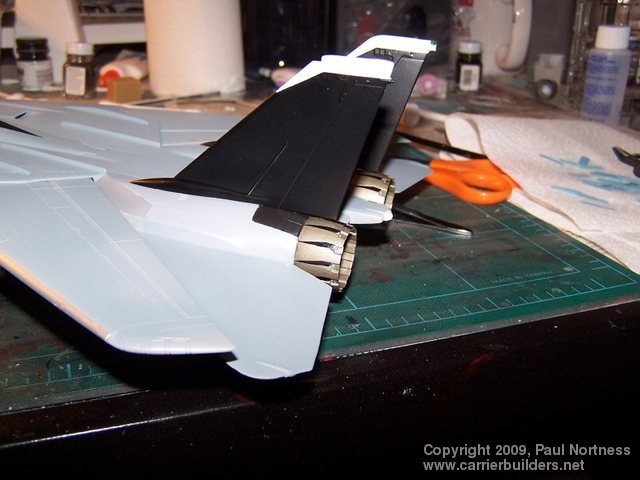
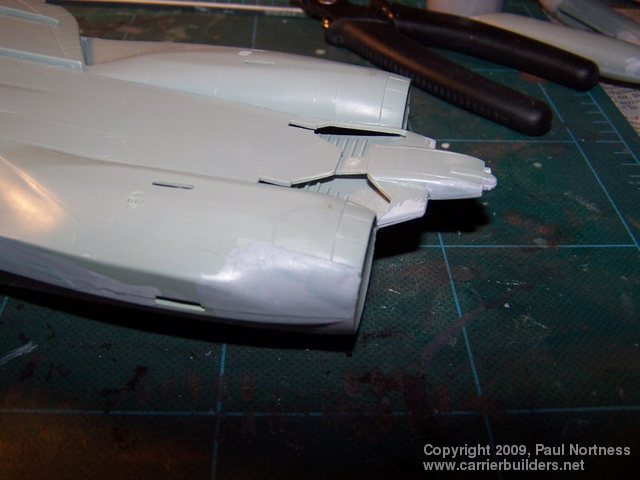
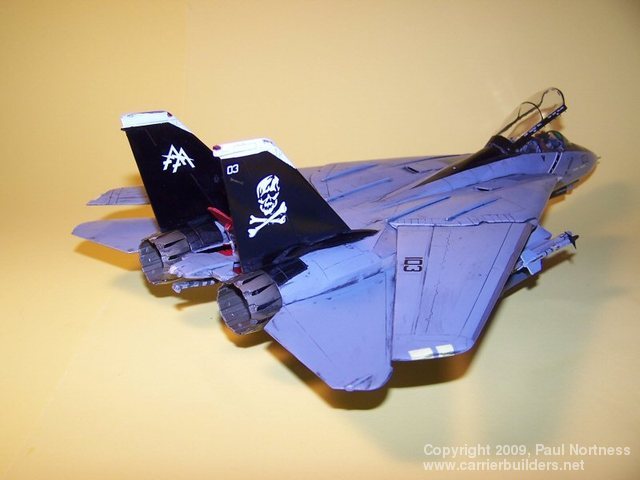
Another area that needs attention is the new GE engines and the fairings around them. The F-14A uses Pratt and Whitney TF30 engines and has rounded fairings whereas the F-14B uses new GE F110 engines and has a square fairing. The fairing is very easily resolved with some careful application of putty. I mask the fairing off with painters blue tape and then apply Squadron green putty. Once it dries, remove the tape and sand the bottom portion of the putty application. If blended properly, you should have a perfectly formed engine fairing. Once sanded, I go over the new fairing with some Mr. Surfacer 500. The GE engine nozzles were procurred from an old R/M F-14A kit. When they did there F-14D kit, they started included the updated parts tree in both kits....so R/M F-14As have the newer \\\\\\\"D\\\\\\\" parts in the box. As the R/M and Academy kits are so similar, the GE engines need no alteration to fit.
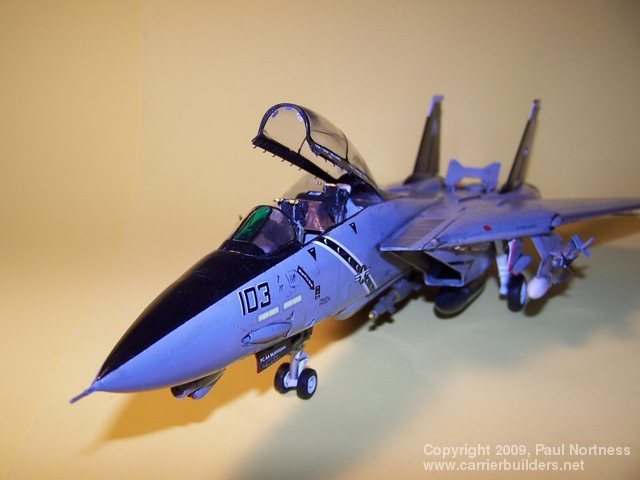
Well, that is all there is to it! The rest of the upgrades for a F-14B are included in the Bombcat boxing, so just follow the instruction sheet to get the rest! The model was finished using Model Master acrylics and a pastel chalk wash. The decals were Fightertown Decals Santa Cat. The GBU-12 was a doner from a Hasegawa weapon set. In my next article, I will show you how to convert the Academy Bombcat into a F-14D.
Photos and text © 2009 by Paul Nortness May 10, 2009 |