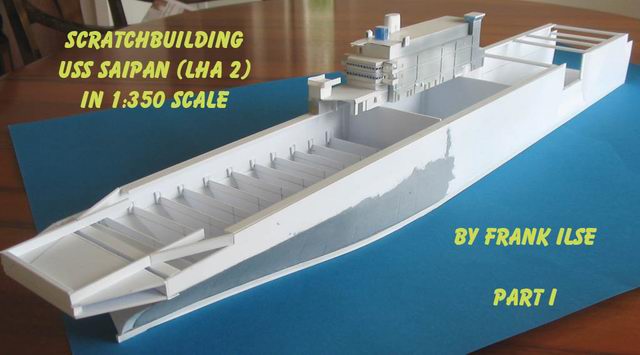
Building a 1:350
Scale USS Saipan
-
Part I
by Frank Ilse
Once in a while you come to the point where kits offered on the market do not
help you along any more. We carrier-builders all know that this is true for a
lot of ships we are fond of, like angled-deck Essexes, Forrestals, Midways etc.
If you build models in 1:350 scale the garage companies with their often
excellent resin offerings are a good choice, but when it comes to the Gator-Navy
you will have to show if you are worth your salt as a scratchbuilder. I am a
confessing carrier-nut and the Gator-Navy offers two wonderful flightdecks with
their Tarawa- and their Wasp-class. A 1:700 Tarawa was my first serious attempt
in building a ship-model with photoetch parts and I chose this class for
scratchbuilding an LHA in 1:350.
The ships are pretty well documented. You get drawings from the floating drydock-company.
They are in 1:192 scale but there is no problem to scale them down. Moreover
comparison with the plans shows that the Dragon/Revell models of the class in
1:700 are pretty accurate in outline and scale. And you get a lot of picture
material of the class via net. I got the idea to build this ship about a year
ago when I saw the first pics of Corsair-Armadas CH-46 Sea Knights in 1:350.
Fine little resin-fellows, superbly cast. I ordered some from White Ensign
Models along with a few CH-53 Stallions of their own flightdeck-350-brand. The
new Cobras, Hueys and Harriers from Commander models will top things off.
Having the Helos at hand I started research last summer and began building the
ship in November. My choice is USS Saipan. Commander Charles Landrum USN took a
complete phototour of the ship when he served on it three years ago and posted
the pictures to steelnavy. This phototour with tons of details is an excellent
starting point. I will build my gator as a waterline modell and will put her in
a diorama together with two LSU (Landing ship utility) unloading/loading at the
stern of the ship. For this purpose I will build a well deck. My Saipan will get
a hangar deck too. She will be shown in her outfit around 1990 for two reasons:
I want the large crane on deck, that is missing today. And I like the three-tone
camo the Helos and Harriers sported at that time.
|
Click on the image to see it enlarged! |
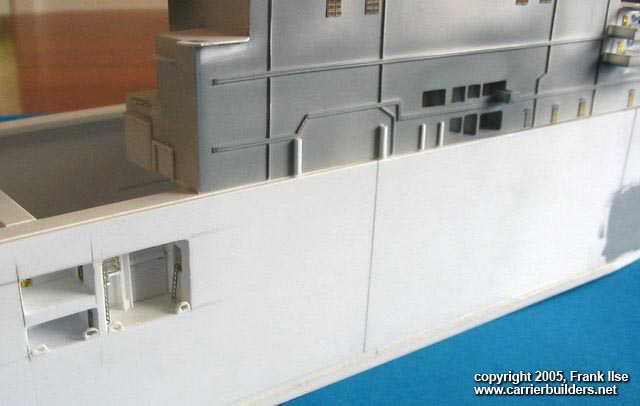
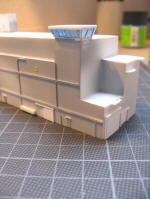
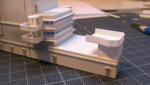
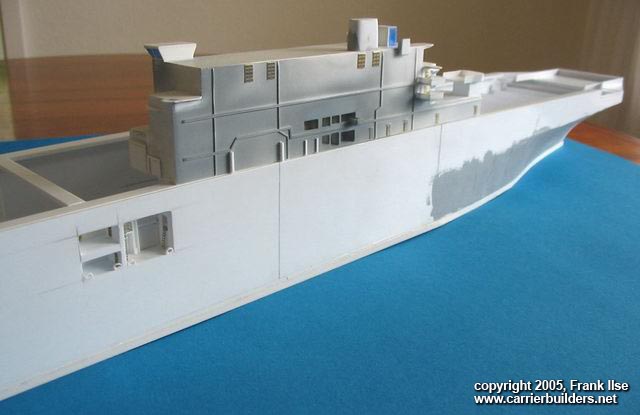
I started the project doing the very prominent island. Measures were taken from
the plans and the 1:700 Dragon-model. The material is styrene-sheet, basically
Evergreen (they will make a fortune). I use 0,75 mm and 1mm sheet and various
profiles and tubes. First parts to be built were the sidewalls, including all
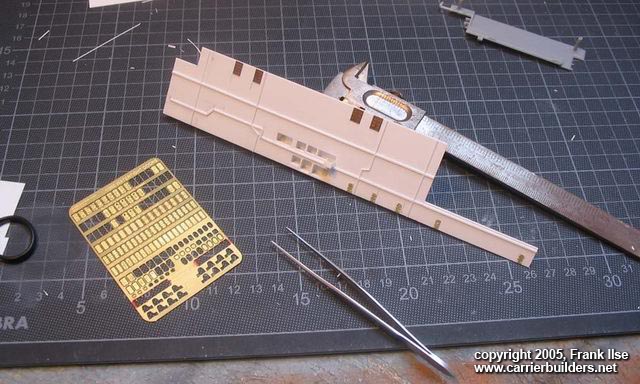
the piping and the doors. They are from the GMM 1:350 fotoetch-set “doors and
hatches”. From little strips of styrene I added the tiny rainroofs above the
doors. I strarted this project before Toms modelworks came out with their door
set, that includes frames and rainroofs. I built the unrep-station before adding
bulkheads and levels.
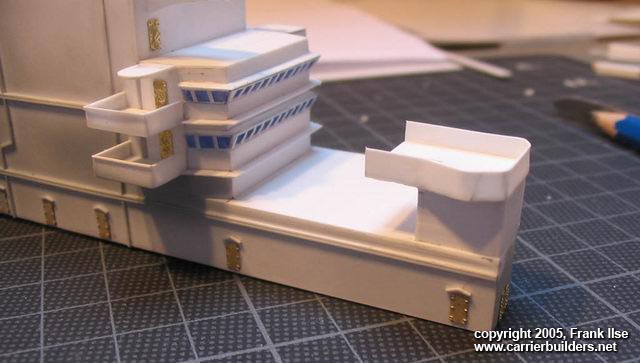
The bridge- and prifly windows are clear styrene with the frames from 0,5x0,5 mm
profile glued on. After adding the window rows to the bridge contruction they
were painted with Tamiya transparent blue from inside before the top was added.
The stacks – one is still missing – are made from styrene profiles sanded to
form. The prominent platform on front of the island later on will take one of
the Phalanx-weapons. Next steps will be adding the second stack, the radar-dome
right behind and below prifly and adding mode detail like railing and ECM-platforms.
The masts will be built seperately.
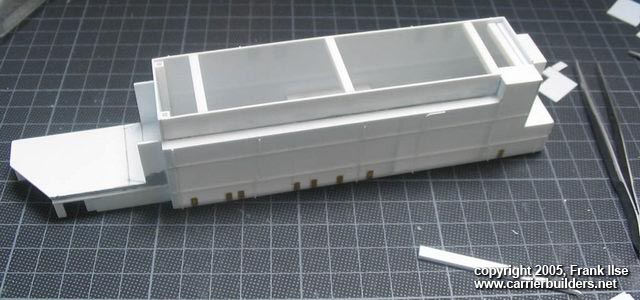
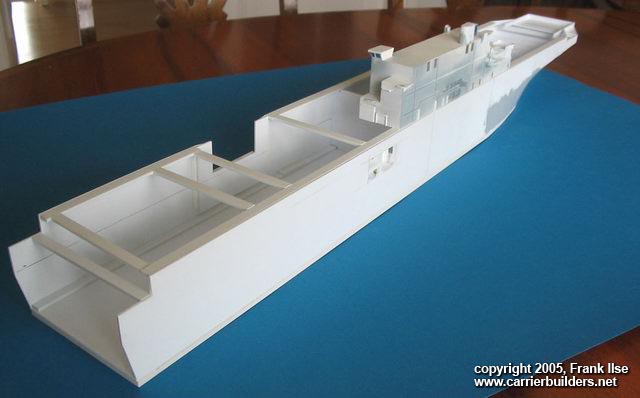
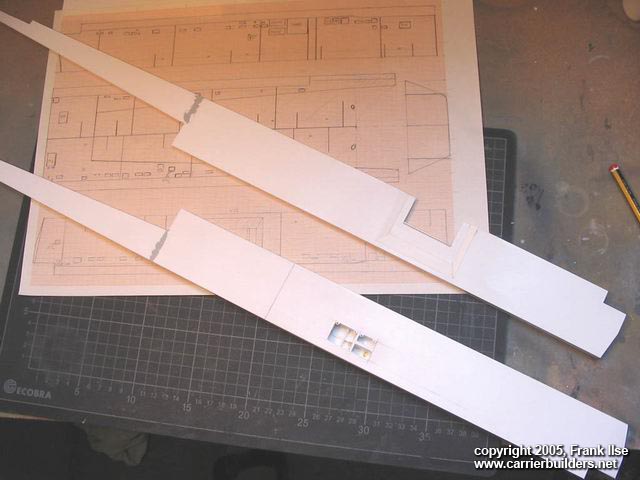
I set aside the island for a while to start construction of the hull in January.
An LHA basically has the shape of a shoe-box. That makes things easier. I kicked
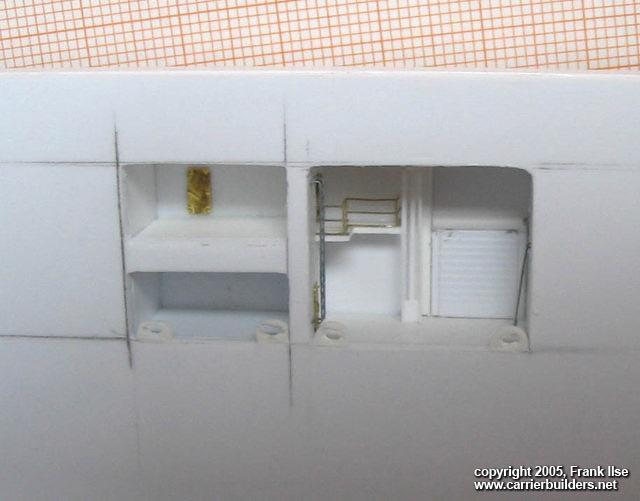
off hull-construction building the sidewalls. Again first step in the starboard
sidewall was to build the unrep-platform. This was done cutting the appropriate
holes in the wall and building the platforms including some of the details like
the unrep-boom from inside of the sidewall. After this was done the three
sections of the starboard-sidewall were glued together and reinforced with
6,8x4mm profiles.
Port-side construction basically went the same way. But instead of an unrep-station
I started off doing the large opening for the aircraft elevator.
A friend advised me to use a solid groundplate ot avoid later warps of the
hull-construction. I followed his advice and took a 4mm styrene-plate the same
friend purchased (thank you Michael!). I glued on the sidewalls and added a few
stringers and bulkheads to add stability to the whole thing.
|


Click on the image to see it enlarged! |
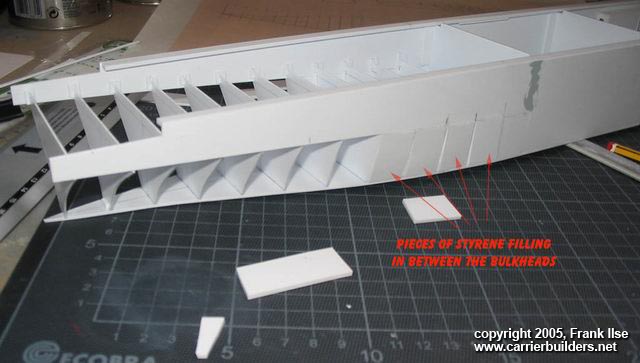
If the shape would really be the one of a giant shoe-box, I’d be fine by now.
But shaping an aircraft-carriers bow makes it a challenge – even if it is “just
a Gator”. I decided to walk the traditional plank-on-bulkhead way of
construction, with the exception not to plank the bulkheads but to fill the gaps
inbetween them with pieces of 2mm styrene sheet and later on sand everything to
shape. As the plans from floating drydock do not have line drawings for the
bulkheads, I had to try something different. With a razor-saw I sliced the bow
of a 1:700 Dragon-Saipan and took off the lines from the slices. Those lines
were doubled and mirrored. And so I got the drawings I needed. Purists won’t
call this method very accurate, but it worked and it looks the right way in the
end, even if there will be a millimeter of incorrectness here and there – who
really cares!?
I filled the gaps and started sanding. First with my Dremel-tool later with
sandpaper, coarse to medium grit. This first session was ended by adding filler
and giving the bow-construction a start. Next steps will be adding the
bow-bulkheads, filling them and go on sanding the hull to it’s final shape.
I will continue to post further parts here on Carrierbuilders as construction
continues.
I hope you like this project and would be happy to get any comments and further
hints.
Frank Ilse